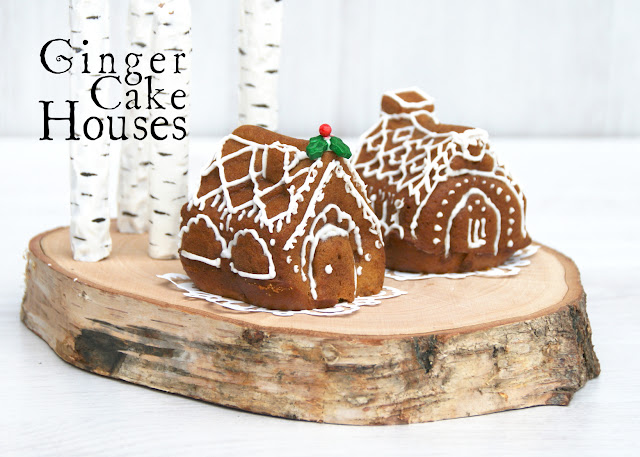
So, gingerbread houses are quite an unlikely endeavour for me. Even if the biscuit came out firm enough, it certainly wouldn't hold its shape and it would all be mismatched and wonky. So what can I do if I want to make a gingerbread house this Christmas?!
Settle for cake.
This mould, ginger cake batter and royal icing make for a perfect combination.
You will need:
For the cake:
1 1/4 cup all-purpose flour
3/4 cup sugar
2 tsp baking powder
pinch salt
1 tsp ground ginger
1/2 tsp ground cinnamon
1/4 tsp ground nutmeg
1/4 tsp ground allspice
1/4 tsp ground cloves
1/2 cup softened unsalted butter
1/2 cup milk
2 medium eggs
1 tsp vanilla extract
Royal icing
Silicone village mould (Example)
Method:
1. First of all, make your ginger cake mixture! Preheat oven to 180 C/350 F/Gas mark 4, and, in a large bowl, sift together all the dry ingredients, then work the softened butter into the mixture until it resembles rough crumbs. Add the eggs, vanilla and milk and combine until smooth.
2. I decided not to chance the easy release of the silicone mould so I coated the cavities with non-stick spray before filling with batter. I used a tea spoon rather than just pouring it in to make sure the mould was properly filled. I didn't want any air bubbles to upset the outcome of the chimney, for example, so I filled them slowly and spread the mixture around with the spoon after every addition of batter to make sure that it was meeting the edges of the mould rather than trapping air.
 |
| Terrible colour from tungsten light - early morning baking for the win! |
4. Set in the oven for about 30 minutes or until cooked through, but be aware that every oven is different. Mine took 45 to bake, and mine always take longer than recipes suggest.
5. The cake will probably rise out of the mould as it bakes, but when it starts to do that, it has already taken on its shape. Mine started to rise out of the mould after about 20 minutes but nothing bad came of it.
6. I chose to over-fill the cavities a little because I could always level the cake out if the 'tops' (bottoms of the houses) rounded too much, but don't do this until they're cool as, odds are, they'll drop and shrink a little as they do and you may find you don't need to do it.
7. Let the cakes cool. I found that my cakes didn't look as good as I'd hoped, but once they'd cooled and I added the icing, it made a massive difference, so don't despair if your houses are a little wonky, have funny rooves or odd walls, because they'll look better soon enough!
8. Mix up your royal icing to a stiff consistency and then pipe through a fine nozzle - I didn't use a nozzle, I chose to use a disposable piping bag and cut off just 5mm. It made an easily controllable hole and I had no problems at all. Pipe your detail, either following your own design or just piping along the edges of the impressions left by the mould. Add any sprinkles or accents you like. I found that the icing was enough because the cakes were so much smaller than full gingerbread houses would be, but I wanted to add some kind of colour so I added holly to the best house, and I think it was enough.
Very easy, very simple, and much less room for things to go wrong! Plus each cake makes for a satisfying dessert so it's wonderful for Christmas gatherings or a Christmas Eve dinner! Pair them up with some birch tree wafers for hot chocolate or coffee and you're all set!


0 comments:
Post a Comment
I do read every single comment, and I will try to respond where I can. If you have an important question about my blog or my shop, however, then you might be better off contacting me directly by email. Thanks so much for reading my blog!