Wednesday 30 November 2011

Etsy Favourites!

Yes, it's that time again! More from my list of Favourites on Etsy! I have a building
wishlist too! I would love it if Etsy would install such a feature...*runs to the suggestion
forums*...and I'm back. Yes, more wonderful items for you to gorge your greedy little
eyes on. Check out their wonderful shops, too! I'm considering starting features of
shops I've added to my favourites, too, but not just yet. Maybe after Christmas...it's all
just too much right now. And, speaking of Christmas, the giveaway is still live! And there
will be a new giveaway every Sunday until Christmas! From other sellers, not me,
so I'll certainly be entering!


Sunday 27 November 2011

New Giveaway!

   Yes, that's right, there's a giveaway going on! And this time, you can get a necklace that's not available in my shop! It was made specifically for giveaways! And, you have two chances to win, too! The first giveaway is live and is being held at Shutter Happy Photography, while the second will be announced shortly on another wonderful website!
   Mary Ann has given you 8 simple ways to enter this first giveaway, so do go and take a look at the giveaway page, where you can also find out what exactly is up for grabs! The giveaway is open for one week, so do hurry!

   In other news, I've had an idea for a great tutorial, but I need to gather up some pennies before I'm able to give it a shot. I'm hopeful that it'll work, and it's quite a cute little idea, so I'm hoping you'll all like it. Also, I just tried my first face mask ever and my face feels really weird and tight now xD Trying to work out if I'll make it a frequent thing but that depends if the red line around my face fades :(

   I also have two new items in my shop! Some cute decorative pegs with either a bare, magnet, or pushpin back, and some gorgeous little fabric spoons! They'd make lush gifts for mother's day! Go have a look - I'm open to custom orders, too! But do keep an eye on the shipping dates for Christmas. If you don't make your order quite in time, there's a chance it'll still get to you. The deadlines are just to try and minimise disappointed customers whose items get delayed in the Christmas rush.


Use code BF1125 for 20% off of your next order in my shop! Valid until Dec 1st!


Friday 25 November 2011

Healthy Smoothie Recipes

First of all, use code BF1125 for 20% off of your next order in my shop! Valid until Dec 1st!


Hello all! I hope everyone had a great Thanks Giving, if you celebrate it. I don't, but I still had
a great day :D My letter box has been jammed with materials for new stock in my shop - admittedly
none of it is jewellery, but I'm working on a few pieces! I'm adding some new and slightly
different lines to my shop in the next few days so do keep your eyes open!

I also have to admit that my blog has taken somewhat over my life a little - it might not seem it, but it has, it's always on my mind, I'm always trying to find ways to better it - as you can see, I've not come up with much :P Christmas has also been on my mind, unsurprisingly. I've already got my parents gifts - no easy feat when it comes to my dad, but fortunately Stephen King was gracious enough to bring a book out recently - for Seeg's mum, my nephew, and for my two closest friends, but I still have Seeg's dad and brother, my sister and her boyfriend, little Lucky-loo, and, of course, Seeg. Fortunately, despite how hard he is to shop for, I have some ideas.

I also have other news. I've not put much work into my trilogy now for months. I wrote the first book, finished it, then redrafted it about 5 times, but on my sixth and, unfortunately, last read-through, I just can't be bothered to finish it. Once I finish it I can move onto the second book, but it's taken me so long that the ideas just seem so old and boring to me now. So, I've decided to take a risk. I know that it's quite unlikely that the first book someone would publish by someone would be that of a trilogy. It's too much of a risk for an agent and publisher to take on a new face. And, obviously, without publishing, I can't get my career anywhere. So, the risk I am taking is starting a whole new, single book. The reason this is a risk is because I'm not very good at sticking with things. I can plan, write, finish and polish the book, but I'll have trouble writing another to continue the story, and if I write a single, stand-alone book that's not part of a trilogy or duology, then I probably won't go back to the trilogy I was writing in the first place. So, I have to trust that the story and my ideas are good enough to pull me back into it afterwards. I like my world, I like my plot, I like my characters...I'm just not sure I love any of it anymore. While this new book will still be a fantasy (I have no interest in writing anything else) with magic and dragons and goodness-knows-what-else, it'll be quite different.
   I am confident that I can plan it well, write it even better, and finish it to a publishable standard, but I'm not confident that I can work backwards into the trilogy. Hopefully, the risk will be worth it, however. I love writing, it's one of the most fun things in the world, and I don't want a career in anything else. This is all I want, and all I've wanted since I was 12.


Anyway, on to business: Smoothies.

I love them. They are healthy and delicious - who knew that could be possible? And here I have 5 delicious recipes with health and beauty benefits! Found, admittedly, via Pinterest, but, as I've said, I've had a lot to do lately and little time for the blog :( I also wish I had some pictures to show you of the finished pieces, but my camera has been on the fritz lately, but you all know what smoothies look like!

Flat Tummy Aid! This smoothie helps digestion and prevents bloating. Bloating is never fun, especially when you're trying to lose weight. It can discourage you, and also generally make exercising less fun. This is definitely something to try! Just blend the following:
 •3/4 cup papaya
•3/4 cup. sliced peaches
•1/2 pear, sliced
•1 tsp fresh ginger
•2 mint leaves
•Water

Skin Nutrition! I don't personally buy into all these anti-wrinkle creams - though I'm sure I will when I find my first one - but the antioxident properties in berries can in fact help to fight signs of aging in skins. Blend these delicious fruits and other things:
•3/4 cup blueberries
•3/4 cup pitted cherries
•5 strawberries
•1/4 avocado, peeled and pitted
•2 tsp wheat germ (optional)
•2 tsp ground flaxseed
•Water

Immune System Aid! This smoothie can...well...aid your immune system. The flu season tends to follow the colder months, and while green tea can help, and lemon and honey voodoo recipes, it's not always a good idea to stick with warm things. Recent studies suggest that going outside while you're ill can help the illness pass sooner. But this smoothie can help you too:
•1/2 cup mango cubes
•1/2 cup cantaloupe cubes
•1/2 cup fresh pineapple cubes
•1/4 cup chopped pumpkin seeds
•Water

Keep Young! The recipe here can help your liver to detox naturally, which keeps you feeling healthy and young! Plus, it really does taste gorgeous! My favourite so far!
•1/3 cup of blueberries
•1/3 cup of raspberries
•1/3 cup of pomegranate kernels
•1/4 cup of beet juice (optional - I don't use it, mostly because I don't know what it is :D)
•1 banana
•Water

Happy Bones! This final smoothie, which I have yet to try, helps your bones stay strong. Rich in calcium, magnesium and other bone-building minerals, if you don't like ordinary milk, like me, then this might be something to take notice of.
•2 bananas
•1 handful of Swiss chard leaves, stems removed
•1 handful of kale leaves
•1 tsp of green Matcha powder
•1/2 cup of homemade almond milk

Do try these, tell me what you think of them, and, most of all, enjoy!


Tuesday 22 November 2011

Etsy Favourite Feature

Some more of my favourites. I'm sure they'll take a Christmassy turn at some point soon,
but at the moment I'm still focusing on things I've added to my favourites. I'm working through
from the beginning of my favourites, so these were added some time ago - but that doesn't mean
I don't still love 'em! As usual, I'veo nly featured pieces that are still on sale. If I want to feature
something that's been sold, I'll look in the seller's shop for a duplicate, or replacement that I
love equally as much (or sometimes more!)
Do keep these sellers in mind for your Christmas shopping!


PS. 10 more Twitter followers and the 50% off coupon is up for grabs!


Friday 18 November 2011

Recipe Card Printable!

Heylo everyone! Today I have some lovely recipe card printables for you! I'll be honest,
I made about 9 of them. I made 5, but then I found a great little brush, and when I used it
in green I just had to do a second set, so this week there's a double printable!
They are best printed on heavier paper or card.


I'll open with my favourites, which do form into a set. I have 4 cards - the green branch is for vegetarian recipes, the pink is for sweets, the brown is for desserts, and the blue is for non-vegetarian meals. I'm actually quite fond of them! I'm not a vegetarian myself - I used to be when I was in primary school, about 11 years old, but the dinner staff needed a note from my parents - they need a note from my parents saying "let her have more vegetables and less red meat". Is this serious?! But something in my head told me "don't ask them, they won't write the note for you" - what possessed me to think this, I have no idea, so I forged one myself. I scribbled instead of my mum's signature, and I was so ashamed that I only actually told my parents that I did this about a week ago. (I'm almost 21 :P) - back on topic: I'm not a vegetarian myself, but I know that a surprising number of the handmade community are - something related to being eco-friendly I expect - so I decided to accomodate for them with this pretty yet simple set:


The second set is a much more diverse one, and not really my favourite, but the work went in, so, dammit, I'm sharing! These ones can be printed off individually to save wasted paper (open in MS paint and just remove the ones you don't want), and so that they all match. I've got a cute little sweet shop one, a nice vintage lace hummingbird (similar to a previous bookplate!), a damasky one, and a blue/purple smokey whisp design. They're all right (my favourites are the sweetshop and hummingbird :D), but I expect if any of you are interested in them, only one would catch your eye anyway!


Best printed on thick paper or card stock, and, as usual, open the image and right click to save to your computer, then print! I do hope you like them. I have another printable planned for next week if I can get the tutorial that accompanies it together - it won't be an easy one for me to figure out, but I'm sure I can with a little research :D and, as I said before, once Twitter reaches 75 followers, I'll host a tweeting contest to win a one-time 50% off voucher in my shop - the biggest discount I will ever do! So do make sure you're joining in!

There's also two giveaways being hosted soon on two lovely blogs: LAST, a wonderful blog with creative DIY ideas, features, giveaways and interviews, and Shutter Happy Photography, which is more than the name suggests, and gives you an insight into the fascinating world of Mary Ann.
Keep your eyes open, because I will be posting links to the giveaway as soon as it's up, and you can win a cute christmas necklace that is unavailable anywhere else, made by yours truly!

And on one last note, I'm looking to change the name of my blog. I have synesthesia which makes finding a name even more difficult, since the colour of the words affect how I feel about them, but if ever I find one, I'll post a notification at the top of the blog a month in advance of the change, along with a new header so you can all get used to it. And, if the carer's allowance claim goes through (I should hear this week if there's any progress), I'll get a domain name to go with it! And perhaps some new clothes for the first time in a year or so.


Wednesday 16 November 2011

Pricing Handmade Goods

It seems to be a tricky subject, with people disagreeing about the method you should use to achieve the final price for the little piece of you you've just spent minutes to hours making. There are lots of
formulas all over the internet, that other sellers have come up with, and what business-extraordinaires
have concocted. In this post I will tell you how I price my products, and what you really need to
keep in mind when pricing your own work. And my opinions on the common pricing strategies.


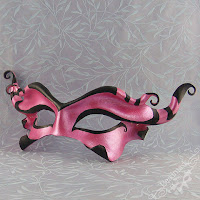
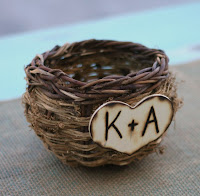
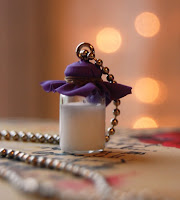
   I don't get many ideas for products to make. I get a new idea once in a blue moon, but when I do get one, I love it. I relish it; I plan, I test, I make, I tantrum, I try again, and I smile. There may be more tantrums from time to time, and perhaps less smiles and more triumphant cries, but I get there in the end more often than not. The next difficult task is photographing it - this is often accompanied by fits of rage and the afore mentioned triumphant crie, but, as before, I get there in the end. Now, time to list it on Etsy, and let the whole world see it so I can bask in my brilliance.
   But wait - what about the price?
   I sit there for a while, a pencil in my hand, jiggling between my fingers as I stare at a piece of paper with a mass of words and numbers upon it that, by this point, mean little to my addled mind. Cost of base supplies, hourly wage, multiplications that I can't do in my head, it goes on.
   I get distracted, correcting little bits of the earrings or twiddling the chain of a necklace about, and in the end, the paper is brushed aside, the pencil is deeply embedded in the wall beside me, and my fingers find the keyboard. A number is typed into the price box. A beautiful whole number, with pretty digits of pinks and whites - it is perfect. The best reflection of the product, my time, and myself in it all at once.
   But how did I get to this point? I will tell you:

   All across the internet, you will find different ideas of how to price your handmade items. I did a little search for "pricing handmade goods" in google, and I looked at the first link. There was nothing really on the page but a link to another website, so I followed that. They have told you to calculate and add the following together:

Cost of Goods:
includes materials, production time, tools, equiptment and
any other costs related to actually making your item.
Overhead Expense:
actual expenses (listing fees, photography fees etc)
 Profit:
Adding an extra percentage of the above.

   The Second link in the search is a little more agreeable. It makes more sense, and seems to have been made by someone who actually makes and sells items, as opposed to the business boffin above.

Cost of Materials
Labour
Upkeep Expense
(domain name, website hosting, or shop rental etc)

   Then add it all together. The outcome is different to the above. You likely took the photos of the products yourself (not a difficult job, just grab a really big white sheet of fabric and go somewhere that's naturally well-lit, and the white sheet will act as a reflector for the light and will help to further illuminate your pictures naturally), and, if you're using something like Etsy, you only have a 13p/20c listing fee. It's a little easier to follow this formula, as it's aimed more at the individual crafter who is perhaps still finding their feet, or doesn't get that much business anyway. You may also notice, if you were following the formulas by testing them out while reading, that the outcome here may be cheaper, because it's looking at the base facts: materials, wage, and the necessary fees to get the product out there.

   Now the third link (which turned out to be a little link hub, so onto the first link of the list). Actually quite a helpful little site, Handmadeology, and they also have some ideas (though these are directed at jewellery sellers) that are commonly used:

"• 3 x the material cost
• 3.5 x the material cost
• $20/hour • labor plus 1x materials plus 50% (or whatever you want your hourly wage to be)
• Eyeballing i.e. guessing at what it should be worth (not recommended, but common)
• $35/hour • labor plus 1x materials
• $26/hour • labor plus 1x materials plus 50%
• $20/hr.labor + mat. + 5%overhead + 20%profit"

   I will say outright that I do (for once) agree with the first two on this new website's list. They've not gone out to say "wage", it's based purely on the materials. Time put in is important, and I'll move onto that now:

   I have little to no problem with the second and final links, but Imust go back to the first: 1. Materials. Good. 2. Production time. Ok. 3. Tools. What? You mean you want your buyers to pay for those pliers that you bought a year ago and have made 70 necklaces and are still completely fine, every single time you sell a piece? I can understand a fraction of the cost, but the whole thing? 5 - does this include the boxes that I keep all my supplies in? I'm a little fuzzy in what this means, and given the third and 4th on the list, I'd expect it did indeed include that.
   I can understand the overhead expenses. Some people just cannot take photographs, I get that, so they hire someone else - friend or professional - then there's also listing fees, which vary depending on where you sell (13p on Etsy, or £1.35 on ebay, AND that's on a "free listing day" - that £1.35 comes from the necessary extras you need to actually sell the item, so imagine the cost on an average day!), and it might also be a good time to take into mind the fact that the host is also going to take a percentage of the price once it sells.
   But now you want us to add a profit to that as well?

   I have read in a few places that hourly wage and labour costs don't count as a profit. Why not? It does not cost the average person (note I said average - if you have a physical disability it's a different matter, which I will address later) to move their arms. Neither does it cost them to sit there and do it. Not only that, but if you craft for a living (especially if you've given up your day job to do it) you really ought to enjoy it. It shouldn't be a chore.

   Now I rather abruptly move onto my own method, and things I think everyone really needs to keep in mind (this sudden change is probably why I never did that well with my English essays - I'm not that good at rounding up :P).

1. Consider the cost of the materials. I quote the second link: "If you spent $10 on materials, then you better be charging more than $10 for your pieces, or you won't be able to do this for much longer!" It's that simple. Write down the cost for materials - if you use clay, like me, write down how much each block of clay is, and then times (or divide, inmy case) it by how much of the clay you usually use. If it's £5 for a block of clay, and you use 10% of it on the earrings, then that's 50p. Or £1, if it was 10% per earring. Then consider the glue. If it's something silly like £1 for a small tube of super glue, for which you only use a drop, this is really your choice. Either £1 or 2p. Whichever you feel better with. Do this for all the products, then add on listing fees and other truly necessary bits and pieces needed for your item to actually sell.

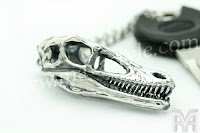
2. How much time did it take you? And, more importantly, did you enjoy yourself for that time? How difficult was the product to make? My dinosaurs were actually surprisingly difficult, as are my antlers, and my latest project is driving me up the wall! All of this does affect my prices, and I suggest it affects yours too.

3. This probably won't affect many of us, but did it harm you in some way to make it? Did you strain your back hunched over something teeny tiny for an hour and then remained in discomfort for the remainder of the day/night? Or, do you have a disability that makes it even more difficult to create things? The last really does matter. Even more time and effort went into it.

   I don't give myself a wage. Instead, I take numbers 2 and 3 into account. I don't have a physical disability, but my back aches like mad when I work because everything's so small. And I definitely get frustrated and there are points when I no longer enjoy it, but I want to add it to my shop so badly that I continue because a) it will sell, b) I want that sort of thing in my shop, c) I won't give up on an idea, d) I want to see the outcome, and e) I want to prove to the voice in my head that I can do it every time it made me think I couldn't and it was beyond my capabilities.

   I'm not telling youyou have to use my method, that's not what I'm saying at all. I'm just trying to give you an idea of what I do, and that you don't have to do as all of these other people tell you to, myself included. I especially suggest you don't follow this next bit unless you're a good judge of people, your own work, and are capable of seeing things from an unbiased view.
   Once I've done all of this, I sit back and look at the product...then throw the paper away. The price is sometimes too steep. I look at the product - the product that I made based on things I like, that I would wear, and would be perfect, ultimately, for me - and know that I wouldn't buy it. Not for that price. Sure someone else might, perhaps, but I wouldn't, and I don't want to dirty myself or my shop with prices that I know deep down I'd never look twice at.
   I do keep in mind the 3 points that I made, but I can't say that I stick solidly to them. The number is often an ugly one. With 5s or 9s - they're ugly numbers. I like soft numbers in nice colours - a pastel pink 6, a crisp white 1, a nice red 2. That does not mean to say that if you run to my shop now you won't see a 5 or a 9 - you will. They're rare though. You're more likely to see fluffy or confident numbers.
   I'm comfortable selling at these prices. I cover the cost of my materials, but when it comes to making it, I love doing it. It's so much fun. Any money I get I turn around and spend it on more supplies, profit and all, because I love it. Only rarely do I use the money on anything else. Lucky needs a new hammock because she occasionally chews through them (and she and sugar loved them so much that when sugar passed we wrapped her in the nicest and buried her in the garden), and I want to be able to go out on my 21st birthday so I need to save a little more.
   So I buy more materials with almost every penny, and perhaps the odd chocolate bar might find its way mysteriously out of my purse, but I do it because I love to make this stuff. It isn't a chore to me. And I figure that if I'm not making any jewellery, what else am I gonna do? Sit on the computer playing solitaire, watch Scrubs, or watch my boyfriend play on the xbox (though admittedly since Skyrim just came out it's definitely a lot more entertaining ♥).


   I'm not saying you should follow this method. The point of this entire post was to just suggest to you all that you don't have to follow these guidelines - that's all they are! They're truly a great place to start, but you don't have to stick to them. Do what you feel is right, with your shop and your products. That's what I'm doing, and I'm happy with it. Just keep that in mind and you might do better - and if you don't, go back to your tried and true method!


Kim out ♥


Tuesday 15 November 2011

Etsy Favourite Feature

More pieces from my list of Etsy favourites! And for once I actually have experience with one
of the featured sellers! I'll leave you to figure out which! But they're a fantastic seller and a
fantastic person. But these products are all amazing, and all worth both your time and mine.
So give them some love and check out their respective shops!


And now, on an unrelated note, I'd also like to draw your attention to a gorgeous photograph I stumbled upon while browsing one of my favourite blogs, Shutter Happy Photography:


The colours, the focus, and the range all make me want to grab my camera and start photography again! I won't, though, or I'd need to redecorate my room again (it's brown now. It used to be a pale peach colour which reflected light perfectly! But I prefer brown, and hadn't photographed for a long time before I had it redecorated anyway).


Interview: Lynda of PureBathandBeauty

A wonderful seller from my Etsy Team with a beautiful shop, Lynda sells handcrafted
soaps, washes and other skincare products - without the added chemicals. So it's all great
for your skin! I've always loved handcrafted soaps, and wanted to give it a go myself, but
I know that I could never reach the standard that many great sellers achieve, Lynda
included! They would make great gifts, especially with Christmas approaching, with
its damaging cold weather in tow, so there's no better time to look after your skin!


1. When and did you first start making soaps, and why did you decide to start selling it?
Well First I started Making shampoo and because my sister starting making soap she didn't want me to do it also. About 2 years ago I feel in love with making liquid soap from scratch and moved on to cream soap. As I was searching around youtube for more tips I found these cupcake soaps and just had to try it. Now several months later I am hooked.
I already sold my sisters soaps so adding my soap was a no brain er and I can't use that much soap no matter how many showers I get a day. As I started getting an inventory in my salon most everyone is eager to buy them.

2. You don't have to have made a hundred sales to be successful. Do you consider yourself successful? I do consider myself successful as I am a fairly new business and learning every step of the way. I feel very successful when I get letters from my clients telling me how one of my products helped their problem skin or cheered up a friend. Those are the days I feel I have achieved what I started Pure for.

3. Where do you do most of your crafting? Do you prefer a quiet, peaceful and tidy space, or do you usually play music when working and find that there are always scraps of this and scraps of that lying around when you start? Are you an organized worker?
I consider myself an organized but must add not an organized worker..LOL I always like to start with a nice clean slate and everything in it's place but once I get started look out. It appears a bomb has gone off.
I have a very small area and table I had my hubby make out of an old door when I turn around I can take literately one step to meet the wall behind me. 4 steps to one side and that is my space. It can become very cluttered quickly. This little area is in the back room of my salon and used to be where I did nails and pedicures. Now it's my lab, storage and work area. I often listen to nature music cd's like you would hear at a spa. It's calming and relaxing. Time goes by very quickly when I am in my room working.

4. Have you always had a passion for crafting?
Yes ever since I was little I was a crafty person. I used to color my coloring books one page at a time and in order. I kept my crayons in immaculate condition and never let anyone use them. My Grandmother had a ceramic shop and later moved on to do Replica Dolls. The old fashion kind with fancy dresses out of porcelain. My mother always made our close and taught me so and can vegetables when we were little. I basically love making everything including jewelry.

5. What was the first thing you made? Soaps, scrubs, lip care?
It's actually quite funny that I started with mineral cosmetics and moved onto lip balm. I then found some great suppliers and lots of information on lotions. The next thing I know I am spending 8 to 10 hours a day researching butters, essential oils, and everything under the sun. I soon moved to soaps and found it to be such a creative way to get clean.

6. What is your favorite product that you've made? And why?
This is a hard question. I spend so much time developing each item and researching that they are all very important to me. I think my first facial moisturizer (Extreme) has to be my most though. From the very first try I loved it and have found many clients feel the same way. The extreme was developed for sever dry skin. Suffering from this and adult acne I have found 2 great formulas that are perfect for dry skin. You can also use it any where on your body.

7. Tell us something interesting about yourself.
Ok this one is hard. I was born with a heart condition and have had 3 open heart surgeries. I worked in a hotel before I finished high school. I worked on a tomato farm my senior year of high school. I also picked apples in the fall for 21 cents a crate. I own my hair salon now for 20 years and have worked as a sewage plant tech for 3 years, bar tender for about 8yrs., horse trainer, and barn manager for 10yrs. I worked for 30 days at a plastic bottling company for 30 days( I don't recommend it)
I have 5 animals and love to fish in the sunshine and would love to spend my winters in Honolulu making grass skirts.LOL
I secretly wish I was born Amish as they have a simple self sufficient way of life.

8. What was your favorite thing while growing up?
Visiting my Grand Parents house was one of my favorite things. My sister and I used to play in all the cubby holes and basement. My Aunts and Uncles were not much older then us.We had them to play hiding seek down in pipe room as it was called. (basement) It was where my grandfather stored all his plumbing supplies. A fun maze of rooms and shelves to hind in. I loved painting ceramic cookies with my grandmother and made Christmas decorations that I still have today.

9. What's the stupidest thing you've ever done, and do you regret it?
Oh I have done a lot of stupid stuff but....One thing I wish I had done when I first started this was to really think about my business name. I first started with Pony Dust cosmetics. Although the business was ok it really only got the attention of young girls. I changed the name this past April and if anyone tells you a name doesn't make a difference they are wrong. It was a lot of work to change everything to the new name but I do not regret that.

10. What did you really want to be when you grow up? Are you still aspiring to do it or something beyond your crafting? Why?
Oh when I was a kid all I wanted was to be a horse trainer. I did get to train a few horses in my life but never as a real job. Now I am just working on what I want to be when I grow up. Perhaps it's mid life crisis not sure.
It would be great to get Pure Bath & Beauty to become my full time job and pay the bills so I can just enjoy my horses I have.


Visit Lynda's wonderful Etsy shop, PureBathandBeauty, and have a look around.
She also has a blog, a Facebook Page, and a jewellery shop!


Friday 11 November 2011

Free Teabag Tags and Tutorial

Winter is just around the corner, and to some of us it may feel like it's already setting in. It's only
the beginning of November, and you're wondering each time you step out of the door whether or not
it's too soon to get your lovely little scarves and mittens out and prevent your fingers from falling off.
Cold is everywhere, in many forms of the word! And what better way to ward off the flu than
with a nice warm cup of tea? If you're in the UK, you can get some nice free samples
sent straight to you! Sometimes things taste better when they're free ♥


   This week I've made a collection of 14 teabag tags! My favourite tea, Twinings' Raspberry and Echinacea, doesn't have any cute little tags on string on their bags. That's fine, because neither does Tetley, but we have a lovely hox of beautiful herbal teas in the cupboard, in small little paper packets, and inside there are lush teabags of blackberry tea, lemon and ginger and all kinds of other wonderful ones, and guess what! They have tags ♥
   It might seem like a silly thing to get excited about, but I am a silly person! And I hope that some of you are too, and that you might enjoy them with your next cuppa! Just open the image, right click and save to your computer, then print! Scroll down for the how-to!


How-to:


You will need:
The above printable or some pieces of pretty paper
Scissors
Glue stick
Needle & thread
Teabags


Method:
1. Cut your chosen teabag out (or if you've chosen to use pretty paper then cut out a rectangle 1x2 inches and mark a small dot in the middle on the back), then thread some...thread...through the needle. Thread it through the chosen point of your teabag and tie 2 knots to keep it secure.

2. Now take your tag and thread the needle through the small white dot in the middle on the rectangle (or where you marked it). There are a couple of ways to do this: either the wrong way, which is how I did it, and pierce through from the back to the front, then loop it back through by piercing a hole about 2mm away from the original and tying it together into 2 knots on the back, or the way I meant to do it which is from the front to the back, and tie 2 knots without threading it back through.

3. Now fold it in half so that the threaded bit is at the top, and take the glue stick and glue it together. If you threaded from the back to the front and then back again, the thread should come out of the side - if it comes out of the bottom then open it and restick! If you did it the -right- way, it'll be coming out of the top.

4. If you used the printouts and are worried that, if you're presenting the tea to a loved or gross and contagious one, the tag might get wet and the colours run, a thin layer of Mod Podge can protect it. If you're using scrapbook paper then you have nothing to worry about. If you use scrapbook paper like Dove Craft then I'd like to see! I bet it'd look gorgeous <3 great for a tea party!


Heart-shaped How To:


1. Pierce through one of the two dots at the top from the back to the front, then pierce through the top (but inside the heart) of the inside corner (the middle stitch in the below picture). Then the thread should be on the back again. Tie the two pieces together gently, twice (don't pull so that the paper scrunches! Keep it neat), then pierce through the final dot, from the back to the front.

2. The thread that was tied together on the back may have moved. Position it as below, so that the thread doesn't overlap onto the white section on the printed side, then fold in half and glue.

3. Take your scissors and carefully cut the white section out to complete the heart shape. If you positioned your thread right, you shouldn't have cut through it. If you did, then either try to open the tag back up and try again, or print a new one and try again still.

4. Thread it to the teabag.


PS. Happy Skyrim everyone! :B


Thursday 10 November 2011

Blogging Is An Art

   And one I have yet to master. While I am indeed quite proud of the layout and minimal content of my features and interviews, and the construction of my printables/recipes/tutorial (except my rubber stamp one, because my pictures didn't come out right so I had to use pictures from another tutorial), I realise that my blog is quite empty of personal stuff. I would say that's because this isn't my "personal" blog, but the one I have always labeled as so is more just a place that I may reblog the occasional picture that tickles my fancy. It's here, if you're interested.
   But I suppose the real reason that I don't post anything personal is because I have nothing to blog about. I have no money to go anywhere or do anything, and usually I'm quite happy to stay in my house, but this is gradually changing. I used to be an avid World of Warcraft player (I am secretly a nerd, you see), but since the last expansion left little high level content, I've gradually drifted away, and that will remain the case until the next expansion in the spring. I also spend most of my time caring for my mum, as some of you know, while my dad works full time. She has Multiple Sclerosis, and has been wheelchair-bound for about 3 or so years. She gradually lost the power in her legs over the course of about 6 years - fortunately, she was able to be an active mum when both my sister and I were young, which is when we really needed it - and she also lost the power of her hands and her eyes. It's at the point now where she can't see straight, her eyes spin around and she can't focus (which means she can't read like she used to love to, do any embroidery, or really even watch the TV), she can't feed herself or even get out of the wheelchair, which makes every day things quite hard.
   Needless to say that this takes up a lot of my time so I'm also unable to get a job. In a way, caring for her is my job, I just don't get paid for it (though that might be changing, *fingers crossed* I might be eligable for carer's allowance from the government).
   On the upside, this does leave me the time I need to craft, which is also how I'm able to host a blog, an Etsy Team, my Etsy shop, and try to further my dream as a writer. I don't want my shop to be my life, and indeed it isn't. I enjoy making things, and I love it so much when I get a new idea, but I find that it doesn't last long enough. I used to do photography, and that was fun, but I found that when I had an idea, it lasted about an hour between getting the idea and taking the final picture. Not long enough. Drawing and painting took a little longer, between a few hours or a few days (though I'm quite impatient with paints so the painting would usually be done the same ay I started and would look the case as well), but still not enough. To be honest, jewellery is the same. I can get an idea, it can take a few days to do once I have all the materials, and it might take a few attempts to get right, making it one of the most time consuming things I've done. But writing...oh, writing.
   With writing, I can get a single idea and it'll last a year. And, I can get more ideas that I can work into the original plan, and while writing, I can get even more ideas and plan what I'll write after. It's something I've done since I was 12, and I read Lord of the Rings. That was it. I was sold to fantasy, and to writing, and there's never been a time since then that I've not had a project on the go. I've written about 20 stories (ranging from 16 to 300 pages, and most of which were awful), which has given me enough time to develop a weakness, realise the weakness, and to fix it. I've finally written something that I believe I can publish. I started the book almost 2 years ago, and I finished it about 8 months ago. It is the first of a trilogy, the second of which I have already started (it was the music in Morrowind that got me to finally start on the second book). I'd been putting it off, because I didn't want to start writing the second book until the first was complete, and I mean completely complete. I'm on my 5th and final draft of it now, and I am half way through...and that has been the case for months. The problem I'm having now is that I can't bring myself to continue it. I know what happens, I know when it all happens, in fact, I wrote it. This makes it more of a chore than anything enjoyable. But I know that it has to be done before I can officially start the second book and go back to my "write 2 pages a day Monday to Friday, minimum of 10 pages a week, and if I stick to this I can have 500 by the end of the year". This doesn't happen as once I start, I can't bring myself to not write on the weekend, and I often write more than 2 pages a day, but it still took me a year and a half to write with 350 pages. But nevermind! Quality is better than quantity (and the second book is 10 chapters longer than the first).
   I just need to find the courage to just get on with it and finish it up. But, Skyrim is released tomorrow, and I think if anything is going to get me to just get on with it, it'll be that game. I don't play them, I watch them. They're like movies that last a month, and you control what happens (sometimes - storyline is storyline).

   I'm trying to find things to blog about, but perhaps I shouldn't force them. This post was meant as an apology/excuse as to why I've not been doing that great a job, but it's turned more into an "about me" sort of thing...and I suppose that's a good place to start. I have a craft fair on December the 3rd, so I'll blog about that, and I have new printables and a tutorial to post tomorrow. And, if this carer's allowance claim goes through, I'll be able to afford new materials to make more jewellery and other things to further my shop, and, perhaps more excitingly, I'll be able to bring around some more interesting and more time-consuming projects to share with you all! Including one based on my book! It's something I've wanted to do for some time, and it occurred to me recently just how easy it could be! So once I've done it and taken pictures of the process, I'll share it with you all in tutorial form!
   I've also spent my last few days on Pinterest trying to come up with some nice DIY Christmas posts for Decemeber - I have 2 ready so far, I need at least one more! I'm quite pleased with them and intend to try some of my suggestions myself!

   Also, as a final note, once I reach 75 followers on Twitter, I will host a small tweeting contest to win a one-time 50% voucher for my shop. It'll be a simple matter of tweeting me with 3 things you want from father Christmas, and the winner will be picked randomly. But do try to make it interesting!

   Peace out, laters!


Tuesday 8 November 2011

Etsy Favourite Feature

Four more lovely items that have found their way into my favourites! I emplore you all
to really check out these shops. Christmas is on the way, so it's a great time to find some gifts
for your friends and family. The items I include are always currently for sale at the time of
posting, and they cover a wide range of prices. Check out their shops, and you might
find the perfect gift for someone! Or, the perfect gift for you! You can always
drop some not-so-subtle hints...


Friday 4 November 2011

How-To: Make a Rubber Stamp

I will put my hands up and admit right out that this is a little bit of a poor Friday post. I had redone the entire tutorial myself with pictures and everything, but when I went to look back at them, they had come out all fuzzy :( So, I'm afraid we'll all just have to make do with Pinterest for now.

Source

The image is pretty self explanetory, but I will talk you through it anyway.

You'll need:
A sharp pencil [for finer lines]
A rubber
A craft/Stanley knife

Interesting tidbit, we have a little gecko as a pet [one of two - there were once over 12 but they were all different species]. My uncle brought him over to our house. He worked in a factory, I think, and a shipment of Stanley knives arrived, and inside was the little fella having hitched a ride over from...somewhere. We kept him, and he's been sat in his terrarium now for I think about 5 years. He eats his crickets like a good boy and is lightning fast. We call him Stanley ♥ At the moment, though, gecko-wise, we only have him and Turbo, a leopard gecko.

What to do:
Find a design you want. It's a good idea to draw it out on paper first, then onto the rubber. I will warn you though, at first it's a good idea to try a simple design, one without too many thin lines. I started with a feather, and once I get my camera together I'll grab a picture of it. [I made 2 feathers and eventually a teacup - the latter is where my warning comes from]

If you're making a narrow or small stamp, consider drawing it on the end of the rubber instead of the side. This way you can save rubber and make more stamps!

Once you've drawn your design onto the rubber, grab your craft knife and trace around the edges of the drawing. If you've felt brave (or foolish - time will tell!) and gone for a more complex design that requires details to be cut out from within the image, or something similar (for example, my feathers had 3 notches in the filament), ignore it for now. Cut the basic outline (for further example, I cut the feather out as if there were no notches, just one smooth line). Cut a little deeper than you want the stamp to stand away from the base - the further it stands out, the neater the print will be (and less chance of unsightly inky corners!). Mine stand at about 4mm out, which is more than it sounds.

You may have found that actually the knife cuts through the rubber better than expected, but don't get too doolally! Once you've cut the outline, cut lines out from that to the edge of the rubber all the way around, then turn the rubber on its side and cut them so that they lift up. Proceed to undercut them until they come off, but be careful not to accidentally cut too far beneath the stamp itself - it's bound to happen that you'll make some cuts underneath it, but they shouldn't be a problem.

So now your stamp has been cut out so that it protudes from the rubber's surface. Now, cut the details. I followed my lines and cut the notches where I marked them, then made a narrow cut down the middle length of the feather, then another 1mm along side it and cut it out. If your details are small, be careful you don't cut them too big by accident. If they're thin and you accidentally cut them off, don't panic. I'd advise against such a detailed design for your first try, but it didn't stop me either. I ended up accidentally cutting a portion of my teacup handle off, and decided it might be best to just cut it further so I could lift it up a little. I got some Mod Podge and was able to glue it back down and adjust it so it sat right before it dried, and it's absolutely fine now.

And, just like that, you're done. You don't need to coat it in anything, once you're happy that you've cut the details out, you're done. If you made it on the end of the rubber, cut the larger part of the rubber away, so that you have a piece of rubber large enough to hold and press with ease. Don't try to cut the stamp design itself off of the rubber to mount on a piece of wood or something unless you can either cut a perfectly level line, or don't mind having to press at an angle.
Get a nice ink pad (your rubber stamp will be fine with the ink pads that you get for proffessionally cut stamps, no need to search for a specific type! Or, you could also try poster paint if you wash it off of the rubber when you're done)
You can use the rest of the rubber to make more stamps (I used one rubber, cut a feather out on both ends, then kept the middle third to use as a general rubber). Don't try to cut the new end straight for another stamp, though, it's almost impossible. I think. I don't know, I tried it and just ended up shaving off more rubber because the end was slightly wonky. I'm a perfectionist. It must be straight, dammit!


I apologise again for my poor tutorial, and I will try to get some pictures together soon. If not of the tutorial itself, then atleast of the finished pieces and their stampings. It's a great and ridiculously cheaper alternative to store-bought stamps, or custom stamps, but if you want a truly perfect or complicated stamp and don't have the patience to practise so you can make it yourself, I would advise Etsy ♥


Thursday 3 November 2011

Etsy Favourite Feature!

Another feature of Etsy listings added to my favourites. The idea is that I can both spread the word
of other Etsians, while at the same time, letting you know more about me and what I like ♥


Tuesday 1 November 2011

Interview with Leviviridae Jewellery, OcularFracture

Harmony Schreiner is a talented jack of all trades, and she's turned her hand to jewellery. She makes pieces inspired by steampunk art, anime and Japanese art. She really pours her soul into everything she does, and here we will get a great insight into who she is and how she does what she does ♥


1. When and did you first start crafting, and why did you decide to start selling it? What other creative things have you done besides making jewellery?
Well, I began as a comic book artist trying to sell my comics at conventions and such, but you can only sell comics to so many people, and eventually everyone who wants one has one, so... I just kept working up and trying to make new and different things every year. I also write short stories and make clothing... I take a lot of photos and do a lot of digital art. I guess you could say I'm a jack of all trades.

2. You don't have to have made a hundred sales to be successful. Do you consider yourself successful?
Definitely. The moment someone NOT related to me purchased one of my items I felt like I was doing pretty well. And of course, once I started making sales to other countries, I was very proud.

3. Where do you do most of your work? Do you prefer a quiet, peaceful and tidy space, or do you usually play music when working and find that there are always scraps of this and scraps of that lying around when you start? Are you an organised worker?
Heh. I try hard to keep a clean work environment, but when you work with a lot of really messy and hazardous chemicals, cleanliness kind of gets shoved onto the back burner. I try to clean my work bench off every few weeks, which is actually my dining room table, by the way. I sit at the table near my back windows with a lovely view into the country side and listen to my Pixies station on Pandora while I work.

4. Have you always had a passion for crafting?
As far as I can remember. Whenever I had the opportunity to choose an elective in school, it was always whatever artistic class I could get my hands on. Probably part of the reason I'm out of shape is because once I got to high school, I could choose art class over P.E. and I thought I'd have to be mental to choose P.E. when I could be doing something I actually enjoy. I've always been the type of person to try to create the answers to problems on my own. If I needed something that I didn't have, I always tried to make it on my own. Sure, it was probably flimsy, but it got the job done.

5. Do you find it difficult to find time to express your creativity while you have a child? Do you try to involve him in it?
Hmm... That's an interesting question. He's actually a pretty self-sufficient little guy. Very independent. He doesn't like holding hands when walking, and he hates riding in the shopping cart at the store. While I'm working, he plays with his toys or watches his TV shows he likes. If he needs something, he usually comes and lets me know. He does like to be involved with what I'm doing, though. A lot of times, he'll just come up and ask me what I'm trying to do and watch me work. He's very interested, and I'm sure once he's old enough, he'll want to help. He's only 2 right now, but he's a born genius. Everyone who meets him thinks he's much older because of how smart he is.

6. What is your favourite piece and why?
Another hard question... At the moment, I'd have to say either my Companion Cube keychain, or my Moustache pin, because I made the models and moulds for those pieces 100% from scratch, unlike most of the things where I just buy the moulds in basic shapes from the hobby store. The moustache and companion cube took such a long and very hard process to create, so I'm very proud of them.

7. Tell us something interesting about yourself.
Interesting, hmm... Well, I weigh a LOT more than I look, and no one believes me when I tell them how much. It's always fun to see their expressions. Other than that, I speak, read and write Japanese. Not quite fluently, but I'm sure if I were in a life or death situation that involved reading Japanese to live, I'd totally live...... Probably.

8. Favourite thing while growing up?
Water. I grew up near water, pretty much my whole life. It's a place I like to go to cool my jets and just relax. We have several beautiful lakes here in the Midwestern U.S. and I like to take little vacations up around there whenever I'm feeling overstressed.
Same went for me as a child. I couldn't live without some kind of lake or river near me. Some things never change, I guess.

9. If you could have one special ability, what would it be? Would it be a superpower? Would it simply be a skill that has eluded you since you first discovered that someone else could do it?
I like to try and solve all my problems in one shot the best I can because I'm tricky like that, so if I had to be limited to one special ability, I suppose I would want the ability to create some special object like a stone or something that could grant any wish I asked, as long as I did something special to it, kind of like how Rapunzel brushes her hair and sings to it in Tangled. Something like that.
So I'd have this ability to create a magic stone which could in turn grant me more abilities. Muahahahahaaa.
And if that doesn't count, then I suppose I'd like to read minds, because I simply cannot stand being lied to and I hate never knowing what someone is thinking about when it's important and they won't tell me.

10. What did you want to be when you grow up? Are you still aspiring to do it or something beyond your crafting? Why?
I sure did want to be a lot of things when I grew up... A writer, a singer... an Artist, a fashion designer... A photographer. And I guess I sort of got my wish. I've become most of those things on my own. Not professionally, of course, but I'm doing well. I'm of the mindset that if you truly want something, you should stop at absolutely nothing to get it, even when other people tell you that you'll never succeed. I got a lot of that from people, but I ignored them, and I feel like I could dangle my success in their faces and laugh if I weren't so darn nice.


Have a look around her shop, and check out her website, too!