Saturday 30 May 2015

Cream Cheese Brownie Pie

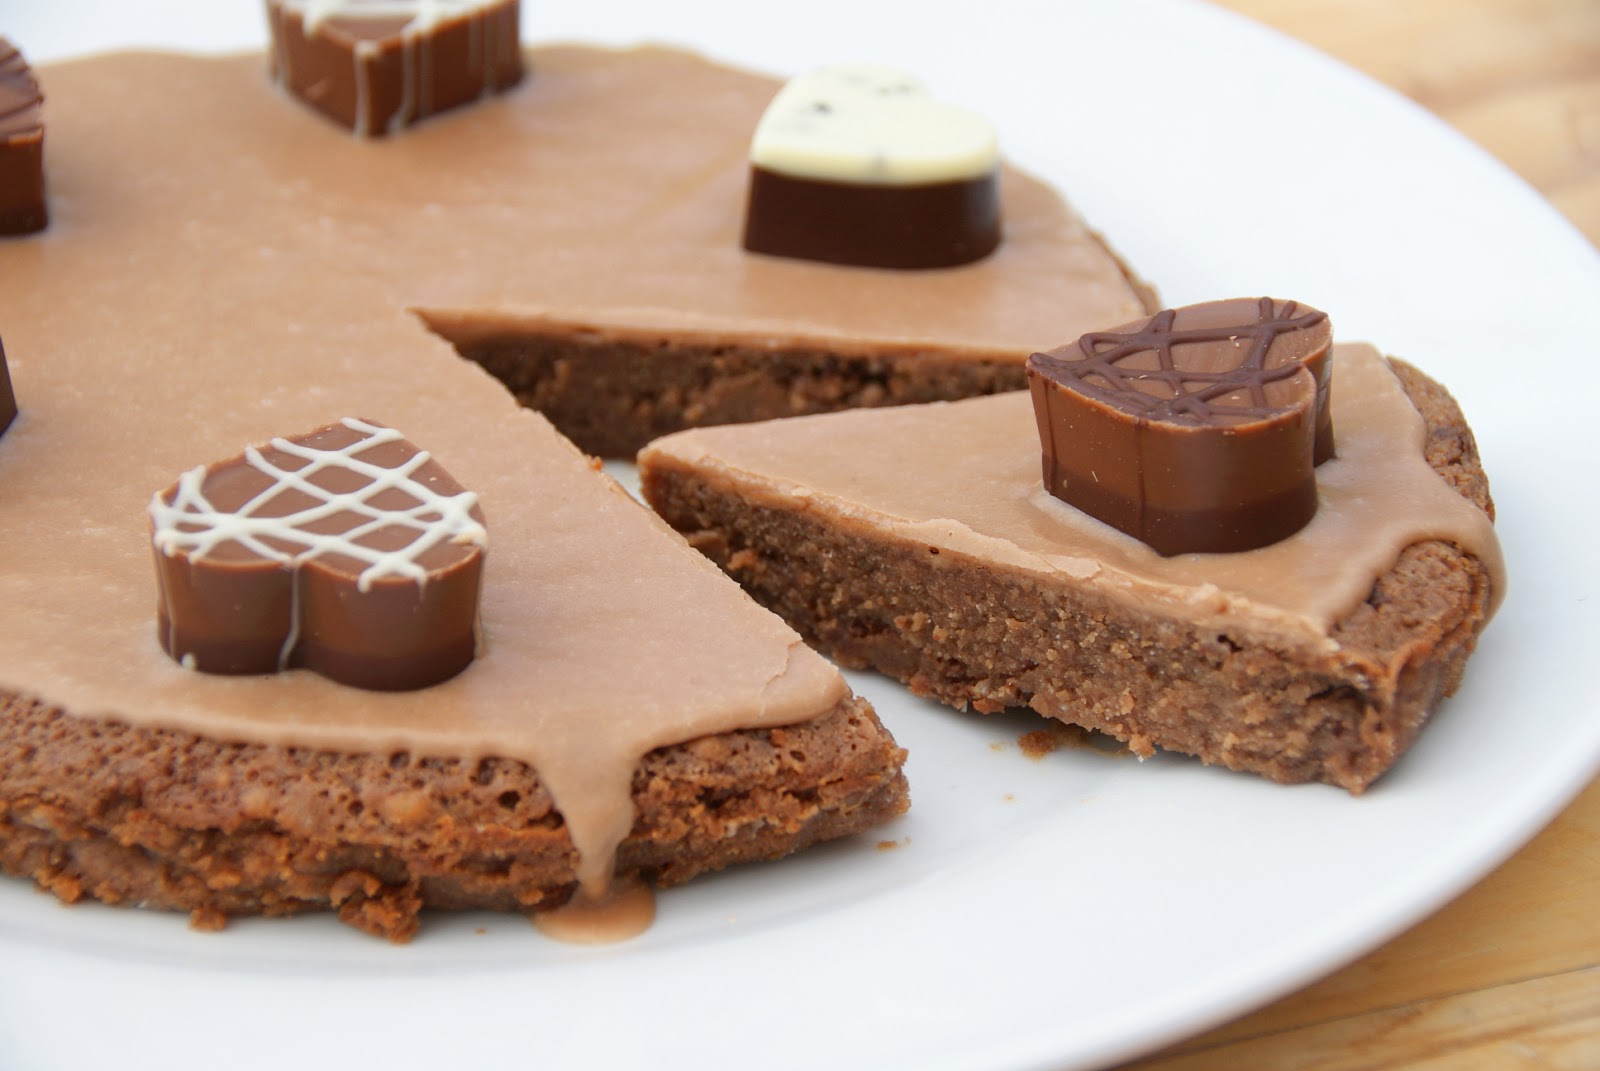
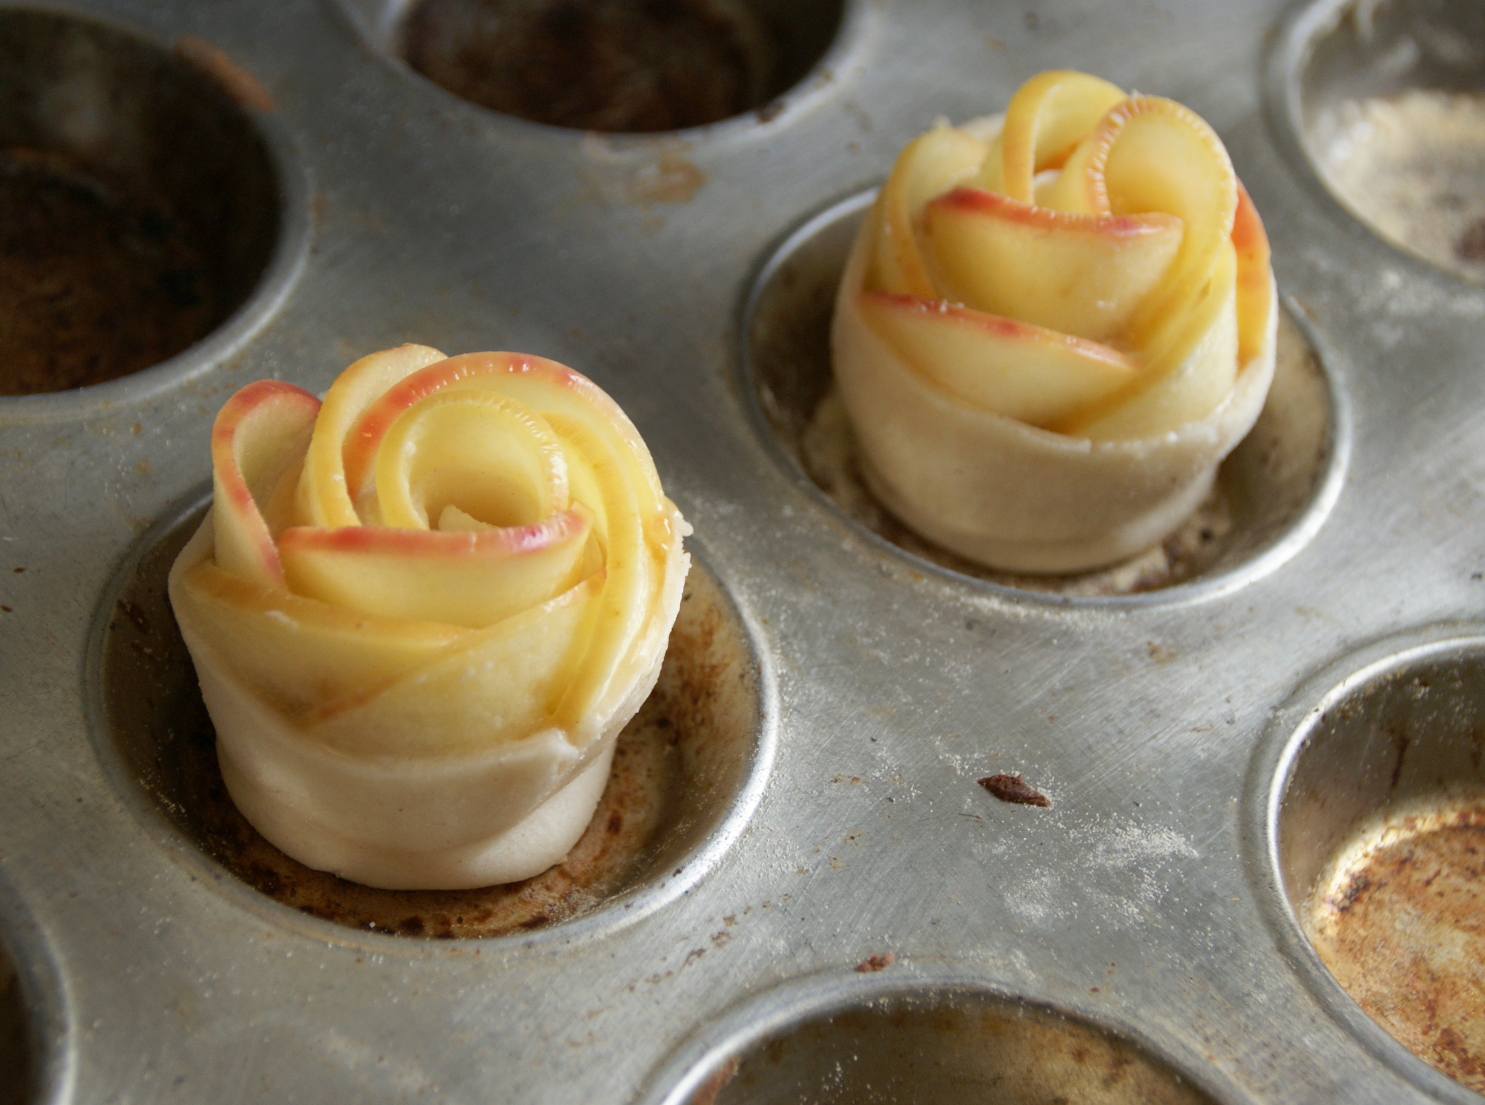
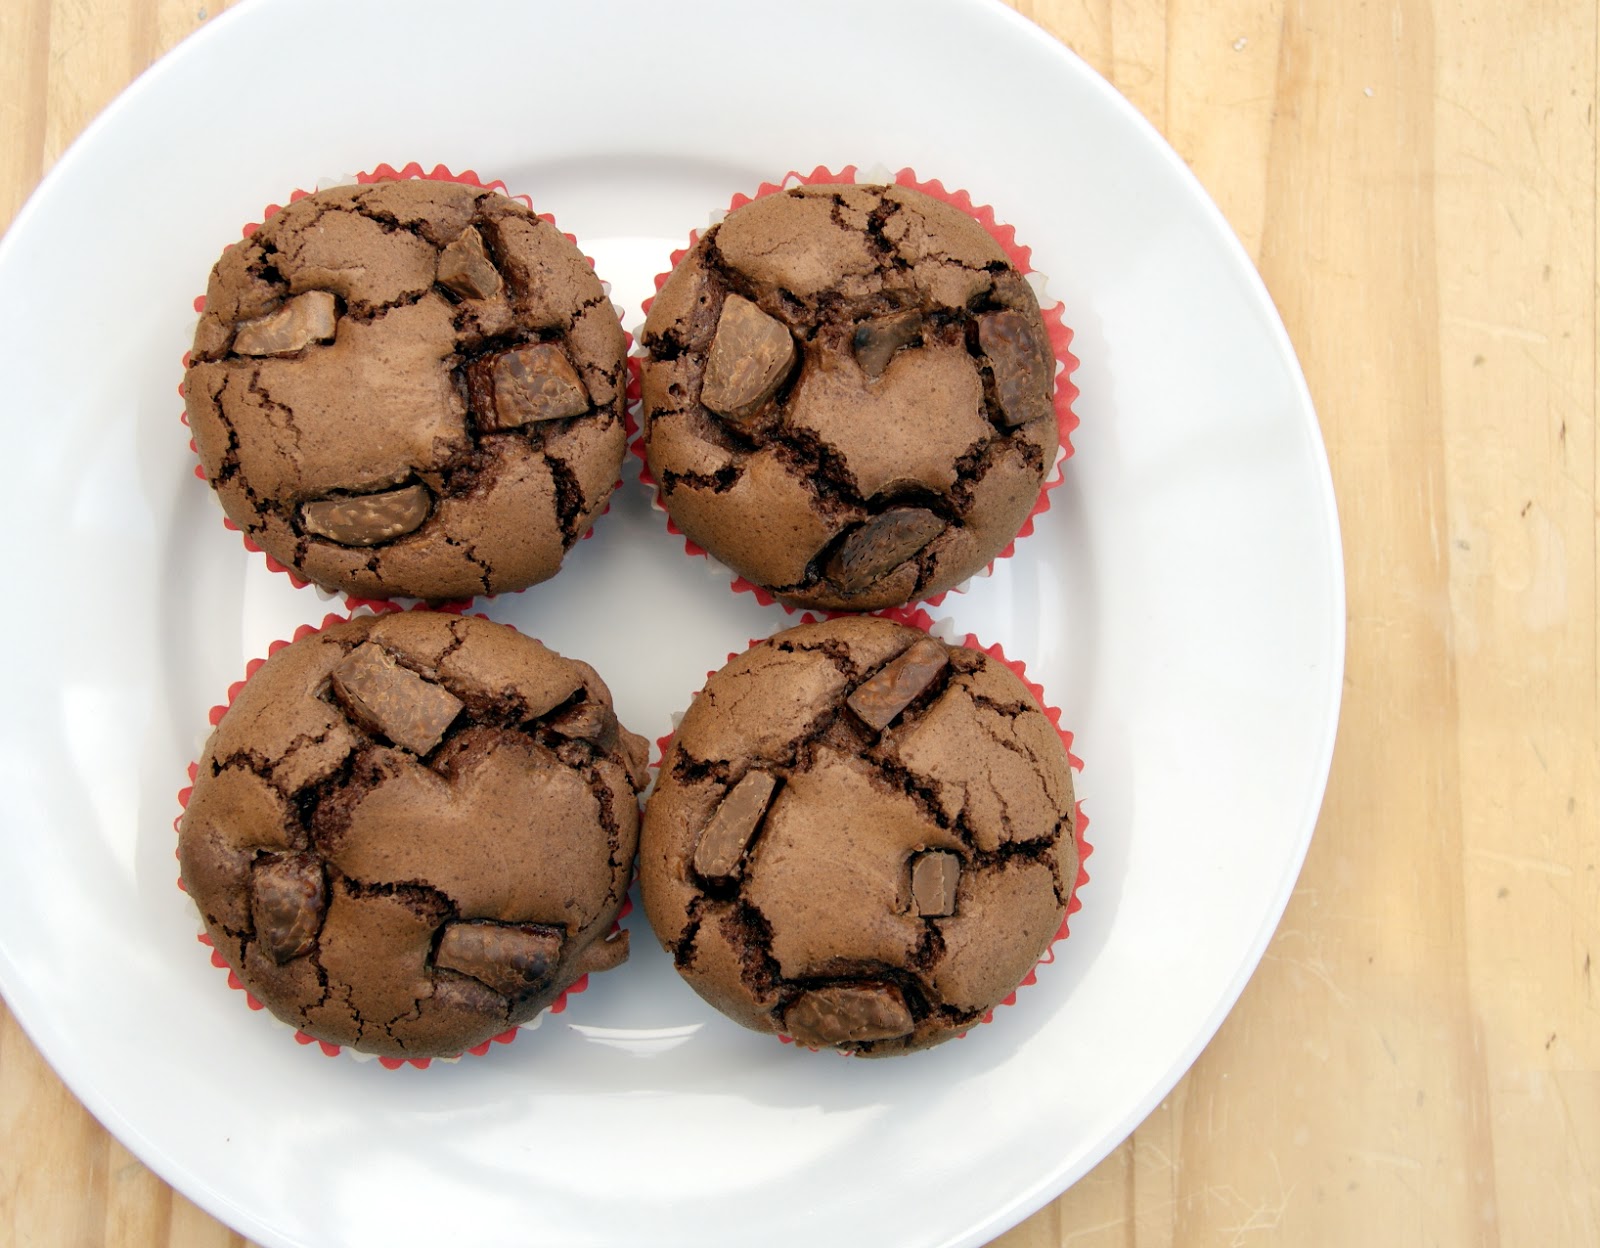
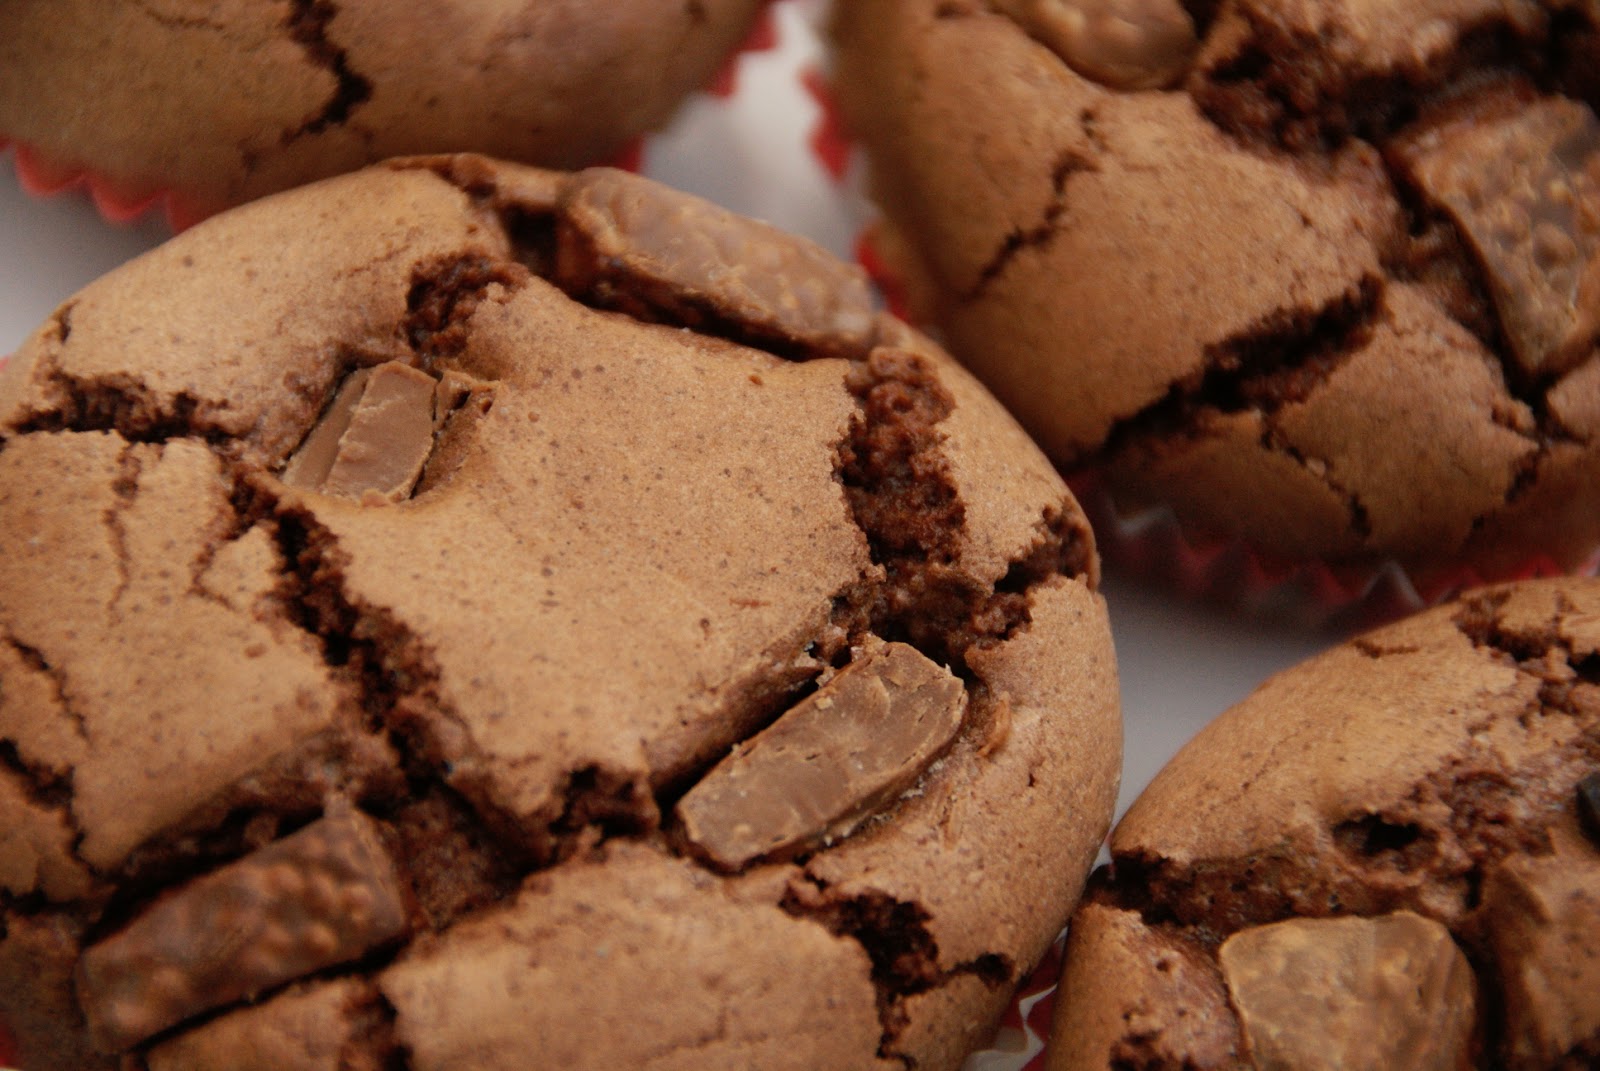
   I posted a brownie recipe recently - the best brownie recipe ever, ever, ever - and I said that I've never managed to make a brownie in a pan because it never cooks properly. This is the one exception, and it's, admittedly, not a typical brownie. It's sort of a brownie pie. There's little flour and there's cream cheese instead of butters or oils, and there's a chocolate cream cheese frosting. It's lovely, especially when topped with chocolates. I admit it's rich, but I made this for my 5th anniversary with Seeg, and everyone has to make an exception sometimes.

   Rather than cocoa powder, this recipe actually uses chocolate. I used Galaxy milk chocolate because Seeg doesn't like dark, but by using dark chocolate instead you can make it a little healthier. Dark chocolate has a higher cocoa and flavonoid content than milk chocolate (and certainly more than white) which actually gives the chocolate nutritional benefits that other chocolate doesn't have. The higher the cocoa content the better, and studies have shown that about 35g of dark chocolate, at least 70% cocoa, can be beneficial for your health when compared to not having it at all. 


Ingredients:
Cream Cheese Mixture
1/2 cup chocolate (chips or pieces)
1 egg
100g soft cream cheese
1/5 cup sugar
4 tablespoons flour

Brownie Mixture
1/4 cup coconut oil
1/4 cup cocoa powder
1 egg
1/4 cup sugar
1 teaspoon vanilla
Pinch of salt
1/2 cup chocolate (chips or pieces)

Cream Cheese Frosting
1/4 cup chocolate (chips or pieces)
25g soft cream cheese
3/4 cup powdered sugar
1 teaspoon milk
Optional: chocolates to decorate


Method:
For the cream cheese mixture:
1. Melt the chocolate over a double boiler (pan of water on a stove top with a heat-proof bowl with the chocolate on top). Stir the chocolate to encourage it to melt, this will also reduce the time and heat needed so the chocolate won't burn.
2. Remove the chocolate from the heat as soon as it's melted, then add the egg, cream cheese, sugar and flour and mix together until smooth.

For the brownie mixture:
3. Pre-heat the oven to gas mark 4/180 C/350 F.
4. In another heat-proof bowl, melt the coconut oil in the same manner as the chocolate before, then remove from heat and mix the cocoa powder until smooth.
5. Add the eggs, sugar and salt and mix well.
6. Add the cream cheese mixture to the brownie mixture and combine fully.
7. Stir in the remaining chocolate chips/chunks.
8. Line an 8x8 cake tin with foil and grease with more coconut oil (a smaller pan will give fewer but thicker brownies), and pour the mixture into the foil. Set in the oven and bake for 30 minutes or until a toothpick comes out mostly clean.
9. Remove from the oven and allow to cool fully.

For the icing (when the brownies have cooled):
10. Melt the chocolate in a heat-proof bowl (save yourself the washing-up and use the bowl from the cream cheese mixture) over a double boiler.
11. Once melted, remove from the heat and mix in the cream cheese, blending it together until smooth, and then gradually add in the icing sugar. Once it's all combined, add the milk to give it a spreadable consistancy. If needed, add a little more milk.
12. Spread the frosting over the cooled brownies and add your chocolates. Leave to set before cutting the brownies.


Friday 29 May 2015

30 Days Wild

   Throughout the month of June, I'm going to be participating in 30 Days Wild, an event set up by The Wildlife Trusts. The idea is that you make an effort to do something to interact with nature every day, even if it's as simple as listening to a bird song. I quite liked the idea and have already come up with a few things to do, and I'm quite excited about it! I rather like monthly 'challenges' like these because they're quite vague and versatile, so it gets my imagination moving.
   The Wildlife Trusts does offer a few suggestions for people who are stuck for ideas, such as go for a walk, hunt for bugs, count the different bird species in your garden and so on, but I was a little disappointed that so many of the suggestions were so simple, but it does mean that their many ideas aren't out of anyone's reach and I'm pretty sure that was the point. If you want to do something a little more extreme you can, or you can use the event as an excuse to go for a picnic in one of the Trusts' nature reserves.
   This event isn't a sponsored event and it doesn't gather anything but awareness of the preservation of nature around us. It's free to participate, of course, and there's a month-view wall chart and booklet you can download for free about the event if you'd like to participate last-minute.
   This event is also not limited to the UK - yes, sign-up and the like is limited as it is a UK charity, but nature exists in other countries too, so as long as you take a little bit of time every day to interact with nature, you're in!


Download the wall chart & booklet
Or sign up for a physical pack


Thursday 28 May 2015

Chicken Vents

   I usually have meal replacement shakes for lunch - I've found a couple of brands that actually make delicious shakes rather than weak and foul ones (Real Nutrition Co and PHD Woman) - because they're just 200 calories, they're loaded with protein which keeps you full and filled with lots of vitamins and minerals, usually about 30% of your RDA of each per serving, at least, which you wouldn't get from any conventional lunch.
   But while I was doing my Spring Cleaning the other week, I opted for sandwiches and 'real' food instead. And while my salmon and chicken sandwiches were delicious, I did want to try something a little different.
   I only made two apple rose tarts when I made my puff pastry, so I had a fairly large amount left over in the freezer. It was made from just white whole meal flour, water and coconut oil, so it was far from an unhealthy pastry, as pastries go, so I figured it was pretty clean. So I decided I'd do something with it.
   And I made chicken vents. They're little chicken and vegetable pies, but they have no lids, the pastry is light, and they're really easy to make in small batches.


Ingredients:
Puff Pastry:
250g whole meal flour
pinch of salt
250g coconut oil
150ml water

4 Vents:
100g chicken breast
1/4 cup peas
1/4 cup diced carrot
1/4 cup grated cheese
1/4 cup gravy
or your chosen fillings.


Method:
1. First of all, make your pastry. Combine the salt and flour in a mixing bowl, then rub in the coconut oil. Don't over-combine, stop when the coconut oil is still roughly the size of peas.
2. Make a well in the centre and pour in the water, then mix it with your hands to create a dough.
3. Cover the bowl and leave it in the fridge for half an hour.
4. Turn it out onto a powdered surface and roll it out in one direction so it's about 3 times as long as it is wide. Fold the top third down over the middle, then fold the bottom third over, turn it 90 degrees and roll it out in one direction again so that it's 3 times as long as it is wide once again.
5. Cover once again and set back in the fridge for half an hour. This pastry can be frozen and kept for about 6 months, so if you make too much for the vents the rest can easily be put away for the next time you need puff pastry.


6. Pre-heat oven to gas mark 5/190 C/375 F.
7. When the pastry is ready, take a circle cookie cutter and cut three circles for each pie. Set one of each three circles aside for the base. Cut a smaller circle out of the middle of the remaining two circles, brush the base circle with water or milk and stack the two rings on top.
8. Flour a baking tray and set the pastries on it. Put them in the oven for 30 minutes.
Optional: if you're adding cheese, pull the pastries out after 15 minutes, add the cheese to the bottom and put back in for the remaining 15 minutes to melt it.
9. Next comes preparing your filling. Cook your chosen meat in the desired manner, such as frying the chicken in garlic and coconut oil, and using any herbs and spices you'd like. I used frozen veg and cooked a pitifully small amount but it proved to be more than enough. I also cheated and used some gravy granules and made about 1/4 cup of gravy to divide amongst them rather than making any from scratch - it's too much hassle to make gravy from scratch when it's just to make 4 small pies.
10. When the pastry comes out of the oven, divide the pieces of chicken amongst the pastry vents, then the veg, then drizzle the gravy - or whatever filling you've chosen - and serve them immediately. If you'd like them hotter you can pop them back in the oven for 10 minutes, but they were more than adequate as they were.


   They don't look like much, these tiny pies, but one was surprisingly filling! I actually didn't feel hungry again for 2 hours, and that helped keep me from snacking on bad things which was important in my spring cleaning. I have another idea for these that I intend to try soon!


Tuesday 26 May 2015

Apple Rose Tarts

   Sweet little rose-shaped apple tarts. That's what I made. I can't believe how well they came out, and even more so how easy they were! Seriously! Anyone can do them, and they're perfect for a spring picnic or tea party!
   You literally just need some apples, lemon juice, puff pastry and apricot jam. You can use frozen puff pastry, or you can make it yourself like I did, and by making it yourself you can make them a little healthier by replacing the butter with coconut oil, and all-purpose flour with whole meal flour. It won't cut the calories, but 'healthy' doesn't mean 'low calorie', it means 'nutritional'. The coconut oil adds many more nutritional benefits than any other fat does without compromising at all on taste or texture (you can't taste the coconut at all), and so does the whole meal flour when compared to plain flour, including fibre.


Ingredients:
Puff Pastry:
250g whole meal flour
250g coconut oil room temperature
pinch of salt
150ml water

Roses:
1 small apple per tart
3 teaspoons of apricot jam or preserve
2 teaspoons of water
juice of one lemon

Method:
1. For the pastry: combine salt and flour in a bowl and rub in the coconut oil. Don't over-mix, you want the coconut oil to remain about the size of peas.
2. Make a little well in the centre of the mixture and pour in the water. Mix it with your hands to create your dough.
3. Cover the bowl with clingfilm and leave it in the fridge for 30 minutes.
4. Turn the cooled dough out onto a powdered surface and roll it out in one direction so it's about 3 times as long as it is wide. Fold the top third down over the middle then the bottom third up and over again, turn it 90 degrees and roll it out in one direction again so that it's 3 times as long as it is wide.
5. Fold the dough again then set back in the bowl, cover and put back in the fridge for another 30 minutes. The uncooked puff pastry dough can be frozen and kept for 6 months.

6. Once the pastry is done, get a cupcake pan out and have it on hand. Flour the pan's cavities and pre-heat the oven to gas mark 5/190 C/375 F.
7. Cut your apples in half and core them, then slice them finely.
8. In a heat-proof bowl half-filled with water, squeeze in the lemon juice, then add the apple pieces and microwave for 3 minutes. This will soften and preserve the apple pieces against the heat, making them flexible.
9. In another heat-proof bowl or jug, add the three tea spoons of apricot jam/preserve and the two teaspoons of water and heat in the microwave for 1 minute.
10. Take your pastry and roll it out to about 3-5mm thick. Cut strips about 25cm long by 6cm wide. Each strip will make one tart.


11. Now you'll need to work fast. I found this out the hard way. Spread a little bit of the apricot preserve over one strip, then place the apple slices along the top, overlapping them.
12. Fold the pastry length-ways so that the apple pieces are tucked in.
13. Begin rolling it up from one end to the other and then put it in one of the cupcake pan's cavities. If you're concerned that it will unroll, make sure the part of the pastry touching the edge of the cavity is the end. They might seem small but the pastry will - you guessed it - puff out and fill the cavity once it's cooked.


14. Make the next tart as quickly as you can and set in the next cavity and so on until you have the number you need.
   The reason you have to move quickly and make one tart at a time is that the apricot mixture will soak into the pastry and it will fall apart. You won't be able to get it off of the work surface. It's awful. So while my image shows two pastry strips with apricot preserve...well, they didn't work. I made them quickly and one at a time after that and avoided the problem entirely.
15. Put the pan in the oven and cook for about 30 minutes, then set them aside so that they fully cool. Don't try to remove them before them or they will break. I'm very impatient but I've learned my lesson in the past about removing cakes and pastries too soon. You can always heat them back up if you'd like them warm.

   The apple skin will probably burn a little but none of it will taste it. The lemon juice and water you soaked the apple in preserves the taste and keeps it from burning, and the apricot preserve acts as a glue as well as a little more sweetness.


Monday 25 May 2015

Characters

   There's a few funny things about writing. You build a character's history, their motives, their decisions, and you get to know their minds. You have to, because, to write a believable character, they're each going to have their own quirks and qualms that are going to affect their decision-making process. Religion, past experiences, culture and so on. And you get to know them, you care - they don't exist, of course, but you've created these people and you know them better than you know a lot of people. I know them better than I know my sister - admittedly we don't have a close relationship, but I can't predict how she'd react to things. But of course I know how my characters would.
   And I'm not just talking about protagonists, I'm talking about every single character, the good guys and the bad guys. You have to know how all of them work, and you get attached. I don't necessarily believe I'd get on well with these people if they did exist, but I wouldn't know how their minds worked. Knowing what I do about these imaginary people changes things. I can pity and sympathise with characters who are my polar opposite because I understand how they feel and, more importantly, why. Even if they're villains.
   And when they die...yes I've cried when killing characters in the past, but whether I cry or not, I get this strangely hollow feeling for a while. I'm knocked out of my rhythm for a few days. As dramatic as it sounds, it's a bit haunting. They never existed, but I knew them so well, and now they're gone.
   I'm sure a number of you are reading this thinking I'm mad and I need to get out more, but it's the same as having a vivid dream, one where things go amazingly well for you - achieve your dreams, fall in love, make friends with someone who truly understands you - and then you wake up and it's all taken away from you and then you're out of whack for a while. It's kind of like that.

   And I love it.


Ripped In 30: 2 Weeks Later

   In the past two weeks I've spent doing Ripped in 30 (barring, of course, my week of spring cleaning) I've cleared Week 1 and Week 2. Obviously.
   As you all must have noticed by now, I'm quite accustomed to changing my workout every month. A lot of the DVDs I use have multiple workouts on them, usually 2-3, consisting of several circuits, so you're not generally using the same routine for a month straight, but each routine on a DVD is usually mostly the same, just different intensities. The beauty of the kind of mixed circuit workouts on Jillian's DVDs means that each workout is varied, and you rarely repeat moves in each different section.
   But moving on to a new routine after just 6 days of use feels very strange, and yet fulfilling. I like using a routine for 2 weeks before moving on to the next, it gives me a good chance to get accustomed to it but nowhere near enough for it to stop being effective. But moving on to a new routine after just one week kind of sends my mind into a spin. When I finished Week 1 I didn't feel at all ready for Week 2, regardless of my week off in between, and when I got around to beginning Week 2, I wanted to try Week 1 just once more, just one more day. I didn't, I jumped right in, and while the intensity had increased, I was able to do it. It hadn't jumped that far.
   I wouldn't say (so far, at least) that this workout is for advanced people like her Hard Body DVD is. Perhaps intermediate, but, to be honest, if you've completed the 30 Day Shred and are looking for the next level, this is it. That's not to say that I find it ineffective, because the fact is that there are so many different moves and by increasing the weights and keeping up with them, resting only at the end, it stays intense and effective.


   Having said that, Jillian did state that the first two weeks would focus on form, so I'm a little dubious about starting Week 3 today. But I can do it. I've realised recently that I've gotten too comfortable with the weights I've been using, so I've been upping them where I can. Unfortunately the highest weight dumbbell I have is just 2.5kg, so I've been holding onto my 1.5kg (3lb) and 2.5kg (5lb) at once, and the weight is a challenge again. I'm going to have to buy some more, of course, but they get suddenly expensive when you start buying them individually, and just one pair of 4kg dumbbells costs about as much as a beginner's set of four, which is a little off-putting. But it's a necessity. If your weights are too light you don't get as much out of it, and it's not big weights that create bulk, but lots of reps. Ideally, for maximum burn, you want a weight you can control initially but is so heavy that you can't keep perfect form on the final 2 reps of a set (a maximum, usually, of about 12 reps per set for advanced, 8 for beginners).

   Still, I'll begin Week 3 in about an hour and update again at the end of the month! Wish me luck!


Sunday 24 May 2015

The Best Almost-Healthy Brownies Ever

   As healthy as I like to think I am when it comes to eating, we all have our weaknesses. Fortunately this past week's 'staycation' has been quite tame when it's come down to food, but one thing Seeg and I could not do without was our brownies and ice cream.
   I've toned the recipe down the last few times I've made them - usually only actually 2-3 times a year - so I don't end up making loads and then eating them for days. As wonderful as that is for my taste buds, not so much for my waist.


   I've tried to make them a little healthier, too. They could never be truly healthy, because there is no substitute for chocolate (and having dropped 5 dress sizes in 2 years, I've not once cut chocolate out), but there are always replacements for other things that can make things a little better.
   Grass-fed butter. People will have you believe that butter is bad for you - and in large, frequent amounts, it is. But grass-fed, organic butter means that there's nothing fake in it - what goes into the cows is all natural, and what goes into the milk is all natural. It's also high in CLA as well as Vitamin K, D and A, all of which require fat to be absorbed into the body, and it has a better omega 3 to omega 6 ratio than grain-fed butter. You could also try coconut oil, like the one from Gold Bee, in place of butter, which is great for vegan baking!
   Instead of all-purpose flour I used whole meal flour - it might sound a little strange but it didn't affect the taste or the texture of the brownies, but it did provide more nutrients than plain all-purpose flour, especially fibre. It's exceedingly better for you as it hasn't been bleached or messed around with anywhere near as much in most cases, and even if you purchase 'strong wholemeal flour', the brownies won't turn out tasting like bread. Texture is also unaffected.
   When it comes to sugar, I stick with the basics. I try to find as unrefined as I can, but sugar is sugar. It's important to remember, however, that sugar in itself does not cause diabetes or obesity, it's over-eating high amounts sugar that does that, and while there are other 'natural' sugar substitutes, they don't all hold up well in baking - some react badly to heat, such as honey, others can have funny effects on your body such as a laxative like xylitol, and others are just downright unhealthy. Sugar is sugar, and I always stick with the most basic because it does what I want it to do in a cake. The trick is to simply not gorge yourself on it. People seem to forget that sugar is actually a natural product and only has a negative effect on the body when abused. Moderation is always key, regardless of food type - fruit contains high levels of natural sugars, and while it's not as easy, you can gain weight by over-eating apples. Having said that, try to go as unrefined as possible. Billington's is available in most UK supermarkets and is an unrefined sugar - you can generally tell, because it isn't white. It tastes no different and won't compromise on texture.

   The changes to the flour and fat can make a massive difference - perhaps not necessarily in terms of calories, but it does make the brownies more nutritious and that means that the calories aren't quite as 'empty' as they would otherwise have been. 'Empty calories' is a phrase you would use when comparing a 250 calorie piece of cake and a 250 calorie chicken sandwich. The chicken sandwich has more nutrients such as complex carbs, protein and probably some greens in there, too. The cake is more or less just fat and sugar, meaning you're not getting much out of the 250 calorie cake when compared to a 250 calorie chicken sandwich. Far less, in fact. No, these brownies are not on par with this chicken sandwich, but they're also superior to the piece of cake.
   Another thing I do that helps is, rather than cooking them in a tray, I spread the mixture into cake cases. This means the servings are more even and you can see more immediately how many you can make, and you can either chill the mixture if you made too much and bake them as you want them, or freeze the brownies themselves for up to a month. But I will admit that this is not the reason I started baking them this way, though it is an important one to me now. It was actually because I have never, ever managed to bake a brownie in a pan successfully. The edges always burn and the middle never cooks, no matter what recipe I use, no matter what heat I set the oven on, how long they're left in there, on what shelf or anything. I can't get them to work. I gave up one day and used cake cases, hoping that smaller areas would cook in the centre without burning the edges, they worked an absolute charm and I've never looked back.


Ingredients:
Makes 10 brownies
100g grass-fed butter, unsalted
150g unrefined sugar like Billington's
80g cocoa powder
1 tsp baking powder
1 tsp salt (omit if using salted butter)
2 medium eggs (EU; large US)
1 tbsp vanilla extract
80g whole meal flour
Optional Chocolate chips or cut-up pieces; pieces of Green & Black's are great because it's delicious but clean chocolate with such a very, very short list of ingredients, including raw cane sugar.

Method:
1. Line and grease a tin or spread cupcake liners in a cupcake tray, and pre-heat the oven to gas mark 4/180 C/350 F.
2. Over a double boiler (heat-proof bowl placed on top of a saucepan filled with boiled water), slowly melt the butter or coconut oil. Once it's fully melted, add the sugar and mix it in together for about a minute or two.
3. Take the bowl away from the heat and mix in the cocoa powder and baking powder, then add the eggs.
4. Sift the flour in gradually and mix it all together.
5. Spoon the mixture into the cake cases.
Optional: add some chocolate chips on top of each brownie, or cut a piece of chocolate into 3 and press them into the top.
6. Put the pan in the middle of the oven and leave for 25 minutes or until a knife comes out clean.

Serve them warm from the oven with ice cream or cream, serve cold with greek yogurt and honey, or scoff them straight.


Saturday 23 May 2015

Trek Protein Flapjacks

   I never used to like flapjacks as a child. Or fruit or veg. Or anything that was 'healthy'. I just wouldn't touch it because healthy stuff didn't taste good. Fortunately I didn't have a say in the matter and my parents made damn sure I got my fruit and veg, but I steered clear of oats and the like. But about a year ago I had a flapjack and suddenly I loved them. I like to buy one-off flapjack boxes from Graze because I'll be surprised by the 'flavours' but they're all essentially the same. But that was more or less my only source of flapjacks since they're usually quite high in calories. Oats are carbohydrates, after all, so they're high in energy.
   But Trek - a sister company of one of my favourites, Nakd - recently started making protein-filled flapjacks that actually fit my calorie 'budget' perfectly. Rather than 350 calories per bar as most flapjacks are, Trek's protein flapjacks range between 200-250 calories for 50g. This is because, rather than being made up of mostly oats, they've got a good dose of soya protein, so you still get a good sized bar, but the protein has meant there's less room for the carbs.


   Because flapjacks are usually made up of mostly oats, I've always considered them a great source of energy (it's really the syrup used to hold them together that make most flapjacks unhealthy), but the calories have meant that if I have a flapjack, I have a small piece or none at all, and only just before or after a workout. Trek's protein flapjacks have changed up the game, though.
   Each bar contains 9-10g of protein, depending on the flavour, and about 20g of carbs. The carbs really give you a good refueling, but the protein means that the carbs digest much slower, so instead of it being a case of 'use this energy immediately or I'll store it as fat instead', the energy is released at a slower and more steady pace which gives your body a good chance to use the energy rather than storing it awa. This makes it perfect for when you're on the move and need an energy top-up, and the protein also means it's great if you're hungry and looking for a snack because it will keep you fuller for longer, and the carbs and protein combined make it a great post-workout top-up, refuelling your body for the energy you just used, and giving your body the protein it needs to repair itself from the strain of the exercise.


   But aside from all this technical nonsense, the flapjacks are truly gorgeous. I like a bit of crunch. Soft flapjacks are lovely, but I find crunchy textures more satisfying, and Trek's flapjacks offer a happy medium. They're soft and chewy, but somehow there is still a gentle crunch, and I love it. They're crumbly because they're not absolutely filled with syrup, it's just a bit of rice syrup holding them together, which also means they're not too sweet. You can taste the fruit in the morning berries flavour, the coconut in the cocoa coconut flavour, the banana in the banana bread flavour and so on. The lack of overpowering sweetness also makes them quite gentle in taste, to be honest, and really pleasant with a cup of tea because neither overpowers the other (at least as far as drinking green tea goes).
   Each of the protein flapjacks I've tried have kept me full for two hours without fail, making them absolutely perfect between meals. I try to eat every 2-3 hours and about 300 calories. This keeps my body constantly fueled, by metabolism constantly working, it avoids long stretches of hunger (which avoids snacking on unhealthy things that might be closer and easier to grab than healthy alternatives) and ultimately helps weight loss in a safe and effective way.

   Put simply: I love them. I love Nakd, too, but these are bigger than Nakd bars and far more filling, and that has meant that they've stayed a little closer to my desk than Nakd has. Nakd is a great way to get your five a day, but Trek is more filling and satisfying, and I've just ordered myself a box of just morning berry flavour. I absolutely love them. Plus the name makes me want to get more active. Always a bonus.
   You can buy all six flavours in a box of 16 bars for £16 on the Trek website, or a box of 16 of one flavour for £15, and, just as with all Nakd orders, there's free next day shipping and a 'sprinkling of freebies' in every order. You can't lose!


Sunday 17 May 2015

Spring Cleaning Day 7

   Today was the last day of my spring clean, and I have to say that I feel great for it. As you probably gathered from the week's posts, I've been sleeping better, feeling better, and generally feeling more rested. I also seem to have improved willpower, though that willpower will be put to the test today, as it's our 5th anniversary today and there are in fact four boxes of chocolates floating around. I did well throughout the day, but the evening is when I become weak, so if I have just a few and learn when to stop, that will be a big win! The first taste of chocolate since beginning is when things risk falling apart, but if I can control myself through this then I'm set!
   Photographing the chocolates below proved hard enough, but I ate none of them! And I made heart-shaped bokeh to overlay onto it. I thought it was appropriate, but I'll tell you what: it is hard to cut out a perfect heart. The first few were too rough-edged and I didn't notice it until I uploaded the pictures so I had to try again and again, but I'm happy with the eventual outcome :D
   I'm back to Ripped in 30 tomorrow and I've got more than enough energy for it! I'm a little daunted, I admit, because I'm jumping into week 2. Part of me says I should go back to week 1, but I'm not going to because I don't want to go backwards. Besides, I doubt the leap between week 1 and week 2 will be that big - it's not like I'm expected to do a flying superman push up by the end of week 4, that would be absurd.

   It's been a great week, and time will tell if it has any effect on my weight-loss, but at the very least, I feel recharged and ready to go, and that was the most important goal of this week. So I can say I've succeeded! I'll probably do this again at some point, and I may also force the habit on myself to take a week 'off' every 8 weeks so I don't burn out again, but for now, I'm happy!


Saturday 16 May 2015

Spring Cleaning Day 6

   I forgot to buy strawberries today, so tonight's infused water is going to be just lime and cinnamon. I wonder how unpleasant that will be.
   I had good fun taking photographs today, I was in a somewhat silly mood so a stuffed lamb got involved. This week has lightened my head to the point that I've gone daft, I don't know if it's because I feel good or if it's because I've gone inside from stepping away from chocolate and sweets. That will change a little tomorrow, though, and while tomorrow is my last day of the spring cleaning, and I will be behaving myself, it's also my 5th anniversary with Seeg and there are at least 3 boxes of chocolates in the house. Well it's Sunday tomorrow anyway, and the next day it's back to hard work - that's not necessarily an excuse, but if I do happen to feel guilty or eat too much decadent chocolate (which, fortunately, is like 4 pieces because it's so rich), at least I can relax knowing I can work it off again. And anyway, once in a while is completely fine, so my willpower (and intelligence) to back off will be tested tomorrow, too.
   And, as it's Sunday tomorrow, I'm also not exercising. Sunday is always my rest day, and while it's true that this week has been slow-paced already, the whole purpose was to give my body a chance to recover so I can boost my weight-loss again. So I'm sticking to taking Sunday off so that I'm raring and ready Monday morning. I can't wait. And yes, there is something wrong with me.


Nakd Nibbles Review

   Since reviewing Nakd bars a couple of months ago, I've become obsessed with them. They're tasty, filling and made from only whole foods, so they're completely natural, unprocessed and wholesome, which is what food should be, especially when you're looking to lose weight and get healthy. But what astounded me about them the most were their flavours. There's such a wide range of them, which you wouldn't expect from just natural ingredients, especially flavours like cherry bakewell or rhubarb and custard, but they truly taste like their claims, which make them even better and even more appealing if you're watching what you're eating. You can genuinely satisfy your taste buds without compromising on anything! And so, as someone with an unfortunately hefty sweet tooth, when Nakd released their new Nakd Nibbles, I had to try them.


   Nakd Nibbles are small packets of fruit and nut bites - like the bars, but small 1cm nuggets - and their flavours are derivative of old sweetshop favourites - Toffee, Mint Humbugs and Strawberries & Cream, for example. Like many of Nakd's bars, each 140 calorie bag counts as one of your five a day, and are suitable even for vegans.
   Though they don't look like much, just like the bars, they taste amazing. The packets are satisfying, too; it doesn't seem as though there are many in the bag when you pick it up, but that's because all of the nibbles nestle in together and sort themselves out flat. The bag is, in fact, full.
   The packets themselves are gorgeous, too! I love the colours of Nakd products and these are just as good, especially Strawberries & Cream and Fruit Salad.


   Once again, Nakd has created a wonderful alternative to a simple apple - not that there is anything wrong with apples! But you can get fruit fibre and all the nutrients without that same old apple taste. And yes, I love apples, but it's nice to have something a little different, and while Nakd bars provide that, Nakd Nibbles appeal to the child in us while allowing us to be healthy at the same time.
   You can get all 7 bags for £6.50 on their website, with free shipping and a 'sprinkling of freebies' in every order. I already bought myself a second box. I've got more Nakd bars and nibbles now than I know what to do with, but I don't think that's a bad thing. They balance out my biscuit collection.


Disclaimer: I was sent this product to review by the brand itself. The quantity and precise products sent were their choice, not my own. All opinions and images are my own, and all appropriate research has been done by myself from a range of sources rather than relying entirely on the product's website, especially where health products are concerned. I do not accept a product to review if I do not believe it is safe or worth my own time, regardless of any kind of reimbursement. I trial the products for an appropriate amount of time before writing reviews to check for wear-and-tear on physical items and side effects from edible (be it supplements or food). If I have negative points to voice, I will voice them, and I never, ever accept product reviews or reimbursement on the promise of a positive review. My reviews are and will only ever be honest.


Friday 15 May 2015

Spring Cleaning Day 5

   I kept myself busy today baking - and I didn't eat any of it! Well, I will, but the danger zone is during and immediately after baking them, so to have not touched anything even while it was right in front of me and in my hands is a definite victory! I've barely thought about food all day, even while making it, and that's gradually been becoming the case since Wednesday, so that's perfect.
   I'm enjoying my yoga but I'm looking forward to returning to Ripped In 30 on Monday and jumping right in to week 2 of the DVD. I admit I'm a little daunted since it's been so slow-paced this week, but I know I can do it and that I will enjoy it.
   I will also admit that I've been spending a lot of time on World of Warcraft camping a rare spawn that drops a dinosaur mount (of course). And when I say 'a lot of time' I mean all day every day since Saturday, constantly logged on and checking ever 40-50 minutes. I feel quite bad about it because a lot of other players have been trying to get it, but I'm always there and always the first to tag it (attack it first and therefore get the loot) and I've had a few people rage at me. But that's what camping is, and it's not like I've been botting, I've been playing fair and square. The upside to camping something like this is that I know roughly when it will spawn based on what time it was last killed, so I don't have to stay at the PC, I can leave and do other things. This has also helped this week because, instead of watching the clock for my next snack time, I'm watching the clock for the next spawn. I'm a nerd, what can you do? The mount is a rare drop from a rare spawn, at only a 5% chance to drop on each kill, and there are 3 different spawns with their own unique mount. Today - just half an hour ago, in fact - I got the third and final mount. Hell yes!
   So today's been a good day! :D And now to binge-watch Stargate: SG-1 with Seeg.


That Professional Look

   Presentation is everything. This is something that's been on my mind a lot lately because my book is almost finished and my attention is turning towards agencies. I have to make sure the manuscript is perfect - if anything can be tweaked, it must be tweaked before being sent out. Once it's on its way to an agent's mailbox, that's it. I can't recall it. I can't correct it, I can't add things or take things away, I can't reorganise it, and if I forgot to add a hint of my personality, then that's it, and the package left looking just like everyone else's. And yes, it's the manuscript itself that counts above all else, not coloured labels, flourishing addresses or choice of paper for my cover letter, but it does add to it. You want to make a lasting impression. You need the presentation to capture their attention and tell them immediately what they can expect from you and your work, and once you have their attention, you let the manuscript do the rest of the work. I want them to know they're picking up fantasy before they read the first page of chapter 1, just the same way a book cover would present the book in a shop. This way, if they're not in the mood to read fantasy when they next have the time to sit down and look through queries and submissions, they'll be able to pick it up more easily when they feel more agreeable to the genre.
   But the hunt for an agent that will not only take on my genre, but actually has room on their client list, is a long job. Fantasy in particular is a very small market - though, thanks to The Lord of the Rings, The Hobbit, Game of Thrones and all these fairy tale TV shows and movies coming out, people are reaching for more fantastical tales than they used to, which has made the market a bit more receptive. But it's still tough.
   Fortunately, this is where the internet comes into play. I cannot imagine how hard this would have been 50 years ago. Writing out your cover letter and queries a number of times to send out to the handful of agents you've managed to uncover, all while likely missing a good number of other agents who might suit you, your work and your genre even better, but you were unable to find them. It kind of makes me wonder how anyone managed it. Perhaps I've taken the internet for granted. But because of it I can easily gather up contact details of all fantasy agents who are willing to accept new submissions, and given how easy it is to make real-time updates and changes to their status, I can avoid wasting my time querying agents who were open to new submissions 2 months ago, but no longer, and agents who don't represent the genre at all.
   Plus there's loads of advice out there for how best to go about approaching agents and what they expect from you, and what you can expect from them.

   Your physical conduct matters, too. The manuscript is what will sell, not the authors - you rarely see much of authors in the limelight. In fact I can only name 3 writers whose faces I would recognise, and they're big names: J.K. Rowling, Terry Pratchett and Stephen King. I wouldn't know the faces of my two favourite authors (Tolkien and David Eddings). It's their work that sells, and even in today's world I'm surprised authors have managed to maintain such anonymity. But the way you present yourself still matters. You will meet with your agent many times, and they need to be able to rely on you just as you need to be able to rely on them. At the very least, you need to make yourself professionally presentable at the beginning of your relationship with them - once you get to know them and they know they can rely on you, your personality can shine through a little more and you can swap suits for jeans, a blouse and a smart jacket. The same will go for publishers. Put simply, the world needs to know that you take your work seriously, that way no one will have any doubt about whether or not their time is well-spent with you.

   All of this can be applied to general job-seeking, too. How you present yourself matters. If you were to walk into a job interview 5 minutes late wearing dirty clothes and frowning or rolling your eyes at the receptionist, that's going to tell your potential employer a lot about you. If you sit down for the interview and stare at what's on their desk or the pictures on the wall behind them, you're going to seem either easily distracted or simply uninterested. So you look at them, instead. And if looking into their eyes freaks you out, look at their eyebrows. Present yourself well and let your resumé do the rest.
   And the internet helps in the same way here, too, with searching for jobs made a lot simpler with job search websites like City Calling. You can either search for job listings in the area you want - be that your professional field or literally your local area - or upload your CV, qualifications and experienced and let the jobs find you. Just as I can filter out all the agents irrelevant to my genre and find all of those who are, others can head straight for the job listings they want and are qualified for without having to dig through the rest, with updates made the moment a new position becomes available. But in this case, even with searching for jobs online, you have to make sure you present yourself well. You should always try your best and never have to make excuses for yourself, but when potential employers are viewing your profiles online, you don't get the chance to make those excuses.


   But all of this talk of professionalism doesn't mean there's no room for you, you just have to know how to wear 'you' well in amongst all of it. Choose functional accessories like hair clips, notebooks and the like that have an element of 'you' - I love tribal and aztec patterns, fantasy and woodland themes. So, a nice woodland or dragon hair clip, aztec stationery - it's functional and it's minimal, but there's room to express yourself without being too loud. They're just details. These are things that I, personally, would choose (I'd prefer a dragon hair clip, if I'm honest, but I couldn't find any!)


Blazer & blouse by New Look
Laptop bag by Morelle
Shoes by TopShop
Hair clip by Avigail Adam
Nail polish by Barry M
Stationery by Paperchase
Textured Twist Hair by Cosmopolitan

1  2  3  4  5  6  7  8  9  10  11


Thursday 14 May 2015

Spring Cleaning Day 4

   I can't believe how well this is all going. I know it's all pretty basic this week, but it's amazing how much of a difference stepping away from sugar and learning to slow down can make! The last three nights I've slept perfectly, no waking up in the middle or waking an hour too soon, unable to fall back to sleep, no bad dreams, and I've actually been waking up rested. And as my yoga routine is much shorter than my usual workout routine, I'm not rushing around in the morning trying to get everything done before and afterwards.
   I'm really enjoying the task of taking one photograph a day, but as photography isn't something I do much of anymore, it's difficult to find subject matter that isn't flowers. And while there's nothing wrong with flower macro photography, there's not much open in the garden right now so my subjects are limited. But it's still fun, and, just as I had expected, I have been forced to try to see the beauty in the detail of the things around me - it sounds pretentious, I know, but the basic purpose of this task was to work on refocusing my mind and attention, because I'd been getting distracted a lot before this week, and even this seems to be changing.
   I've got a bit of a staycation this coming week, too, when my responsibility as a carer will be temporarily relieved. I love my mum and dad, but I can't deny that the situation is tough and stressful. Since I started getting in shape and generally more healthy I've been able to deal with it a lot better, but it's still a challenge. But this means that this spring cleaning week will end on a high note, and I'll have an easier week afterwards in which I hope to continue some of what I've been doing this week and make them into habits.
   But, half way through this Spring Cleaning week and it was clearly the right decision! I'm loving it and, above all else, how I'm feeling.


A Dinosaur Stood Here

   It didn't really. It's just a carving - and in the UK most of what you'll find are aquatic dinosaurs, anyway, and not many of them really 'stood' anywhere.


   Some time ago I introduced you to the amazing stone worker, James Lamb. I still wish custard creams came so big.
   Well, I was super lucky recently and received my own unique piece of his work! It's absolutely perfect in many ways, and it really shows his creativity as well as his skill!
   Anyone who knows me knows I'm a dinosaur and natural history nut. I want to be a published fantasy author above absolutely everything else, but my fallback profession would be geology if I wasn't so nervous about the idea of going back to school, maybe specifically volanology if not paleontology. Rocks have always fascinated me - if I walk along a coastline I'm not looking out to sea - what the hell is there to look at out there?! No, I'll be staring at the cliffs, at the history standing right in front of me, and rather naively looking for giant skulls. I know, I know, it's England, best I can hope for is a Kimmerosaurus. And no, I'm not making that up.
   So when James wanted to send me a small piece of stone work I'd made of a dinosaur foot print, I was over the moon.
   Look at it. Look at it. It's been carved into a stone with other fossils in it.
   And yes, it's as heavy as it looks.


   The shape of the footprint is amazing, and the work that went into shaping it is just as wonderful. Unfortunately the picture doesn't do it justice. It's modelled after theropod trace fossils - typically big carnivores like T-Rex and the like - and the carving itself is nice and rough, which contrasts to the rest of the stone which is perfectly smooth and filled with mollusc fossils. The one thing that's always annoyed me about trace fossils is that they're just prints - either moulds or casts - and there's never any colour to them because there was nothing there to mineralise. You can only see the footprints by the shadows cast over them. I made little trace fossils out of clay when I was little but I always painted the footprint black because you couldn't see it. But that's nature, and, this time around, I find myself loving that this footprint is just an indent. As it should be.
   I'm really excited about owning this piece - more exicted than I should be - and it's joined my pitiful little fossil collection (I say pitiful because it's small and filled with common things, but there are 3 things of note in there: a fish, a pleiosaur vertebrae and a fragment of a titanosaur eggshell which was actually the first thing Seeg ever gave me). But as small and simple as my collection is, I'm proud of it, and I'm glad to add this faux fossil to the mix!


Wednesday 13 May 2015

Spring Cleaning Day 3

   No yoga today! Instead I spent my morning and most of my afternoon painting the final couple of animals for my art exhibit this summer, and I can't tell you how relieved I am to finally have it done! I've been making animals for it for a full year now, and my shop has suffered for it, but I'm finally done! Now I have to make the jars, and though that's also time-consuming, at least it doesn't require any thinking, and as I'm not mixing up any paint, I don't need natural light to do it, I can do it in the evening instead while watching TV - and that keeps me busy so I don't start snacking!
   I'm finding the infused waters really helpful at night, too. They're refreshing and they fill me up and keep me hydrated, but because they're healthy - just fruit and water - they also spur me on because I'm actively drinking something good rather than something carbonated or with added sugar. Little things like that always give me a nudge, like actively saying 'no' to dessert rather than making deals with yourself like I used to. I posted the recipe for the fat burner detox water I've been drinking today, and linked the Blogilates post it came from.

   Photography was a little difficult today with rain and high winds, so I was forced to resort to indoor stuff. I had no idea what to photograph, though, and I don't want to keep turning to nature because it gets a little repetative. I stuck with something soft, though, and went for my black and gold Clara set from Bravissimo and some flowers. I don't know how I feel about it, but it will do!


Detox Water Fat Burner

   Part of this week's spring cleaning has been this fruit-infused water. The simple recipe came from Cassey Ho at Blogilates from her fat-flushing detox water concoctions, and it has helped immensely. It ensures I drink more water and subdue 'hunger' (read: boredom) by having something on hand that not only silences the cravings with startling effectiveness, but as it's also undeniably healthy, it makes me feel more positive, too! Because I know I'm doing myself good rather than reaching for the biscuit tin.
   The recipe I've been using is the fat flusher itself, which consists of a full bottle of water and a pinch of cinnamon, with 2 strawberries and 1/4 lime cut up and added into the infuser basket. The mix is shaken (so that the cinnamon mixes around rather than staying at the top) and then refrigerated for about an hour, giving the fruit the chance to infuse the water, as well as keep it cool and refreshing.
   I absolutely love my green and herbal teas, but it's nice to have a cold alternative that isn't just plain water. The taste is subtle, but it's there. Plus, when you've finished, you can refill the bottle and refrigerate again, or just eat the fruit!

   You can find this recipe and two others on the original blog post over at Blogilates!


Tuesday 12 May 2015

Spring Cleaning Day 2

   I'm already seeing an improvement! I had a brilliant night's sleep last night, the best in about 2 weeks. Thoroughly uneventful. Slept through the whole thing and I woke up half an hour late. At least I had a smile on my face while rushing around!
   Yoga went well and, as yesterday, I felt re-energised afterwards. My stomach rumbled an abnormal number of times but each time a glass of water solved it, so I was able to stick to eating little but often so my body got the chance to use the energy instead of storing it somewhere. Lately, a tummy rumble would lead me to eat something almost immediately without thinking about it, even though I know full well that the body can sometimes show thirst as hunger. Not keeping hydrated can easily lead to over-eating because you think you're hungry when all you need is a glass of water. If, after 25 minutes of finishing the glass, you're still hungry, then you're probably actually hungry.
   I'm pleased with my photograph, too, though it took forever to get a good shot, but I did notice that the fish in my pond were swimming in a sort of circuit, so each time I missed an opportunity I knew it would come back. This was doubtlessly the best of the lot, though ^^
   All in all, today was a more positive day than yesterday! Yesterday went really, really well, and I was so proud of myself, but after that and a great night's sleep, today was even better. I can only hope that tomorrow at the very least matches it.


Buti Yoga Transformation DVD Review

Price: £35/ $50
Length: 25, 45, 60 minute sections
Workouts: Full body
Suitable for: Intermediate
Rating:   ★★☆☆
Based on 5 weeks of use.


   Buti Yoga is a unique style of yoga, incorporating classic moves with the cardio of tribal dancing. It's great fun, looks amazing and will keep a smile on your face while doing it. But it's not for the faint-hearted. You need experience with yoga already if you want to try this as the moves are around the beginning of intermediate level, and the transition between moves is quick, giving you little time to look up and check your form. But it's very unique, great fun, and something to look forward to doing.

Overview
   The Buti Yoga Transformation series is the first in Bizzie Gold's line of tribal dance yoga, and it consists of 3 full workouts - Feel which is 25 minutes long, Think which is 45 minutes long, and Look which is 60 minutes long. There's also a bonus section called 'Buti Basics' where you run through the signature yoga moves you'll only find in Buti Yoga - and as such can find little help for outside of the Buti community - and a few toning sections for upper and lower body. The workouts all run alongside high-energy music that really give you something to move to and really bring it to life. It's great fun when you get the hang of it.

Difference in Difficulty
   Each workout difficult, and they're each harder than the last, but this is more down to the duration of each section rather than the moves. When it comes to yoga, everyone struggles with different things. There were moves in all 3 workouts I had trouble with either because I wasn't flexible enough or couldn't keep up with them, and there were moves in all 3 I found quite easy. It's down to your experience. But they do offer you the perfect opportunity to get cardio burn into a yoga sequence as none of the poses are static. The sequences are all fast-paced, however, which is why you need some experience with yoga. You're not given the time to check your form as you move quickly from one move to the next. You need confidence in your poses if you're going to get a good burn out of it as it's easy to get it wrong when you're moving too fast to think. That said, if your yoga is good but you're struggling with Buti, stick to Feel until you're confident enough to move on - and remember that if it turns out the next workout is too hard for you, there's no shame in going back.

Trademark Moves Instruction
   This was, unfortunately, a big problem I had with this DVD, and ultimately why I can't decide if I like it - well, that's not strictly true. I can decide: I want to like it, but the instruction really let it down. I think Bizzie Gold's idea is great, infusing yoga with tribal dancing is seriously right up my street, but I think she would be a better instruction in person than on a DVD. The basic poses I had no trouble with - how can you get a downward dog wrong? But the trademark moves were something else entirely. An example? The Buti Shake. It looks so simple, but I can't figure it out. I watched the Buti Basics section after struggling through Feel a couple of times, hoping it would be cleared up, but the brief section on that move amassed to a quick demonstration and a vague description of shifting your weight side to side, and then it moved on to the next move. Shifting your weight from side to side is kind of helpful, but that much I'd figured out already, and my question was ultimately left unanswered. My issue was not knowing where I'm shifting my weight from. Is it my hips? My knees? Or do my legs stay locked straight? Is it my feet? And if it's my feet, is it my toes or my heels? Like I said, it looks like an easy move, but after 5 weeks of use I just couldn't figure it out. I'm still none the wiser. And that's just one move as an example. Every move I struggled with I found wre actually one of the 'trademark Buti moves' and no matter how hard I tried, how closely I listened or rewatched 'Buti Basics', I just couldn't get the info I needed.
   In person I think she'd be a fantastic instructor - of course she would, because she could see you struggle and give you the help you need so you could get the most enjoyment and physical benefit from her class. But online or on a DVD it's just not the case, and yet I've used so many DVDs from so many different instructors - celebrity fitness trainers and indie fitness instructors - and this is the first time I've come across this problem, and I'm very patient with this kind of thing. Things shouldn't be easy - but they shouldn't be so unclear that you can't do it at all.

Summary
   I really wanted to enjoy this, and when everything was going right, I did, but instruction is so important and this DVD really, really lacks it. Perhaps her more recent DVDs nail it, I don't know, but if I'm honest, I'm not keen to spend $60 to find out. This is my first negative review, and I admit that I feel guilty writing it. I'm not attacking Bizzie or her workout, I think her idea is - forgive me - golden, but I'm not so sure she's the one that should be instructing the DVDs. Or she just needs to try to remember that her trademark moves aren't found anywhere else, and since those moves are what make Buti Yoga so unique, it's fairly important that we're able to understand how to do them. That clarity and understanding of the moves should be a big priority. It's her workout she wants to share with the world, and that's great, but I think she could do a better job. It let the entire DVD down, all three workouts were made so much harder because of lack of proper explanation. If things are hard because of weights used or number of reps or stamina, fine, but not when it comes to understanding and communication. It's a fundamental part of instructional DVDs.

   Fortunately, if you're interested in this workout but unwilling to spend the $50 on the series, you're in luck. By signing up to the Buti Yoga newsletter, you'll be emailed a password to a 53 minute buti yoga workout video. It's a full workout, but it gives you a generous taste of the signature movements. It has the same lack of proper instruction, but it can sate your desire to try it. If you don't get on well with the free video, you won't get on well with the DVDs, but if these signature moves I personally struggled with click for you, then that's  brilliant. Maybe I'm missing a subtlty in the moves or she's implying something that I'm not picking up on - whatever the case, I don't recommend buying these or any of her DVDs without trying that free video first - ideally using it a good number of times. I used it twice and, sadly, regret buying the DVDs.


Jillian Michaels' Shred It With Weights DVD Review

Price: £8/ $15
Length: 2x 25 minute sections
Workouts: Full body
Suitable for: Beginners - Intermediate
Rating:   ★★★★★
Based on 5 weeks of use.


   Jillian Michaels' Shred It With Weights is a fantastically demanding fitness DVD, and is a great place to start if you're new to kettlebells, as it's a brilliant introduction to the kit without being too easy.
   I was already very familiar with kettlebells when I started using this DVD, but I wanted Jillian's non-stop and powerful technique, which is why I bought it. In truth, I thought it would be well within my abilities to do, and while I found level 1 a little too easy, level 2 put me in my place.
   It was a lot of fun to do, and with each workout being just 25 minutes long, it's easy to fit into your day - but it's certainly not ineffective.

Kettlebells
   Kettlebells are incredible pieces of kit, as their function is relatively unique. Their shape means that their weight distribution is unbalanced so it's harder to control the weight - the weight itself is round and sits beneath the handle rather than balanced at either side of it - but because they're so heavy you incorporate your whole body to lift it, using more momentum than strength. This means that kettlebells offer the perfect balance of cardio and strength in their explosive movements, even when they don't seem challenging like a kettlebell swing. It feels so easy, but it's such an effective total-body move.
   The cardio burn of explosive moves and full-body movements is what really helps to melt fat, but the use of the weight itself is what helps to build lean muscle, and lean muscle (muscle that is healthy, toned and functional) burns more calories because it takes more energy to use it, even at rest. Cardio helps to melt fat away, lean muscle helps to keep it away, as well as create a gorgeously smooth silhouette - who doesn't want that?!
   Kettlebells are becoming more popular and gradually working their way into people's homes, but they're not something a beginner usually has on hand unless they're at a gym. Jillian realises this and so has one of her two back-up instructors (both of whom you'll recognise from her Yoga Meltdown DVD) completing each move with a dumbbell rather than a kettlebell, holding it by the end rather than the middle so that the weight is distributed more similarly to the kettlebell. This means that even if you only have dumbbells, you can still use this DVD and get a lot out of it. However, it's important to remember that kettlebells are not dumbbells. As well as being unevenly weighted, kettlebells are also typically much heavier, starting at 2kg (4lbs) at the lightest, and that means you get more out of them than a dumbbell again, so you will get different results depending both on the weight style you use, as well as the weight itself.

Overview
   The DVD consists of two 25-minute workouts (including warm-up and cool-down) broken into two different levels of difficulty, the first being the easiest of the two, of course. But it's not like her 30 Day Shred or other week by week workouts, you simply move on to the second level when you feel you're ready.
   Each workout consists of three circuits of three moves, and each circuit is repeated twice, with a single new move between each circuit to break them apart as a bonus. As always, she talks you through each move while you do it, telling you what not to do and what to look out for, and where you'll really feel the move coming from. At the end of the day, she provides you with all the info you need which makes it pretty difficult to do the workout wrong. If you listen to her, pay attention and use a weight you can control (rather than a weight so light you can juggle with it or a weight so heavy you can lift but barely manage 3 reps) you will get amazing results.

Level 1
   Level 1 is the easiest of the two, and as someone who knows her way around a kettlebell, I'd say it was the perfect introduction to kettlebell usage while still being a challenging workout. She shows you how to hold the weight, she explains how it works and why it's effective, and the moves provided are pretty standard kettlebell moves - but they're nothing you've seen in any of her other DVDs. While it's true that she rarely repeats moves across her massive range of DVDs, these moves are fairly unique to the kit, so unless a kettlebell is used in another workout, you've probably not seen them. But the moves are not complicated; they're very doable, and some of them are some of the first moves I learned in 2013 when I was just starting to use kettlebells.
   Even after two weeks of solid use and really familiarising yourself with this level, you will still get a good sweat, so there's no need to go racing ahead to level 2. Definitely get used to this one before moving on.

Level 2
   Level 2 is far harder. The jump in difficulty between the two levels is fairly visible, which is why I say to really come to grips with level 1 first. I struggled a lot with level 2 and it took me three weeks of solid use to get comfortable with it. I could do each move fairly well, but there were a handful I had real difficulty with - rock and roll squats, the very first move of the first circuit, is one such challenge I have yet to overcome. However, as in level 1, the moves are not complicated, they're just challenging, and it's more a case of stamina and strength than understanding what's going on - stamina will improve with use, and if strength is an issue, dropping down a weight is no problem. I completed level 1 with 6kg, but had to drop to 4kg for the majority of level 2. It's more important that you're able to complete the set than you use a stupidly heavy weight. If a set consists of 10 reps but you can only do 6, you're not getting as much out of it as you would if you dropped down a weight and managed the 10 reps with difficulty.
   Most of the moves are different to level 1, but there are three moves that are similar to one in level 1. Kettlebell swings, as I mentioned above, is a really effective but simple full-body move. Level 1 has basic kettlebell swings, and it has a kettlebell swing with a pass (an alternating one-hand swing). Level 2 has swing-throughs, which are kettlebell swings that go really far back between your legs, it has plyo swings where you and jump forwards and backwards with every swing, and it has rotating heroes, which are similar to the swing-throughs but instead of going deep behind you and chest level in front, you go shallow behind you and then right over your head in front. I realise I've made it sound complicated, but I promise you it's not. The upset to these kettlebell swing variations is that you get a lot of the best kettlebell move there is, and the variations are different enough to keep things interesting, but simple enough that, once you master the basic swing, you can do these with little trouble.

Summary
   It's an incredible DVD. You get such a sense of victory for completing it, collapsing into a puddle of sweat in the end with your new best friend piece of kit, whether it's level 1 you've conquered or level 2. The cardio burn is surprisingly good, but your muscles will be on fire. It's one of my favourite Jillian Michaels DVDs and one that, even after a solid 5 weeks of use, I can say I will happily use again later in the year - quite possibly around Christmas when there were certainly be a little more fat that needs melting away.
   I cannot recommend this DVD enough. Buy it, and either grab your heaviest dumbbell (you'll only need one) or buy a kettlebell. Better still, buy a beginner's set of 2kg-8kg - I promise you you won't outgrow them quickly. I've had a 2kg-8kg set for the last 2 years and while my 2kg hasn't seen the light of day for 15 months, neither has my 8kg, and I doubt it will for 12 more.