The use of nature in Christmas decorations lately is amazing. Last year or the year before I bought a lovely snowy toadstool tree ornament made out of a pine cone and other garden scraps, and it's one of my favourites. I also love the white woven wood decorations with acorns and tiny pine cones tied to them. I'm a sucker for things like that, and I've always rather liked pine cones and conkers since I was a kid, they're lovely autumn keepsakes.
But I also like cake. And so, while I'm not entirely sure what sort of gone-off cheese induced the idea to combine the two, I have to say I'm astounded by the results.
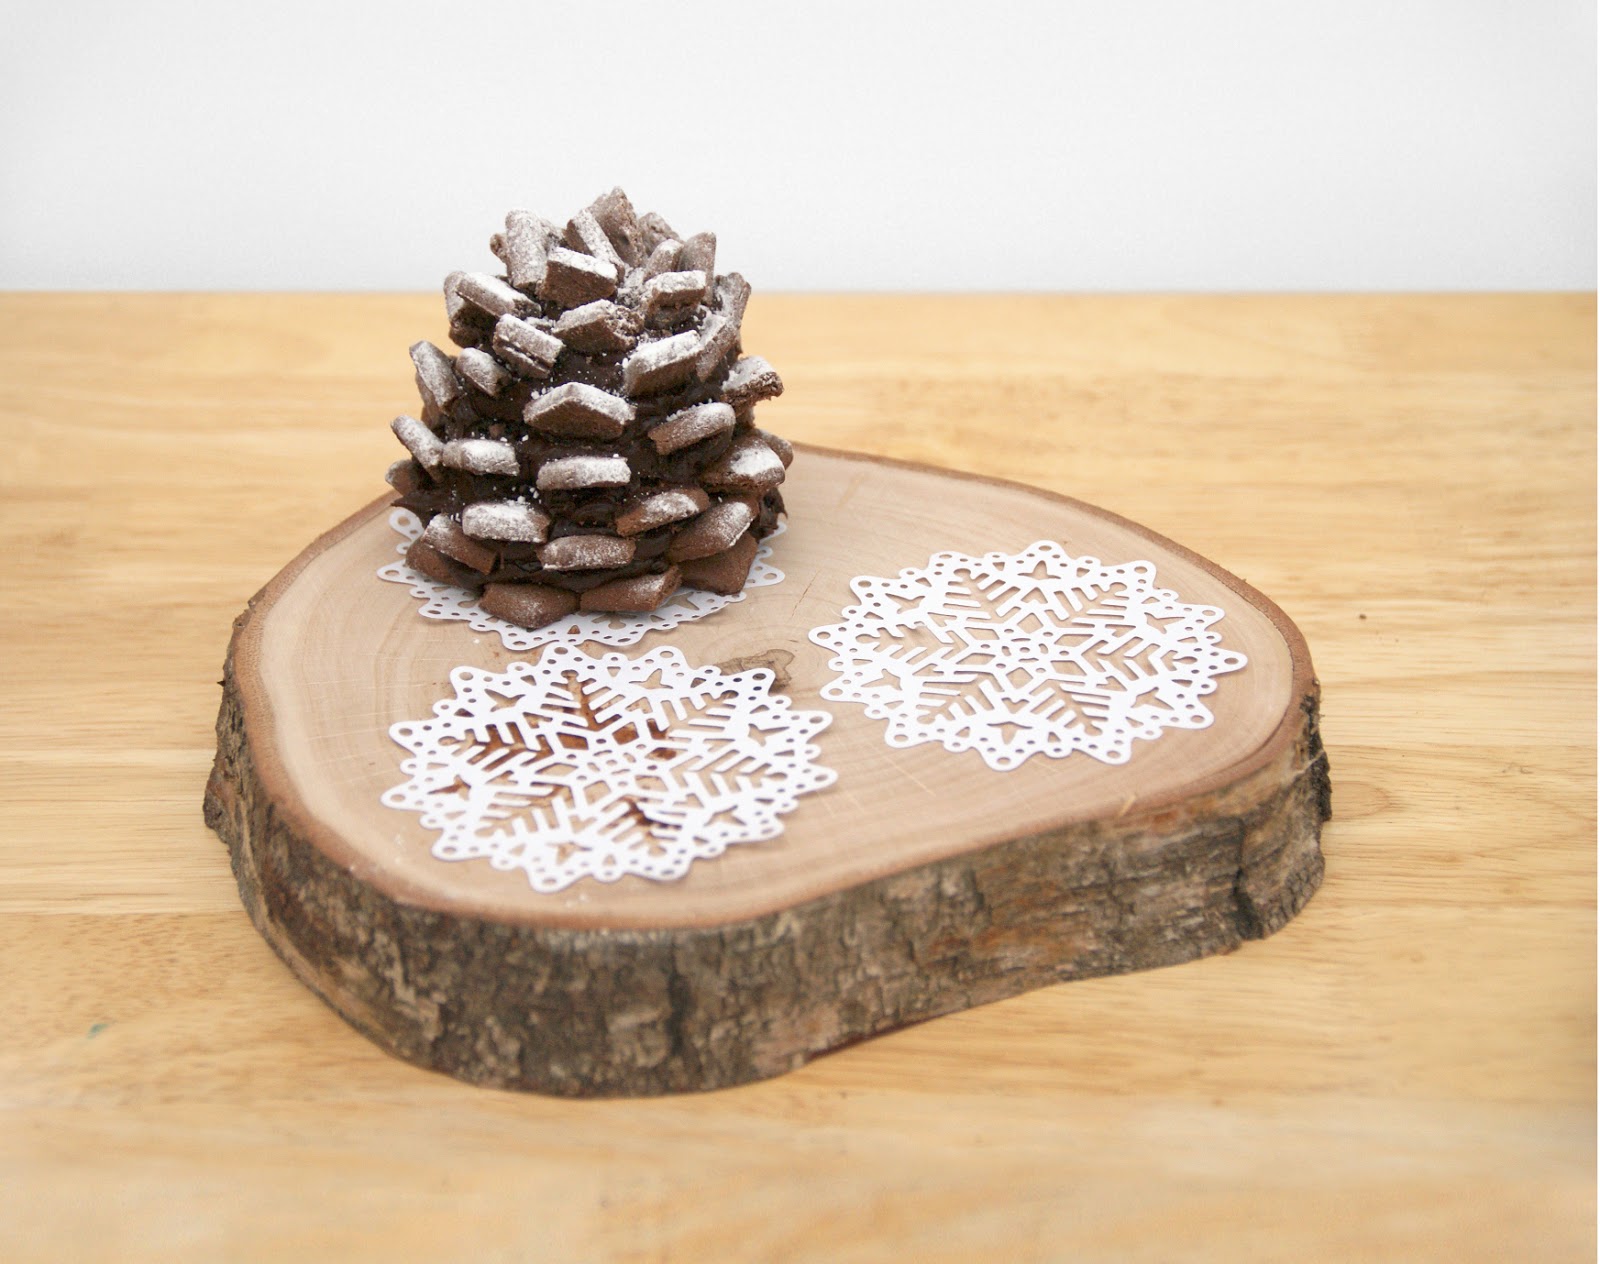
A pinecone cake.
It's small, I grant you, more like a cupcake or muffin, but my goodness I do love it! And it was stupidly easy. And while I know that 'easy' is a word thrown around a lot in crafting or baking tutorials, many of which turning out to be harder than they looked, this is coming from someone who fails in the kitchen a lot. I can't count the number of projects I've tried for this blog in the past and failed miserably with, so when I get a win, I'm over the moon.
The cakes are guaranteed to be a winner at Christmas for you, too, and they're the perfect alpine dessert for your Nordic Christmas theme!
You will need:
A silicone easter egg mould*
Cake mix - either home made or a bagged mix**
Butter for greasing
Chocolate frosting or ganache - either home made or store-bought
Bourbon Creams/Chocolate biscuits
Icing piping bag***
*You can pick these up year-round in pound shops or from suppliers on Ebay, which is where
I got mine from for about £2.50. They're usually either pink, blue or yellow, but to my knowledge there are no variations to the mould's pattern if you choose different colours.
**If you're using a recipe or box mix you know to be quite light and moist, you'll want to add a little more flour to it to firm it up. This will let it take and keep its shape from the mould much easier. You can experiment by splitting the mix in half and adding flour to one of the bowls and see which works best for you.
***Nozzles and fixtures don't matter for the piping bag, so disposable ones will do well. It's just to allow you to apply the frosting to the cake surface without pushing the cake around or making it fall over like it might if you were to spread it by knife.
Method:
1. First of all, butter/grease your moulds to help release the cake once it's done, then preheat the oven to the temperature specified on your cake mix. I used Wright's Chocolate Fudge Cake and used gas mark 5.
2. Mix up your cake and spoon it into the cavities. I wanted to make sure that the cake would completely fill the mould once risen so I spooned it in quite high. The excess cake can be trimmed away easily later.
3. Put them in the oven for the length of time you would for cupcakes and leave it be. Check back when the timer goes off and if the knife/skewer/toothpick doesn't come out clean, but them back in for 5 minutes. Once they do come out clean, set the cakes aside to cool down.
4. To remove the excess cake, slowly run a knife across the surface of the silicone mould, cutting the cake away gently until it's all level. Once the cakes have cooled - not before or you risk them breaking apart - carefully pull the silicone mat away from the cake, pushing them out from beneath. Some of the cake may not release perfectly, but remember that you'll be covering the whole thing anyway, so it's not a huge issue.
5. Prepare your ganache or frosting and pair up the cakes. Using the ganache/frosting, pipe or spread a little on the back of one piece and press another on top to form an egg. You can trim away more cake from the backs of each piece if you feel they're too big. Place the eggs back in the mould, though obviously only one side will be in a cavity. This will allow the frosting to set a little.
6. Take your biscuits. I used bourbons. Break them apart if they need to be, like bourbons do, and try to scrape the cream off. Not as easy a task as I had hoped, and it posed the first real problem. I had no idea how these biscuits would cut, but I knew they were far from crumbly.
Take a knife and carefully cut the square/rectangular biscuits into small squares. I managed two rows of four from a single layer. I can't say how many pieces you need, but it took half a packet of bourbon creams with Seeg stealing some in between to cover one cake, and there were many pieces that broke and had to be nudged aside. In theory, I should be able to make 3-4 pine cone cakes with a single packet of bourbons, but allowing for errors and theiving boyfriends, I'll say 2 pinecones per pack. Just as well they're only 43p.
Alternatively, if you can't find any square/rectangular chocolate biscuits, you could make your own small, square chocolate biscuits about 1cm in size with a basic biscuit mixture or recipe. It depends what sort of work you want to put in.
7. An hour or two after having 'glued' your cakes together, you can turn them out of the moulds again and stand them up within the cavities to keep them from falling over. Prepare a surface to pipe upon, be it a turn table (you lucky devil), a plate or so on, and place one of the cakes upright upon it. It probably won't fall over, but if it does, you'll be adding frosting and biscuits around the base very shortly, which will keep it upright.
Fill a piping bag (I used a disposable one without a nozzle) with frosting/ganache and pipe upwards from the bottom of the cake to the middle. There's no need to cover the actual base of the cake in frosting, that's just making more unnecessary work. The piping doesn't need to be perfect, and it should preferrably be a bit flat rather than round to avoid making the pine cone too fat, so try to pipe at an angle. Alternatively, you can smooth it out with a knife if you like. The frosting will add additional flavour and texture, but it's mostly only there as a glue. Piping only half way up will allow you to hold the cake in place with your hands as you work.
8. Take your biscuit pieces and push the roughest corner of each piece into the icing and have them pointing upwards at an angle. Work your way up until you've covered about a third of the cake, using bigger biscuit pieces as you near the middle if you can (if your biscuit pieces are all the same size then it doesn't really matter), then cover the rest of the cake in frosting and continue to add the biscuits. Use the smallest of the biscuit pieces at the top.
9. You can leave the frosting to set and use another plate to ice each of the others, or you can move it to its final resting place now. I did the latter with a spatula and unsurprisingly found some of the frosting at the bottom come away when I pulled the spatula back out from beneath it, so I'd recommend either using a large surface for all of them and letting them set before moving.
I found my pinecone looking quite good at this point, if I do say so myself, but I wanted to try adding 'snow' - though I was very concerned I was about to ruin it. I have a habit of 'finishing' things by adding one step too many, and that final step usually makes everything fall apart. Fortunately, this wasn't the case.
I used powdered/icing sugar and poured some into a sieve over an empty plate. I did this because I didn't want a sudden downpour of icing sugar on the pine cone when I wasn't ready for it, so the downpour went on the plate instead, and I carefully moved the sieve over the pinecone and gave it a gentle tap, then another, and another, until I was satisfied. I think I'll use this method...well, forever. It's the simple things which elude me.
I'm dead chuffed with the outcome of this. Like I said, so many things go wrong for me in the kitchen! This was also just a test-run for Christmas, as I plan to make several of these when my sister comes over Christmas day. They're a little bit heavier than a normal cupcake, I'd say, and because they're a bit of a hassle to eat, I'm making one for each person.
Also, how about that wooden cake stand? Eh? Eh? Everyone seems to have one, and for that reason they're overpriced. I got mine from a lumber place that makes play houses and things like that from 'raw' wooden logs, if you know what I mean, and they sell the excess pieces like these, all nicely sanded, on Ebay. I told them what I needed it for and they sprayed it with food-safe sealer for me at no extra cost! Wayhay! Needless to say I already went back for another...


