Tuesday 28 February 2012

Etsy Favourite Feature

 Another selection of items from my favourites! Aren't they lovely? Those journals especially
were the first things I ever saw on Etsy, and I've been in love with them ever since. And, as a bonus,
the wonderful Jessica of ASimpleKindOfFancy has given you  - yes, you - 10% off of any item
 in her shop with the code blackbird! Take advantage of that wonderful offer!


Sunday 26 February 2012

Blog Tips: Unselected Blogger Tab Backgound Colours

   I decided to start divulging simple secrets for blogger users here. I've seen on several blogs - even blogs with literally thousands of followers - that even the simplest things can elude us. I have a few points to make over a few posts, but I'll start with one of vanity: changing unselected tab background colours.

   Using blogger's simple Template Designer tool, you'll see that it does have a feature to change the colour of the tabs when they're selected. But when I was starting out a few months ago, I couldn't find a way to change the colours of the tabs that hadn't been selected. I had a nice and simple white/grey and pink theme going, like on my tumblr, but the tabs were just too dark a grey. They stood out like a sore thumb. My tab backgrounds, at the time of writing this, are a lovely neutral green colour, though I intend to create some custom buttons for them soon enough. Otherwise, they are default tabs from blogger.


    I had to  wonder over to the help forums to find any idea of how to do it. If it was out there on the web, it completely eluded me. But now I shall tell you how, whether you are interested or not, to achieve such a thing.

   Go into Design > Edit HTML, and download your current template. This is just in case you, somehow, manage to make some huge error and blow up your blog. You never know. It could happen. Download the template and keep it safe.
   Now go back to the Edit HTML page and press Ctrl+F - this will open a small bar at the bottom of your page (you can try it right now). In the small typing space, paste the following: 
.tabs-inner .widget li a { 
 And press "next". The answer I was given with which I was told all of this told me that the second result was the one to focus on, but there was no "second one" in my HTML. So, I proceeded with the only one I had. The text should look something like this: (you might want to click this picture to make it bigger)


   You see where it says "background:#cacbba;"? Well, it says "#cacbba" in my case because that's the exact colour I am using at this current time, but yours could be anything - but if you're reading this, it's probably not what you want. Now, you have several options here. You can search online for a colour chart to get the hex number, or you can do what I did and mix it up in GIMP. I opened the program up, made the colour I wanted, and found the hex number with the colour tool (click the currently selected foreground colour to get the colour tool up)


   As you can see from the above image, I made an innaccurate colour, but my point stands. Highlighted in blue is the hex number to the colour I've made. Copy the hex number from wherever you've found it and replace the number in your HTML, in my case "cacbba" with the new numbers, but make sure that you don't delete the hash (#) or add a second one, or it won't work.

   Preview your changes using the "preview" button (I promise I do have a degree in rocket science), and once you're happy, you can save it. I tweaked mine several times before I was happy. Colours have a tendancy to look different across smaller or larger spaces and that can be make or break sometimes. But once you're done, that's it. You can change the tabs easily with your current colour scheme whenever you fancy a change.


You're welcome :B


Thursday 23 February 2012

Book Printing

Just a quick update, I just went to Lulu.com and had a print of my book made up. I've just purchased it and I can't wait to see what it looks like in the flesh! Uhh...paper! Seriously, my heart is thumping. I'M SO EXCITED!

I'll grab a picture of it when it arrives! 478 pages it reached! Oh my goodness!


Agencies and New Domain Name

   I've finally done it, I've finally got a domain name! The new blog URL is www.ablackbirdsepiphany.co.uk - don't worry, though, peachesandpebblesweekly.blogspot.com will still redirect here ^^ You don't need to learn a new URL :P

   But mostly, I wanted to let you all know that my Writers and Artists' Yearbook 2012 arrived yesterday, and I spent most of the day looking through it and trying to make sense of it all. I went through quite literally about 200 different agencies, and it boils down to ten who will happily take fantasy books. Needless to say, my chances don't look good. I put a cross through most of the agencies who either refuse to take fantasy, don't take fiction, and who aren't taking anyone new on; put a star next to the ten who will at least read my synopsis, and I've got about twenty question marks - places that accept fiction and either haven't expressed that they don't want fantasy, or don't have websites for me to check up on. I'm going to send my synopsis, cover letter and first three chapters (unless they express otherwise) to all questionmarks and asterisks. Some will accept them via email which means that I can get started much quicker, but writing a synopsis is hard.
   I've had to contact people to find out how to write it, and I'm still waiting to hear back. The book tells you how to write a summary and a synopsis, but it doesn't tell you whether the agents would want you to give all important information in the summary - twists, deaths, surprises etc - to determine whether they would be interested in reading the first three chapters or whether they'd waste their time, or whether they want you to write the synopsis as if to a genuine reader, not giving anything away so that they can see how good (or bad) the writer might be at delivering shocks, or whether the story is predictable.
   The cover letter seems to be the easy part. It's the synopsis I'm struggling with, and I can't decide if my book is dark fantasy or just...not light fantasy. Given the plot, I wouldn't say it's for kids - but at the same time I've seen books like the Northern Lights in the 12 year olds section - that book has a lot of science in it that a 12 year old surely can't grasp well enough to appreciate. But at the same time I don't want to be so...well, bigheaded I suppose to say that my book is for adults.
   It's for anyone who appreciates fantasy - magic, dragons, imaginary races and dark plots - be they male, female, old or young. It isn't crass. There was one swear word in there, and after my final revision, I took it out because it looked too silly. It's just a little bit violent really, that's all.

   Also I read some notes in there from Terry Pratchett about fantasy books, and what he's said has boosted my confidence. He outlined that fantasy is best written when it's been taken seriously - when science and reason is put where it shouldn't be thought of, and that a lot of people don't do it. I know that I did it. One of his examples was magic: where does it come from? Why doesn't everyone use it? These were among the first things I figured out. However, other things that were in the book has shaken my confidence, but I think that that is because I am a procrastinator and am, on some levels, afraid whenever things get real - sending out my chapters to agents is getting quite real. But at the same time, I've done the hardest part. Next comes, admittedly also a hard part, but one that I have little control over. I have full control over my writing. I do not have full control over other peoples' decisions.
   I expect rejection. Everyone gets it, even the most famous writers about today. The trick is to just not take it personally, and to understand that its their job to be critical, and that they get so many submissions it's impossible to accept them all - not to mention that the more writers/actors/playwrights etc that an agent supports, the less support they can give each individual. I expect, in fact, for it to take a few years for me to get an agent. If it takes less than two or three then I will be surprised. If it takes more, I'd say it was normal. But, I am going to continue to send my submissions, even after rejection. Sir Winston Churchill said "Success is the ability to go from one failure to another with no loss of enthusiasm."
   This is what I intend to uphold. While being passionate about my work, I also need to distance myself from it to allow it not to sting so much when someone says no. Or, when someone offers criticism, be it constructive or not. Otherwise I'll be knocked down after the first rejection, and likely not even bother to send anything out again for a while. The sooner I get the rejection out of the way, the sooner I can get to success.

   Either way, I will continue to update you all about my progress and my many, many rejections, and, of course, I'll let you know when I start sending out submissions.


ta ta x


Tuesday 21 February 2012

Etsy Favourite Feature

I don't for the life of me remember what day I was supposed to post these each week, and I 
certainly can't be bothered to check. I will admit to feeling a bit lazy lately, but nevermind.
But no matter! Here it is, another Etsy favourite feature. I love doing these. I love going
through all of my favourites and picking out pieces to share. It reminds me what I've
actually favourited. I favourite so much that I often forget...
So check out their shops, as usual, and spend your hard earned or hard begged-for cash
and support us handmade artists!


Saturday 18 February 2012

Self Portrait Saturday + Updates

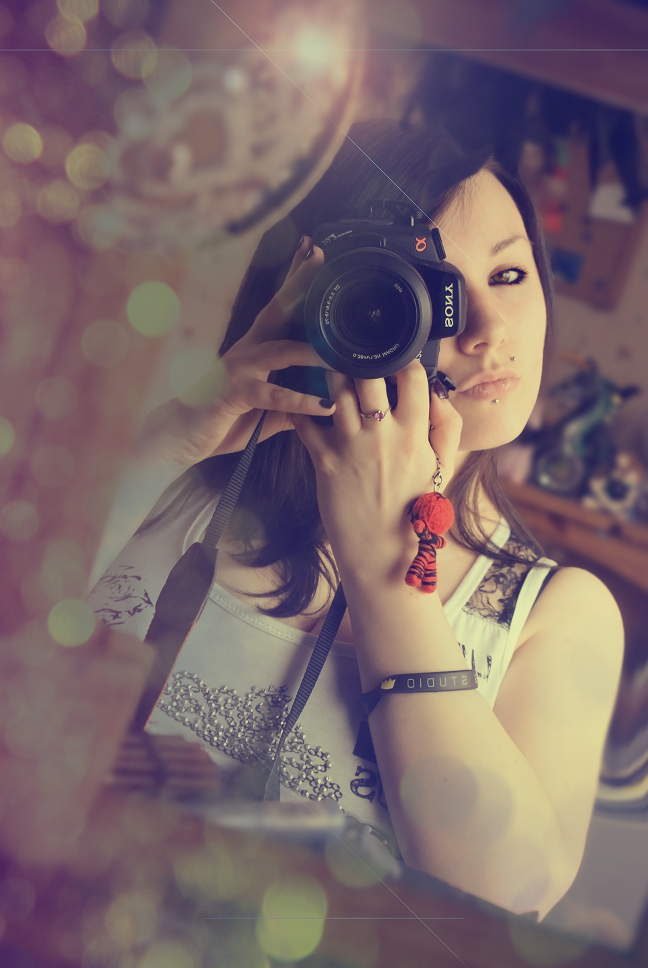
   Well, WonderForest is holding a self portrait saturday event on her blog, and I've decided to participate. I did it last week, and I found it surprisingly enjoyable! So I'm gonna do it again ^^
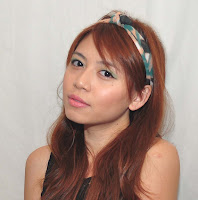
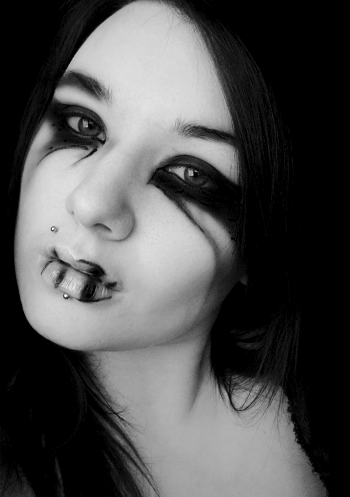
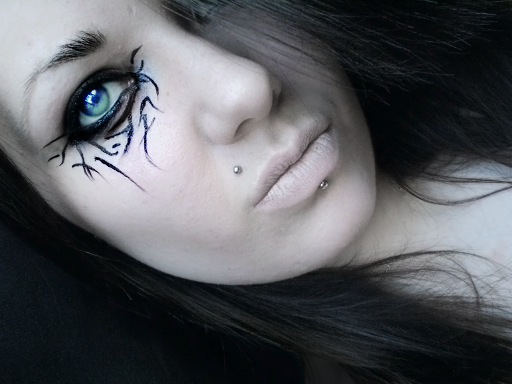
   As always, I can't help but change or obscure something. I actually find it quite enjoyable. And though Dana has said that she will get me to take a picture without obscuring something, I wish her luck! :P I enjoy showing other sides of myself through photography like this, I always did, but like I said, I lost my photogaphy mojo. However, and I must thank Dana for this, I really feel like I could do it again. It's been a few years, and my poor DSLR is sitting in its bag, unloved and uncared for. It never comes out with me - in fact I think it's only left the house a handful of times. It might help if I got it a sprucey new coat, but I'm hardly in that position at the moment. But the point is, it doesn't have much of a life. I've considered even selling it at some points, but then I remember that my dad bought it for me. I'm so sentimental, that there is no chance it's going anywhere.
   But, as I said, I feel like I could really take photography on again. I've decided to start Project 52 (I know I'm a bit late), and I know that some ideas I have for photographs could be part of that - I actually have ideas!
   I'm so excited about it, so I think I'll probably participate in this until the end of its run, whenever that might be, and you lovely people will be subjected to the tort--honour of seeing each picture as they come, even the ones I won't be submitting!


   I think I took a big leap with this one. No make up - well, no more than usual...in fact, less than usual! But, as you see, my face is still obscured. Maybe it always will be, who knows? But I took a bigger step with this one than I have in a while. So I'm proud of myself ^^ with any luck next week I'll keep in the same direction.


Anyway, updates!

   As I've said, I've decided to take part in Project 52. I've got some nice ideas, and I think it will help me also find new products for my Etsy shop. I've also started to try out a different kind of product today, some motivational prints. I won't know if they're going to work until I actually have a print in my hands, but I'll be sure to let you know how it goes! I'm quite hopeful that it could work out, though.

   Also, today Seeg's parents have come from the Netherlands to England to visit, but we won't be seeing them until tomorrow. However, they've bought us tickets to see Billy Connelly at Colston Hall, so that should be awesome! I'm a little worried about it though, in recent years Billy Connelly has become a bit...well, old. At first he would forget things he was talking about because he would go off on tangents, but he'd always find his way back. Now, though, it seems as though he is forgetting things. On one hand I'd say perhaps he should just quit, he's had an amazing run - but on the other hand, if there was something I loved doing I wouldn't stop just because I was getting forgetful. Hell I wouldn't stop if I was disabled, if I could help it, so why the hell should he? I admire that he still goes on, and eventhough I've heard most of the jokes he has these days, they're still funny, and after the amount of time he's spent doing it, it's only natural that he would sort of run out of material. However, I know at the same time that the show will be awesome. I've only ever been to one show, and that was a Mindless Self Indulgence concert, so this will be something nice and different. Plus I get to sit down. Sitting down is awesome. And I'm sure, even if he does tell the same jokes, because I'm actually hearing him deliver them, they should be even funnier.

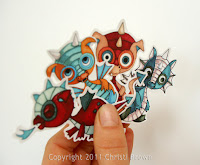
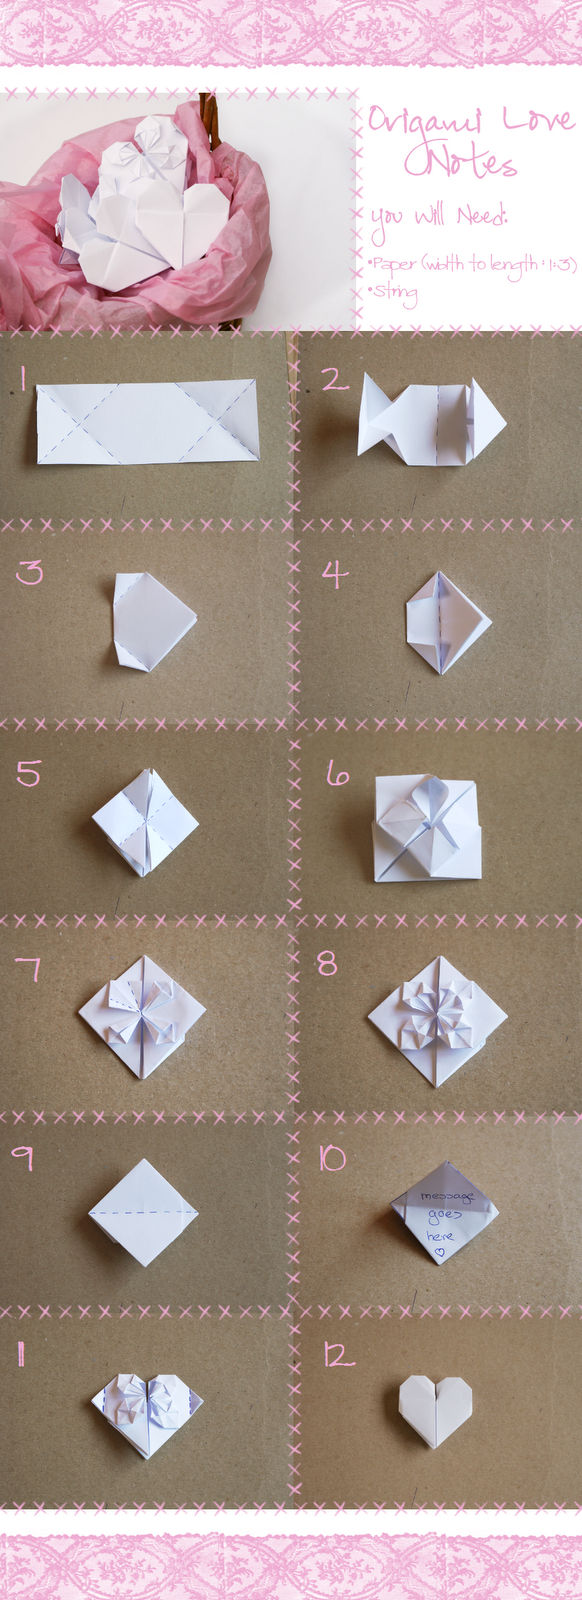
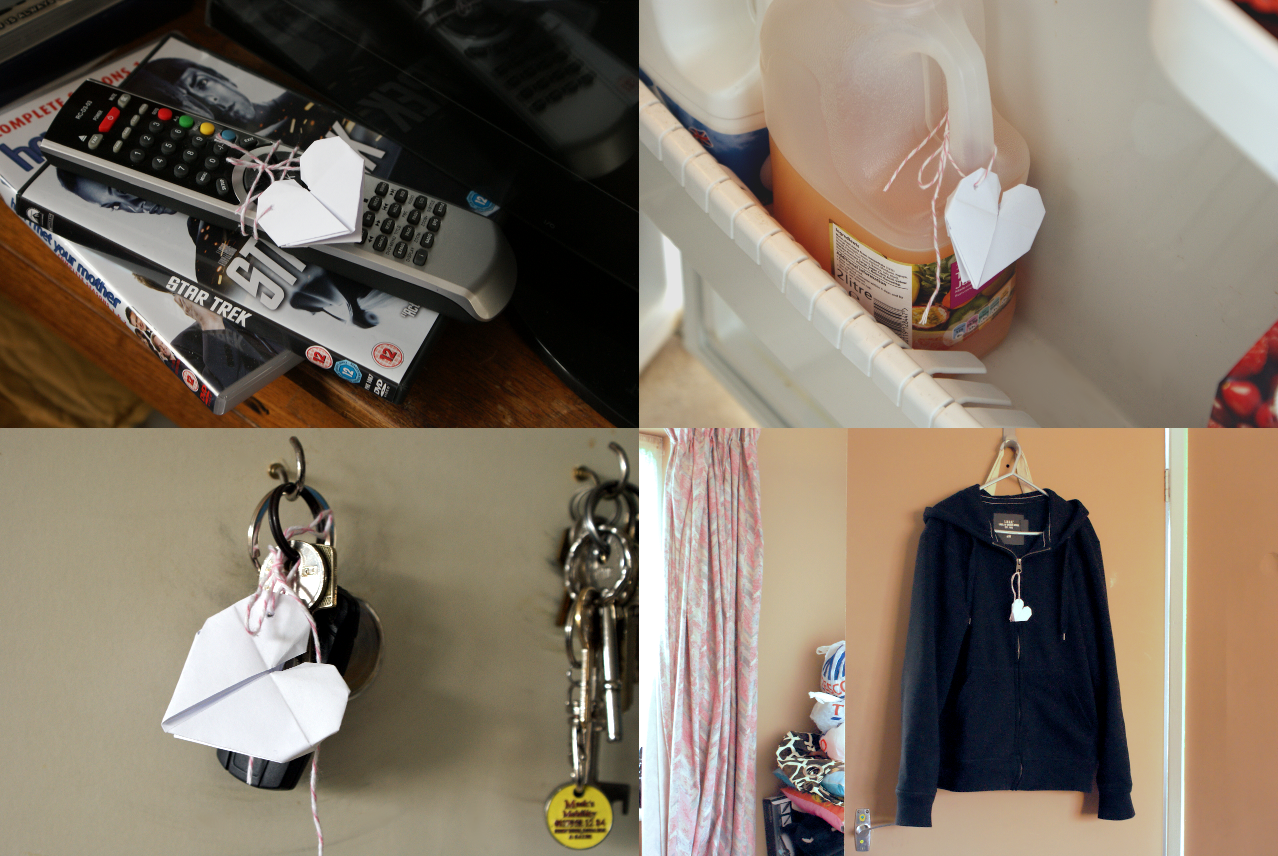
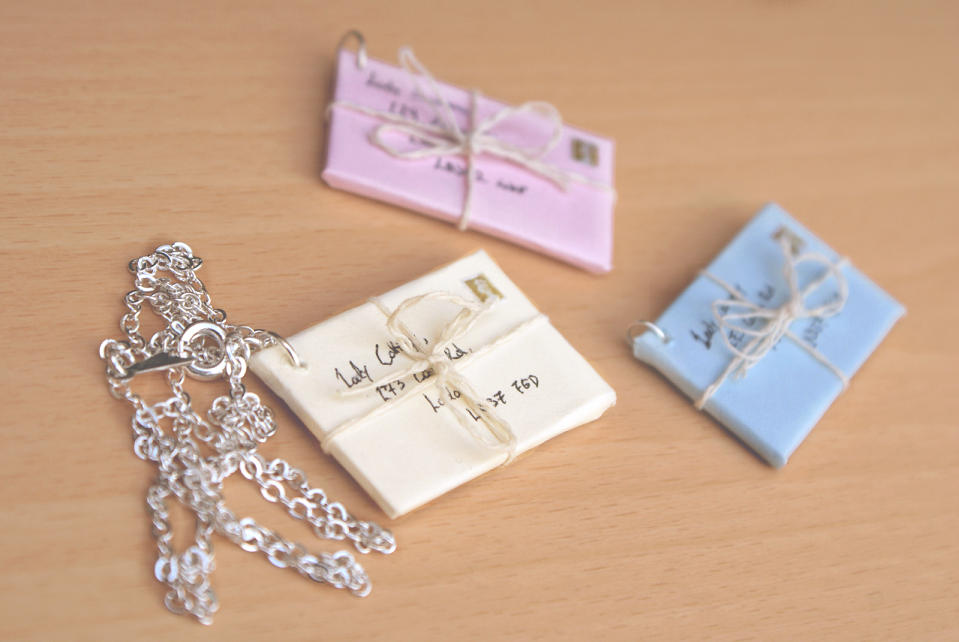
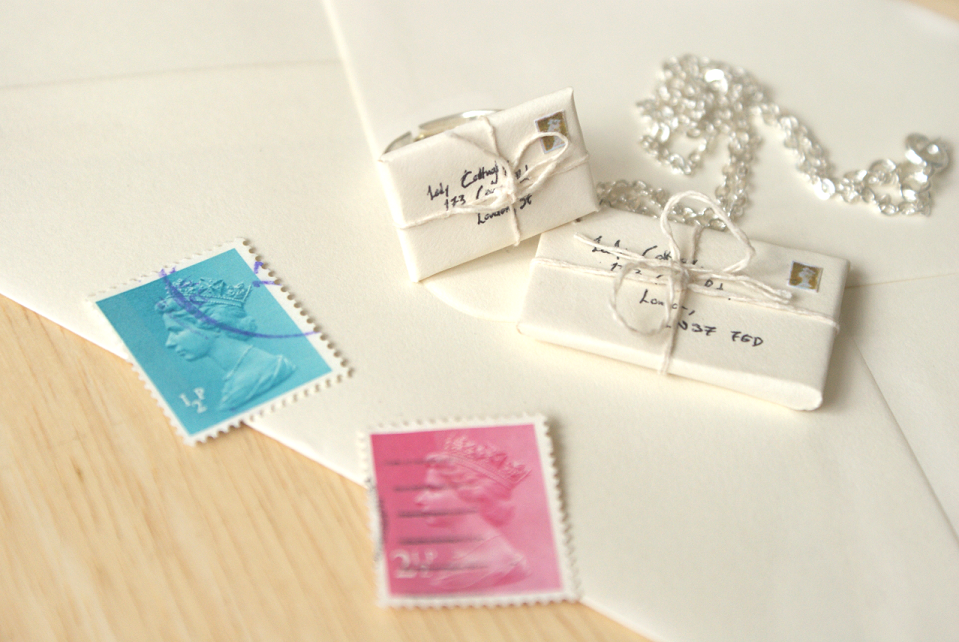
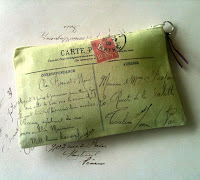
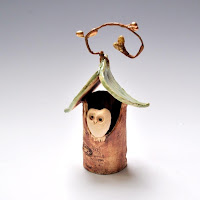
   Dandelion Grenade will be up again soon, and it will be muuuch different to last time. Lots of clay involved <3 I'll introduce you to my forest of proud creatures when it opens up! :D I'm quite excited about it, and I've also, thanks to that, come up with a new product for Peaches and Pebbles - but I'm not sure I can get it to work perfectly yet. But hopefully, work it shall, and will be up in a few days, to a week. But, knowing me, it probably won't :P

   I also have a tutorial in the works, probably for the first day of Project 52, which will likely start on the 2nd of March. There was a reason it wasn't taking place on the 24th of this month, but I don't remember why that was. Only that there is a reason. ^^

   I also have a couple more features I'm adding to this blog, but due to money and other people, they may not be that frequent. I love packaging, you see. Not food packaging or anything silly like that, but creative product packaging. And I've thought that perhaps Etsy is the best place to find it. That's not to say I'm going to be featuring people who sell handmade packaging materials - though if you do and you're interested in being featured, do let me know - but rather I intend to feature products that arrive to me creatively packaged. Generally, if I purchase something handmade, I kind of expect that creativity to overlap into packaging and the like as well as their products. That might just be me. My packaging might not be amazing, but when those parcels come through your letter box, you know that it isn't a boring internet lead you've ordered, you know that it's something more awesome than that. And that's kind of what I expect from other sellers. I've had compliments from the lady that works at the post office for my colourful packaging, too ^^
   However, it's not always the exterior packaging. Some people don't think of that. It's usually the interior packaging, the packaging of the product itself, not the shipping container, and that still counts. I hate nothing more than to buy something handmade and have it arrived wrapped in bubblewrap and nothing more. If that bubblewrap has been sealed with washi tape or something, it's a bit better, but I just can't help thinking that if you're creative enough to create this wonderful piece of whatever I'm looking at, then surely you're clever enough to press a stamp to a box or envelope, and find some nice, coloured tissue paper.
   Having said that, that is what I wish to feature. In fact I have a few purchases that I intend to make via 2 Storenvy stores, by two wonderful women. I might be disappointed, but regarding who these two ladies are, I actually do expect to see some pretty packaging. Therefore, anything I buy with packaging worthy of it, shall be featured here.

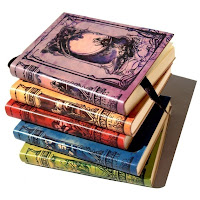
   On a similar note, I also intend to get some shelves put up in my room for me to house wonderful handmade pieces on that I've purchased with no real use for. Plushies that will sit by and make the room look softer; pictures to make the room brighter; even book ends that I can't realistically use due to the nature of my veeerryyy stuffed bookcase. Each time I get an item that will join the others on the shelves, it will get a mention here. So, that will probably be even less frequent than the other feature I explained just now.

   I realise that I've typed an awful lot here, but I had a lot to say ^^ The giveaway is still live, so do go and enter, but in the mean time, I'll bid you adieu.


Also I'm quite happy with my new background :D
Does the background display well on other screens? All I've seen it on is a couple of flat ones which have a tendancy to change colours, or remove colour altogether in some cases!


Friday 17 February 2012

Etsy Favourite Feature

It's time again. I have pages and pages of favourites on Etsy, and actually, not every piece
gets featured. I skip quite a lot due to perhaps quality of picture or because I have the
intent to buy an OOAK item and don't want it snatched up by one of you vultures!
I jest...partly...
But here is a selection of gorgeous pieces I have fallen head over heels for! Enjoy!


Ooh, look at that, the colours work! :D


Wednesday 15 February 2012

The Book is Finally Finished!! EEEEEEE!!

   After two years of work, it's finally finished. I've written a lot of stuff. I've written lots of really stupid books from like 20 to 200 pages, revolving around either magic or mundane rubbish, but this is the first book I've taken seriously enough to work on properly and get published.
   I started a long time ago, planning it out. It took me a few months of planning to finally start writing it at the end of 2009. I did a truly great job keeping dedicated to it through 2010, and in 2011 I hit a few snags, but I kept going nevertheless. I finished it shortly into the year, then came months of proofing. I read the book through about five times in total, and needless to say, despite that it's my pride and joy, I got pretty sick of it in the end. I mean, I know the story, so it's hard to keep myself in suspense when I know what's around the corner. But nevertheless I kept up with it, until I hit August last year. I just stopped working on it, and I was half way through my final read-through. I just couldn't convince myself to pick it up again.
   So, a few months passed in the end with me doing little work on it. I'd look at and just think "Eh." I supposed it was partly due to the story - I'd had some ideas for a new book during the time I was proofing it, and it made the story I was working on at the time look dull. I sat down one day to plan out a new book, to put my trilogy on hold, but after a few hours I wondered what the hell I was doing. I'd already been working for a year and a half on this trilogy, and I was about to give it up! I promise you guys, I am dedicated, it's just that sometimes that dedication goes on holiday sometimes and refuses to come back. So I have to drag it home.

   Long story short, after saying for so long that I was gonna do it, I finally did it. As you all know. After months of nothing (though towards the end I did start writing the second book of the trilogy, I'm 3 chapters in already) I finally picked it up and read it. And I have to say, once you reach the half way point, it does start to get better. But, as with most trilogies, it does have a slow beginning, where you get to know the characters before events start exploding.
   And, today, I finished reading the final chapter. It's a sad one, though, and I did cry (I'm not big headed, I'm just attached to the world I've created), but it's finished. Completely. Spell-checked, sense-checked, everything. And I just spent the last hour putting it into a position where I can get a copy printed through Lulu. And I was so shocked to see how  many pages it comes to! 434! I thought it was just on the 300 mark, but I guess my handwriting is a lot smaller than I thought! I'm going to get a print made up at the end of the month so I can finally hold this work in my hands, bound and polished, and just sniff it. New books are awesome.

   And, yesterday, my dad bought me the Writers and Artists' Yearbook 2012 - when that arrives I can start pestering people about it all over the world! And I had a great idea about how I can stand out from all the other letters that agents receive, and it involves a wonderful Etsy seller!

   I'll keep you guys posted on the progress of this new stage, I am so excited!! AAAAHHHHHHH!!!!!!! Though the work is far from over, it's so nice to be able to say that something is finally finished. And the writing is the hardest part. To come up with an original story, with original characters in an original world, it's a challenge. I know it's probably going to be a few years before I get an agent, if I get one at all, but I don't have to bend over backwards. I know the process I have to go through for that, and once I've got one, they're the ones that handle finding a publisher. The biggest job for me is the writing. Then it's a case of hoping that the writing is good enough to catch someone's eye. But I won't be sitting idle while I wait for people to respond, I'm already writing the second book of the trilogy - a longer one, and muuuch more eventful one. Afterall, it's the second book. Events have already gotten moving, and you already know the characters. The second book starts in the middle of it all!

   Anyway, I'll stop my rambling now...I'm just so so so excited. All I want is to be a successful writer. I'm so excited and I'm so scared! I feel a little sick, actually.


Peace my lovelies x


Tuesday 14 February 2012

Printable and Digital Valentine Washi Tape

Happy Valentine's Day my lovely readers! I don't come bearing roses, chocolates
 or teddies, but I do have something cute for you to add to your valentine photos!

   I scanned in some of my washi tape for you all. Valentine theme, yay! You can print and cut or you can add to your pictures on GIMP or something! It's so easy if you use the magic select tool on the tape, copy it, and paste it onto your image. Resize to your desire and you're good to go!
   So, as usual, click the image to open it up, then right click and save to your PC. Feel free to edit or alter them as you see fit. I might do this more frequently, too. Also, if you do use them I would honestly love to see the results! Enjoy!


 Yay, example!


   Have a good day my lovelies! And remember that while Valentine's day is always nice with your partner, it can be just as fun with friends. Don't be a party pooper and bring down other people's valentines! Get your friends round, make some fatty treats and watch some rom-coms! The best part of doing it with your friends is you don't have to make sure you're wearing your best panties! :D


   Also, I hope you enjoyed my run up to Valentine's Day. I really enjoyed making the tutorials, and it's given me some ideas for what to do next! Peace out! x


Monday 13 February 2012

Origami Love Notes


Valentine Tutorial Number 7.

   This is the last of my valentine tutorials this year. I have to say, I'm surprised I managed to keep myself to it, and I'm even more surprised at how many views some of these have gotten! But, as I said, this is the last tutorial for Valentine's day, but I will try to keep to my tutorial every friday. It's something I've neglected since Christmas, since there's so much on my mind right now, but I'm trying to get back to it. In a way, this valentine collection is my apology.
   Anyway, I've seen these origami hearts in several places, but have found that the tutorials are few and far between. Therefore, I've made my own. Now, they look really hard, especially when you see the circle the paper seems to form on the back of them, but, seriously, once you've done one, you'll see how easy they are.
   I've never found origami very easy. It took me a few hours to make a crane. Yes, hours. Therefore you can trust me when I say that this truly is doable. Hopefully my tutorial makes sense. Now, with my other tutorials, I like to write it out, and take pictures, because people learn in different ways, but you will definitely need the pictures in this tutorial. I'm not sure I have the capacity to be able to actually write the proper method out in words. The words are there purely to explain a few odd looking folds, that's all. This is a very picture-based tutorial.

   The idea behind these hearts, however, aren't to just make the place look pretty. They make great tags, but the purpose of this tutorial is that it's been made with the idea in mind that they're to be strung up for your partner to find. This will be easy if you share a place, but if you're only seeing eachother at the moment, you might want to just keep it as a tag. Once you've made the heart, choose where you want the string to go and make a hole with the end of a pair of scissors, then string some...string, through it. Use that to tie the heart wherever you want. To their toothbrush, to their drink, to their wallet - anywhere they are certain to go to at some point in the day. If you're feeling really silly, or if you've found the perfect joke, you could even tie it to the toilet flush!


You Will Need:
• Paper - I don't think it really matters what its length is, but I would
suggest a width to length ratio of 1:3
• String or baker's twine to tie


Method (see below for corresponding pictures):
1. Fold as shown

2. Fold the upper and lower triangles inwards and flatten them so that the two triangles on the ends are now on top...as shown. Then fold in half so that the corners all line up.

3. Fold the corners down as shown

4. Fold the top flap/triangle back so that it now forms a square.

5. The square should be made up of two triangles. Fold the corners of the triangles to their top tips so that they make two small squares instead.

6. Move the flaps back so that they form a triangle again, then gently open them up. Lift them vertically and open them gently. The highest point of the paper should be pressed down to meet the middle of the full square, and flattened. At the end of it you should have one big square with four small squares.

7. Now fold the edges of these squares so that the edge meets the middle. Do this for all the 4 squares.

8. Stand them vertically and flatten them out in the same way as step 6.

9 + 10 Now make sure that the broken crease down that side is vertical, and turn it over so that the other side is facing you. What a lovely clean square with a funny little triangle-y bit. Write your message on this side of it, then fold it in half horizontally. On the other side there's the circle made from folded squares. Make sure that they all stay facing the same side. If you fold the entire thing in half, it's not a problem, just lift that part back up, but that is the part that gives it its final heart shape.

11. Now flip it back over so that the circle-folded side is facing you. Now fold a small triangle over on both sides. This finishes the heart shape, and also keeps the heart locked shut as best as a fold can. To open the heart again, just unfold those two triangles, flip it open and the message is fully readable.

12. Now, flip it over and marvel at yourself. Aren't you clever! That wasn't so hard now, was it? Now make some more. The best part is, once you've done your first couple, you won't need the tutorial anymore. It's then that you realise how simple the steps are and you can easily remember them.


   Once you've made a few more, take the end of a pair of scissors and make a small hole whereever you want to thread the string through. I used pink and white baker's twine from my valentine packaging for my shop, and was able to get it through easily enough. Once you've done this and written your messages, tie them to things your partner will use that day. Their toothbrush, a drink in the fridge, a pair of scissors, a notebook, some work supplies if you know they have to go about business - and if they're going to work, tie one to something he won't see until he's already at work. Be clever about it. If he has a ringbinder, open it up and tie it to one of the closure rings.
   There's any variation of places you could put them! See below for four I've done for your benefit! I won't be doing anything like this for valentine's day for Seeg - all that can wait for our anniversary!


 Enjoy!


Sunday 12 February 2012

Envelope Jewellery Giveaway! [Closed]


   Yes, this is the first giveaway I'm hosting on my blog. Since my following is not amazing, I'm not willing to host a giveaway for any other shops just yet, so this is from my own.
   It's one of my most popular items yet - it's gotten over a thousand views all on its own! It was featured on one wonderful website which really gave it the kick it needed, and since then it's been doing well. But now I offer it to you! One winner will get both an envelope necklace and matching ring in the same colour! Just follow the below rules to enter!


   For each entry, leave a seperate comment below. The giveaway is open to the world, since I ship internationally anyway, and while this giveaway is live, you can use the code Blackbird115 for 15% off of any order placed. Both the giveaway and coupon code end on the 29th of February - and a few items also disappear from my shop that day until January next year, too, which have, at this point, already had their prices reduced. You could always use the coupon code on those and save even more!


   Also a quick note to say that Dandelion Grenade has closed temporarily. I was going to wait until February 14th, but I've decided to just do it now. It will reopen during mid-March at the latest, though may open sooner if my supplies turn up sooner, and will be applied to both Etsy, and my new Storenvy shop of the same name! And the returning customer coupon code which is given with each order placed in either shop is usable in both of my shops, regardless which shop the code came from!


    The above image shows what you'll receive. Old stamps included! I have plenty :P The ring is adjustable so it fits all, and both feature an imaginary London address :P
   To win, you must do the following:

Mandatory Entry:
   First of all, you must follow this blog, either through blogger (click follow on the navi bar at the top - you'll need to hover for it to appear. With your mouse, not above your seat.), bloglovin' or networked blogs. Leave me a comment to tell me you've done so.

Additional Entries (only count once, not daily):
   Follow me on Twitter. Leave me a comment telling me you've done so.
   Like my Facebook page. Leave me a comment telling me you've done so.
   Favourite my Etsy shop. Leave me a comment telling me you've done so.
   Tweet the giveaway, and include @Peachesnpebbles in the message. Leave a comment telling me so.
   Share the giveaway on Facebook. Leave me another comment.

   The giveaway and coupon code Blackbird115 run until February 29th, midnight. The winner will be notified by email, so leave me a way to contact you if you win!


Good luck! x


Self Portraits

   Well, self portraits. I don't have a whole boat of confidence, especially not about the way I look. So photographs of me are few and far between. These days my boyfriend is in them too, which gives me a little more confidence, since it distracts from me, but I also can't help thinking that maybe I should just grab my camera and just take some of me. For my sake.

   Anyway, you want to know what I learnt from this? Well, I learnt that I do need to stick to my small digital camera as opposed to my DSLR - I just can't hold that thing backwards and it has no screen on the back for me to keep track of composition.
   I learnt that I do actually have cheekbones hiding somewhere on my face.
   I learnt that sometimes a harsh black and white contrast can work.
   And, most importantly, I learnt I always obscure my face, somehow. I used to do photography as a hobby for a few years, but now my camera has been demoted to tutorials instead. I looked back at the photos I took a few years back. They were almost all exclusively of me, since I was the only person I had to work with, but my confidence was back then much the same as it is now. After taking the picture below, I found that I have an on-going theme of obscurity. I will either add strange make up to my face, like below, which seemed to be my favourite method, or I would edit it in some way - usually my eyes or I'd add a photograph over the top of something unrelated - or I would go as far as to crop. Some of the few unedited and un make-uped pictures I've taken have only half of my face in it.
   Obviously, this shows my level of confidence, but I also like to think that it keeps some questions. You wouldn't recognise me on the street, that's for certain! I am able to keep my own identity, and I'm able to be versatile when I need to be. Like a chameleon! Looking at it, it's not a habit I'm ashamed of. I'm surprised at myself for always doing it, but it's a habit I think I like. It's almost like in every picture, I'm someone else. Sometimes I have a harder expression, other times a softer one. None of them really portray how I feel at the time - that's just not the self portraits I seem to make - but they do all portray parts of who I am. I might listen to a song I love and that can change the outcome. Below, I was listening to Star Struck by Lady Gaga. I've done others influenced by other things - one of my favourites is influenced by Magic - I'm sure it exists somewhere - and I've painted an arcane style image beneath my eye. In fact, I'll add that to this post because I'm really fond of it. But that portrays my love of fantasy and other worlds. Then there are other photos of just certain aspects - my lips or my eyes. My eye photos were especially my boyfriend's favourites. I did most of them for him anyway. They were all influenced by completely different things. Certain make up colours I had reminded me of dragon scales and mermaids, while others reminded me of Greek deities - all of which are interests of mine.
   So while you never see my full, real face, you get to know me a little better. Maybe my personality comes out more than my appearance.

   But I also learnt that I need to have more confidence. I truly do. I'm not a gorgeous person, but I'm not unfortunate either. I'm sure I didn't land Seeg with personality alone - though I'm quite sure that that shines through the most. I never go out, and when I do, I used to wear my favourite double breasted coat, but now I just bundle myself in an unflattering grey...thing, and just go out like that. There's not many parts of my body that I am fond of, either, but when I'm wearing the right clothes, I don't look too bad. I never ever thought I'd do it, but I bought a pair of skinny jeans a few months back at my sister's request - I got some lush boots to go with them - and they actually work. For that, I have new confidence in my legs, and following a whole year of exercise, I'm starting to grow a little more fond of my upper body too. I dropped a clothe size! And I know, after a year you'd expect that, but I didn't. And not to a 10 - I've never been a ten. Whenever I go into a clothes shop, almost all UK 12s are out of stock - this makes me happy. I have an average body size

   So I suppose I learnt a lot from taking one photograph. And I'm glad I did it.
I was nervous at first, but it was the right choice ^^


Saturday 11 February 2012

Crispy Marshmallow Chocolates


Valentine Tutorial Number 6

   I'll be honest, these weren't planned as a tutorial. I was just making them, and as I was watching the chocolate, waiting for it to melt, I saw my camera. "Why not?" I thought, so I grabbed it and got started.
   This is such an easy thing it's unreal. But my boyfriend loves them and, frankly, I do too. And I know the above picture isn't too flattering, but that's only because it never occurred to me to flatten the backs while they were upside down. Like I said, I never planned this one as a tutorial. But it's 100% mine!


You Will Need:
• 200g Chocolate (cooking chocolate or brand-name)
• Mini marshmallows (or you can cut down big ones for larger chocolates)
• Cocoa Pops/ Rice Krispies


Method (See below for picture method):
1. Crack your chocolate apart and melt it. I used a saucepan filled with water, I put it on the stove top and put a heat proof bowl on top, in which I put the chocolate. I proceeded then to boil the water, and stir the chocolate until the heat from below melted it.

2. Then I took a small bowl of cocoa pops - there is no real measurement here, it's just a case of going with your gut, probably literally. The less cocoa pops, the smoother the chocolate will appear, but the more cocoa pops, the better the crunch - and probably the more chocolates you can make! I poured the cocoa pops in and stired them into the fully melted chocolate. I kept the chocolate on the heat from this point on, but turned the heat right down. This kept the chocolate from solidifying while I was spooning it out, but also kept it from spoiling.

3. Once it's all mixed in, take whatever you're using to mould your chocolates in. I used mini amo heart cupcake cases. They're like an inch big, so they're perfect, and this is exactly why I bought them a few years ago. You can use ordinary cake cases, however, or even proper moulds, whatever will give the chocolate shape and will allow it to be removed easily.

4. For the cases I used, I put one half of a heaped teaspoon of chocolate and cocoa pop mix down in the bottom of the case. I spread it flat and it came half way up the mould. Now for the purpose of pictures, I did this to several moulds first, but you would be better off completing one entire chocolate (step 4,5 and 6) before doing a second. It would help the marshmallow to melt a little better.

5. Take a mini marshmallow and put it in the middle of the chocolate and press it down a little, preferably so it's sitting halfway into the chocolate, then take another half heaped teaspoon of chocolate and cover it.

6. You can level the chocolate out once you've put the top layer on by taking a broad knife and pressing the side of it onto the chocolate, squashing it all down. This never occurred to me at the time, so I never did it, I left them all nice and cocoa poppy.

7. Once all of your chocolates are done, you have several choices, and each depends on the kind of chocolate used.
   To make chocolate, the mixture is tempered, which means it's made hot and cold and hot and cold and so on. The number of times it happens contributes to how quickly the chocolate, once completed, melts in the mouth. By melting chocolate, you're re-introducing tempering. Now, if you've chosen to use a proper chocolate bar, then I do not advise that you put your chocolates in the fridge. If you put them in the fridge then when they come out, especially in the summer, they will melt much quicker with little contact. Of course, this also depends on the specific bar you've chosen. If, for example, you chose galaxy chocolate, you have a problem. It's the best chocolate in the entire world, but it melts far too quickly in the mouth for it to withstand this. If you use a fast-melting chocolate, it will still work, but they may not last. Don't put these in the fridge.
   If, however, you used something like Dairy Milk - something much harder that takes a lot more to make it melt, it should be fine. Though I hate Dairy Milk so I won't use it :P
   To make mine, I used ordinary milk chocolate, but I used bars specially made for baking. This way, they melt slower and set better.
   The cocoa content also contributes to this. The darker the chocolate, the higher the cocoa content, and the stronger it is once set. Also, it's better for you and your skin, especially during your time of the month. But that's another aspect of it altogether.

   I used baking milk chocolate, and I let it set out on the side in my kitchen. Every other time I've made them, however, I have put them in the fridge and they've come out fine. But this was something I thought I would share with you before you possibly create problems for yourself.

8. Once they're set, wrap them in foil, or arrange them in your desired way. Or something. You can get chocolate transfer sheets which transfer pictures and patterns onto melted chocolate. If you get a sheet of this and cut it to size to fit the bottom of the mould, it will give a special finish. Also, hide them from Seeg or he'll eat them all. It doesn't matter where you are, he will find you. The same goes for M&M Peanuts. Seriously.


I hope you all found this useful, and if you did anything special with them, I'd love to see
how they came out! Good luck and have fun with them!


Thursday 9 February 2012

Found a Little Confidence

   As some of you know, I've not been feeling one hundred percent lately. I've been feeling really down and negative towards a lot, particularly my shops. But, fortunately, I think the clouds are starting to lift. I made two sales today, the first for what feels like a while, and my carer's allowance claim was put on hold temporarily until some paperwork was sorted, and it's been put back to action too, so in a few weeks we'll get a little money. Seeg and I have agreed not to do anything for Valentine's Day, instead everything will be put into our anniversary in May, cards and all - fortunately I haven't written mine, and he's not bought one yet, so the panic of making Valentine's Day awesome has also been lifted. And, I woke up in a good mood this morning for the first time in about two weeks or so.

   I'm also becoming quite confident about my new shop - I've got my direction all sorted out, and Dandelion Grenade will be put in vacation mode until mid-March, latest, when every single listing will change. I'm really happy with what I've come up with, and while a few things need to be tweaked, practised and then tweaked again, and I need to figure out how my logo will work...and I also need a new scanner...well, apart from that, I'm really pleased. It won't look anything like it does now ^^ and the products are all different, too, so it's a bit exciting :D And, my glass jars arrived yesterday, so I've been able to finally relist my two best sellers on Peaches and Pebbles. So that's even better! :D

   There is some sadder news, though. Lucky isn't improving. She seems to be struggling to walk about comfortably, and her back right leg just doesn't seem to be responding. She spends most of her time sleeping - she always has been very chilled and relaxed, and has spent a lot of her time sleeping, but lately it's all she does. She still can't eat solid food and I don't think she'll be able to again, but fortunately she's taken a keen liking to tuna. She has a dinner time now; when we finish whatever we're doing downstairs and retire to our room for the night, we give her a small plate of it. She smells it right away and ambles across the cage to it as best she can and gobbles it all up, bless her little heart. But we both know her time is running out. She really hates the vets, so we agreed not to take her unless she starts suffering. As it is at the moment, though, she still tries to go about with her day as normally as possible, and her eyes are still bright, if tired. While her time is indeed running out, we know she's going to fight as long as she can. I tried to give her a bath the other day, because she's struggling to wash certain parts of her body, and the fight she put up was about the same as it used to be, surprisingly. She really doesn't like baths...

   Anyway, that's the update on my little world at the moment. I hope you're all enjoying the tutorials, and hello to my new followers! Do introduce yourselves, won't you? ♥


Valentine Blossom Ball


Valentine Tutorial Number 5

   This one wasn't what I wanted it to be, I'll be honest. I wanted roses, but I am incompetent and I couldn't follow the tutorials to make roses myself. Can't make a tutorial for something I can't do myself, eh! So, instead of roses, I've gone for blossoms. I think they look just as cute, anyway ^^
   This one is easy, like the others really (except the fortune cookies, they were a little tricky). You need very few items, but you probably don't have polystyrene/styrofoam balls rolling around your house. Fortunately, I did, but only because I never got around to making some Christmas decorations. Enjoy!


You Will Need:
• Styrofoam/Polystyrene balls
• Tissue paper
• Glue
• Scissors


Method (scroll down for the picture method):
1. Like I said, this one is quite easy. Cut some of your tissue paper and fold it numerous times to a square about an inch big. The more you fold it the less cutting you have to do. Once you've got your folded square, cut out a flower. I only did four petals, it would probably look better with five, but you might want to use less tissue per cut in that case.

2. Now you've got lots of flowers. They might not look very good, but once it's all together, you might not notice. Take your ball and dab a little glue onto it. Place your first flower on it and fold up the petals. This will free up some more space and make it easier when you apply more flowers.

3. Stick some more flowers down, leaving a nice bit of space between them. Make sure to fold the petals up. I used pink and white flowers, but I applied the pink wones first. This enabled me to have nice even coverage of colour.

4. Once you've gone around the ball with one colour, go around and stick the other colour flowers in the spaces - unless you're only using one colour, in which case, just fill in the gaps with the others.

5. Once you've done that, fill in any other gaps. Set to dry, and you're done!

To Hang: if you want to hand it up, I used a piece of craft wire from my jewellery supplies, created a loop and stuck the end in nice and deep. I tied some pink and white baker's twine through it and made a loop. If you don't want to hang it, it looks lovely standing on top of a small or narrow vase filled with something to compliment it. I went for pink and white lace ^^


See you in two days for the next one!


Tuesday 7 February 2012

Valentine Fortune Cookies


Valentine Craft Number 4

   There have been felt fortune cookies almost everywhere I look. They don't really appeal to me, personally, unless there's chocolate in them. And I'm not sure how that would work :P Soo, after browsing the internet for a little while, I realised that I could make real ones instead!
   They're surprisingly easy, but the only fortune cookies I ever had came from a chinese place in the Cribbs Causeway Mall, and has long since disappeared. They were amazing, though. Though, I will mention one thing: if it's your first time trying this recipe, and you want a certain number of fortune cookies, you're better off perhaps increasing the recipe quantities by about 50% or so. Sometimes you might leave the cookies in the oven for a smidge too long, or not long enough, but you'll try to shape them anyway. I did :( Also, in the picture method below, I showed a bit of butter - thought I needed it, but I was wrong. So disregard the butter. Unless you calorie count. I can't tell you the nutritional value of this stuff, but Taralynn's fortune cookies give you all the details. Just click that link over thar and ctrl+F and search "fortune" - it's the easiest way to find it.


You Will Need (makes about 10):
• 1/2 cup of Flour
• 1/2 cup of sugar
• 2 egg whites
• 1 tsp Food flavouring (typically almond, but these are your cookies!)
• 1/2 tsp Red food colouring, if even that much
• Grease-proof paper (I used washi tape)
• A pen


Method (Scroll down for picture-method):
1. Before you do anything else, write your fortunes. Well, no, you can pre-heat the oven if you want (400F/Gas Mark 6/200C), but before you start mixing anything up, make your papers. I used washi tape because it seems to have some sort of resistance to grease, but not a massive amount. I stick it down to grease-proof paper and wrote my message in a reliable pen on the tape. I could only come up with three things and they were cheesy, but I did them anyway.

2. Once you've done that, take your egg whites, stick them in a mixing bowl, and with an electric mixer, mix them at medium speed for however long it takes for them to become very frothy, and almost form soft peaks. Once you've done that, add in the flour, sifted, and mix a little more.

3. Now add the sugar, the flavouring, and the colouring. Continue to mix. Once it's nicely combined, run to the sink and walk back slowly with 2 tablespoons of water to thin the mixture. Don't try to get two tablespoons at once, that's just silly.

4. Mix it all together, and, as you can see from below, it should be niiiice and runny. Grab a non-greased baking tray and put one tablespoon of the mixture on one half of the tray, and use the back of the spoon to smooth it into a mice circle. The mixture won't increase in size by much, so however big you make the circle is about how big they'll come out. Do this for the other half of the tray. It might seem counter productive to just make two cookies per tray, that's what I thought, but it's very helpful.

5. Stick the mixture in the oven for about 4 minutes. You have enough time to make a cup of tea, but not drink it. That'll have to wait for the next two cookies.

You have a decision to make now: As you can see from my pictures, I have one cookie that is a lighter colour than the others. I found that the top of the cookie when they come out of the oven is stickier than the underside. So I tried it that way instead. It's the best formed cookie out of the entire lot, and the one that dried quickest and best...est. However, it's more pink than red. Basically, decide if you want red cookies or pink cookies. Pink cookies: once you remove the cookie from the tray in step 6, don't flip it over. If you want red ones, flip it, but it may not turn out quite as well, because the entire thing will be stickier for longer.

6. When that's done, pull them out and use a thin spatula to remove them from the tray. This is the tricky bit. Now, I don't usually get on well with biscuits, baking trays, or spatulas, but this all went smoothly for me, somehow. But it's still tricky. Once you remove the first cookie, and it will still definitely be soft, but it should hold its shape, put it down on a dry surface, place your fortune in the middle of the circle, then bring the two sides of the cookie together, the side above and below the fortune. Pinch them together so that they stick, then bend it in half with the aid of a cup. I'm so sorry I haven't got a picture of that but I know there are other, better places online to go than here for fortune cookies.
7. Once you've done that for the first cookie, do it for the second, then place them in a cupcake tray so they retain their shape while drying. Then, repeat step 4 by placing more mixture back onto the tray and putting it in the oven for 4 minutes. Do this until you run out of mixture. Now, once I was done, I put the cookie tray itself in the oven for five minutes to help the drying along. When they came out, they seemed wetter (except the pink one), but they did all dry and go hard about half an hour or so later.


   This was the tutorial I thought was going to go horribly wrong. While not going quite as smoothly as the others so far, I am greatly impressed with the outcome. I will try this again, but with nicer flavouring than almond (not to my taste) and I'll also not bother flipping them over before folding them. And perhaps make sure they're in the oven for 4 or 5 minutes before removing them. Aaaand maybe I won't put the cake tray in afterwards and just see how long they take to air-dry. Enjoy! Let me know how it goes! But do remember that every recipe is different. If this one doesn't work for you, try some others. There's a link to Taralynn's further up!


Monday 6 February 2012

Etsy Favourite Feature

Hello all! I hope you're all enjoying the Valentine tutorials so far! I'm really enjoying making
them! But now I'll turn your attention to 4 pieces from my Etsy favourites!
Have a look, and also take a dance through their shop and see if there isn't something
in there to catch your eye, too!


Sunday 5 February 2012

Cupid's Arrow Cupcake Toppers


Valentine Craft Number 3.

   Well, it's time yet again for another Valentine craft! This time I'm showing you how to make full cupid's arrow cupcake toppers, like the ones in my shop! They're great fun and they look so cute, too. You could have them standing alone on a cupcake, or get a bundle and pierce a bigger cake with a volley of them! Or be -really- creative and make a Valentine hedgehog cake!
   They're super easy, and you should have most of the necessary materials, except perhaps double-sided tape, but that can be substituted for glue if need be. So let's crack on!


You Will Need:
• Cocktail sticks
• Scissors
• Plain paper
• Coloured paper/coloured tape
• Double-sided tape


    Method (see below for picture-method):
1. Cut a piece of double-sided tape about an inch long, then stick it to the bottom corner of the paper, leaving a small gap to one side. Cut a strip of paper out, in the same direction as the tape and leaving the same space on the other side, but cut the length of paper at least twice as long as the tape.

2. Fold the paper in half and trim the excess from the end, so that the strip of paper, in half, is the same lengh as the tape. Then, remove the backing and place the toothpick down the middle. Make sure that the point of the stick as at the top of the tape, then fold the paper over and stick it to the rest of the tape.

3. Next, cut the paper which now has the cocktail stick securely inside to the rough shape of the fletching, or the feather, of an arrow

4. Now make lots of little cuts pointing at a downward angle along the fletching, and once you've done that, cut some notches out to make it look a little more worn - or cut none to keep the prestine look.

5. Next, take some coloured paper and a piece of double sided tape and cut a smaller strip. I used coloured tape. Remove the backing from your double sided tape and place the end of the tooth pick in the tape, much the same way as you did for the fletching. Then fold it up and stick it down, the same as before, then take your scissors and cut the two bottom corners away to make a triangle.

6. Grab a cake and fire it in. Or, rather, just push it in. Unless you have a little tiny bow, in which case, I want one too. And you're done!


I hope you enjoyed this, and I also hope to see you in two days for another tutorial!
Or printable...I really don't know yet :P


Saturday 4 February 2012

Would You Rather?

   I read a blog a week or so ago, and the writer asked if you'd rather know everything that has happened, or everything that will happen. You had to pick one, and you couldn't change your circumstances.

   Stop reading this post right now and tell me which you would rather and why, and then come back and read the rest of this. I don't want my post to sway any of you.


*    *    *


   In truth, I'd want to know everything that has happened. I'm the sort of person that only looks at the bad stuff, and I'll linger on it, too. I don't want to know when, where or how I'll die. I don't want to know whether my dreams will fail or succeed. I also don't want to know if the vials I'm still waiting for turn up in the post tomorrow or not. See, I need the hope. Hope is such a powerful thing for me.
   In my day to day, I have very little to focus hope on. I just get on with things. I don't need to hope that my boyfriend will be there beside me when I wake up, because he will, and the same applies to most things. Which leaves me room to hope on simple things, the biggest of which is what the postman will bring. Usually it's junk, of course, but lately I've been waiting for a lot. DVDs, craft stuff, art, more craft stuff, and then a little more crafty bits. So I do my exercise, looking out of the window to see if the postman's coming or not, and when he does and he's been, I go to the door to see what's there. But now it's all dying down, which means the excitement of knowing something will probably arrive has been replaced with the hope that something might (key of which: vials - it's driving me mad!). In fact, if the post man isn't bringing anything that day, I'd rather not know he's been. At least then I can hope it's all just a little late.

   I also remember, foolishly, perhaps, hoping that when Seeg still lived in the Netherlands that he might come and surprise me one day. You know that day dream that maybe when you look out of the window, that someone special will be standing outside, waiting to build the courage to knock, or whenever the doorbell rings, that special someone will be standing there? Well, sometimes hoping pays off. But more on that at another point.

   I also love history and science. How great would it be (for me, perhaps) to find out what really happened to the dinosaurs, or how the earth was formed, or what it was like to live during the World Wars? To know things that others lived through, or things that no one else may ever know for certain? It would be amazing - and you'd be awesome at quiz night! Even though I really enjoy learning about it all and trying to figure out what the most plausible answer could be to some of these things, I'd still prefer to have the answer in my hand.

   This may be because one of my fears is people thinking I'm stupid. Ever since I was little I always acted the fool. I'd make people laugh - and that felt great! It still does! But the problem I face now is that I feel as though my friends and people I don't see frequently still think of me that way, and don't realise I have a brain. I don't know, I think part of the reason I learn new things is to show these people I'll never see or speak to again that I'm not a fool. Who knows? But it's mostly because learning new things is amazing, finding things out, knowing things that you are relatively sure your neighbour doesn't know. And I don't mind my sister not enjoying talking to me because I'm "boring" for being interested in science. In my funny little mind, it makes me awesome.


   On an unrelated note, Seeg actually said to me once "I'd love to spend one day in your mind" when I spouted some random thought. I didn't think people every actually said that :P

I look forward to reading your responses!


PS, I think I might try to make "Would You Rather?" a frequent thing - if I can come up with the relevant content! I would love to get to know my readers that way!