
My Halloween costumes have always been a little...off. One year I was the 'punk-ass fairy of doom', another year I was a dead child with a blood-soaked stuffed toy and a skeleton face, and another year still I was a drowning victim - I actually went trick-or-treating with my then-boyfriend's kid brothers, which was pretty stupid because my costume consisted mostly of black clothing I'd worn in the shower moments before, so I was dripping wet and freezing outside at the end of October.
This year I'm doing something a little more orthodox, though I admit that that's because I'm not going out or seeing anyone so my costume will be worn in front of the TV and I can't be bothered with the effort (she says, having put far more time into making one single aspect of the costume than she has on any costume before) of something unique. But I did have an unrelated idea I wanted to try.
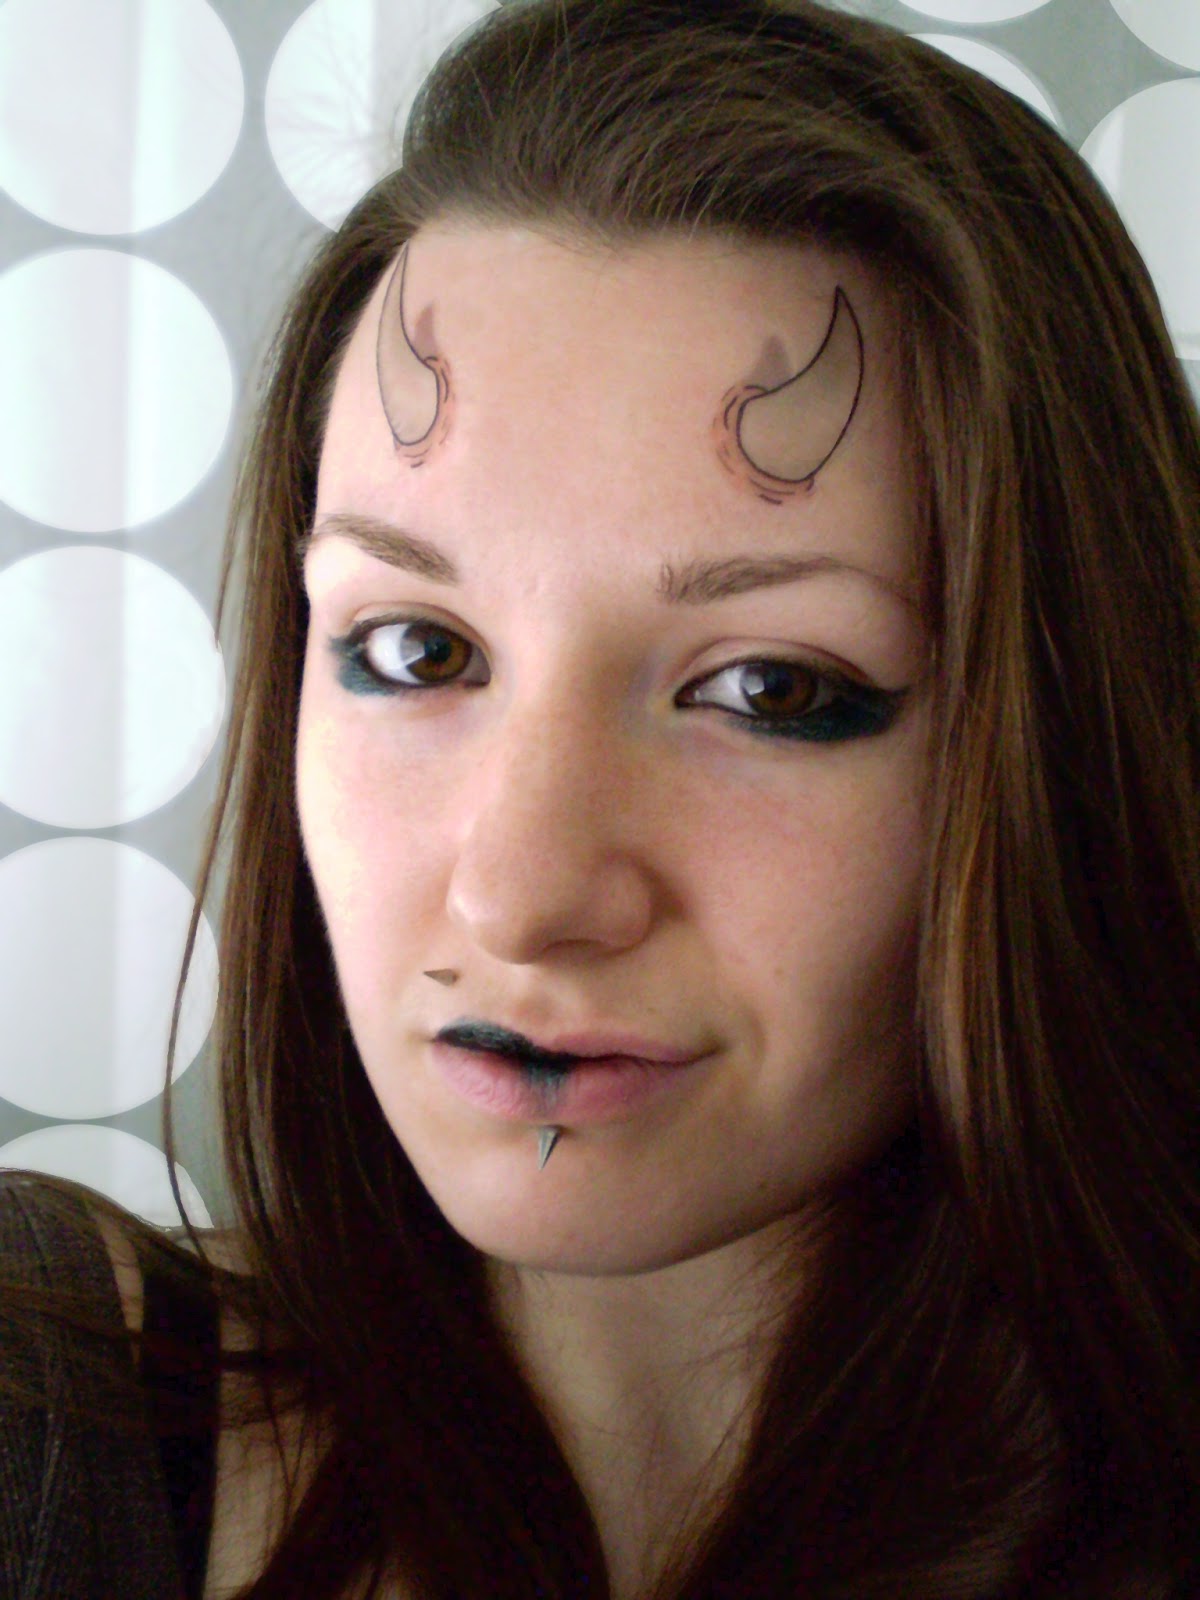
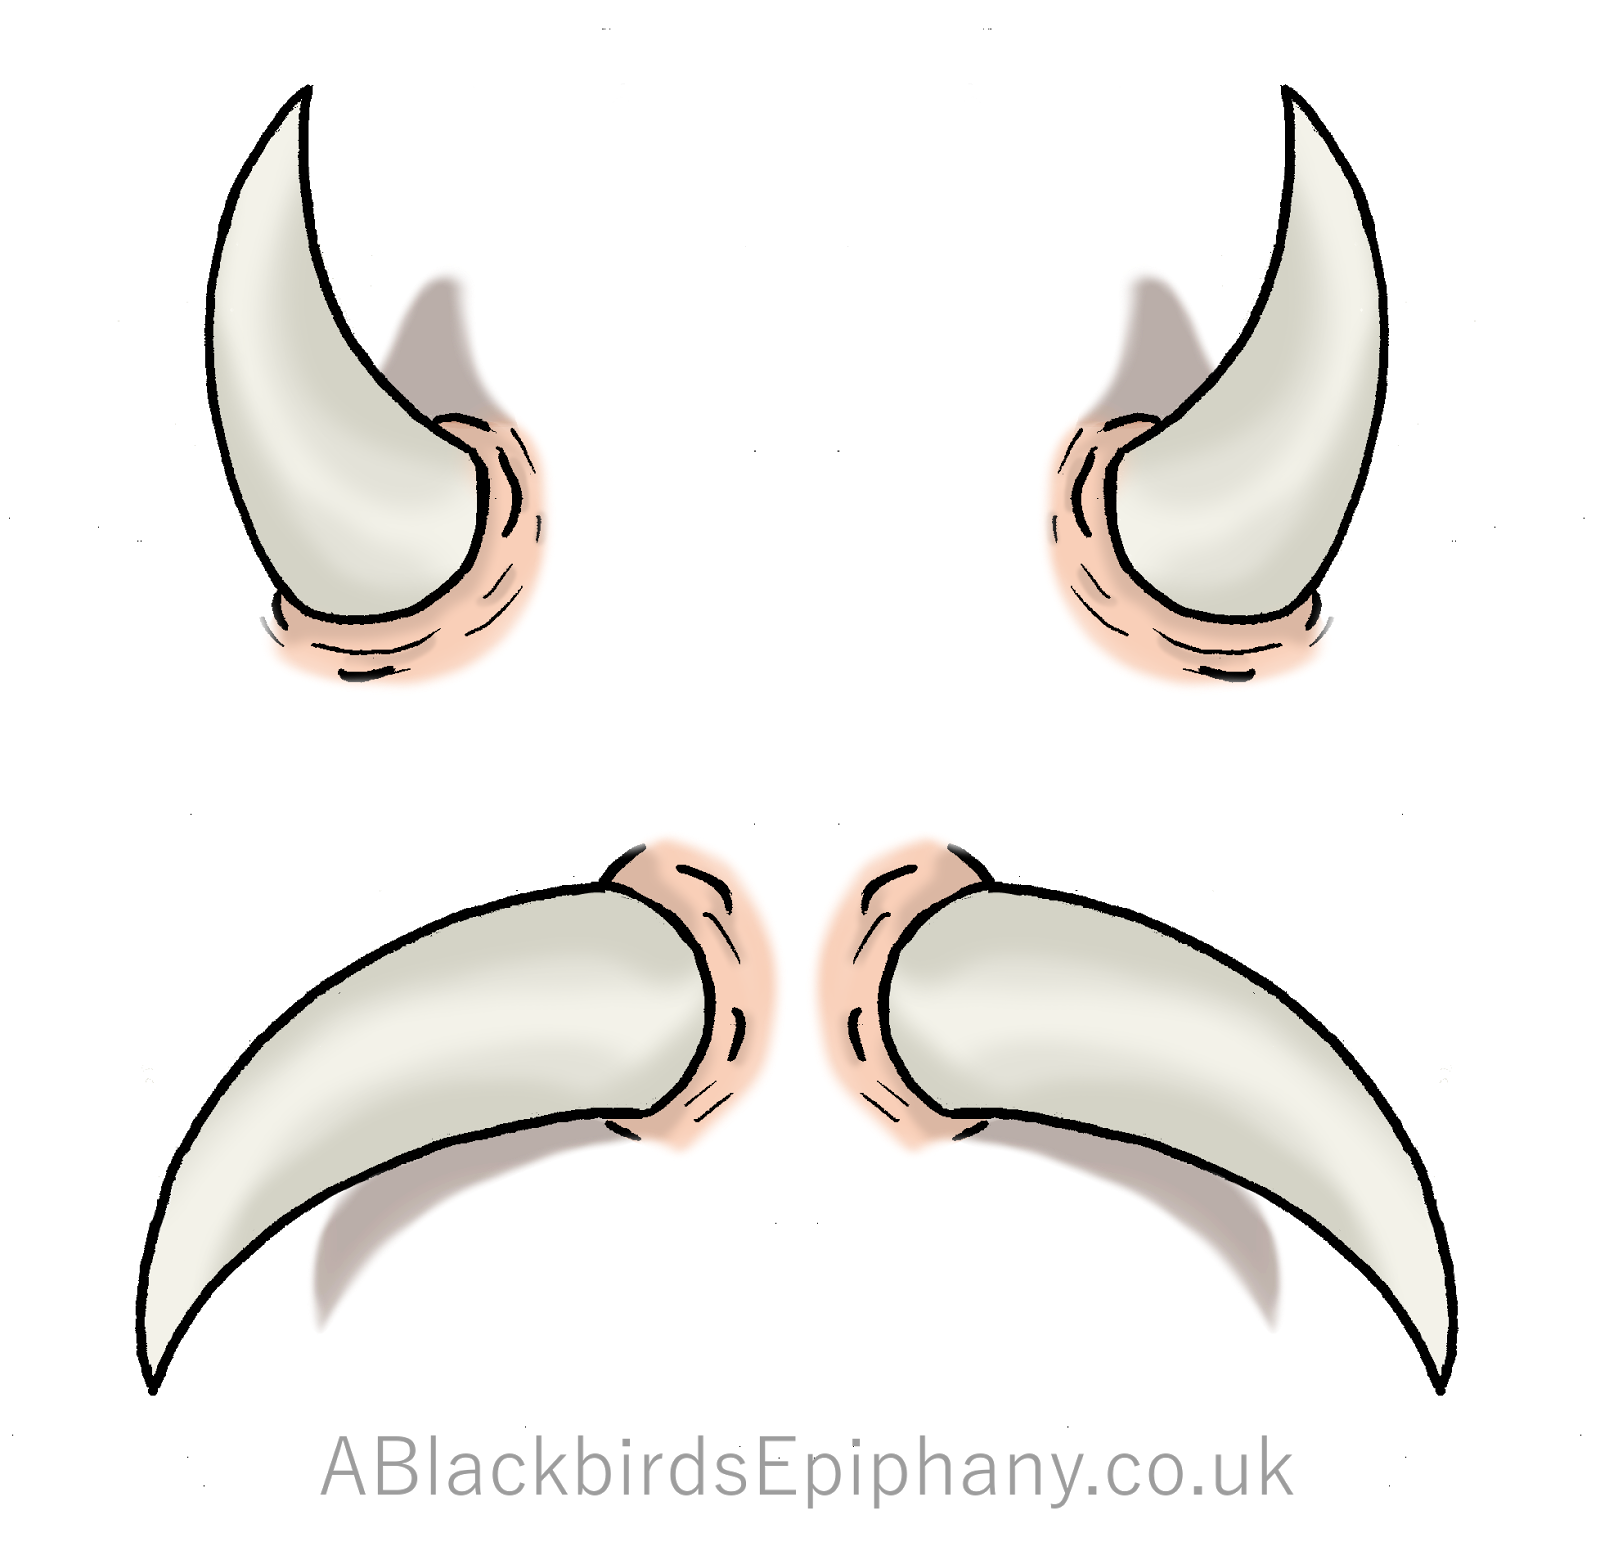
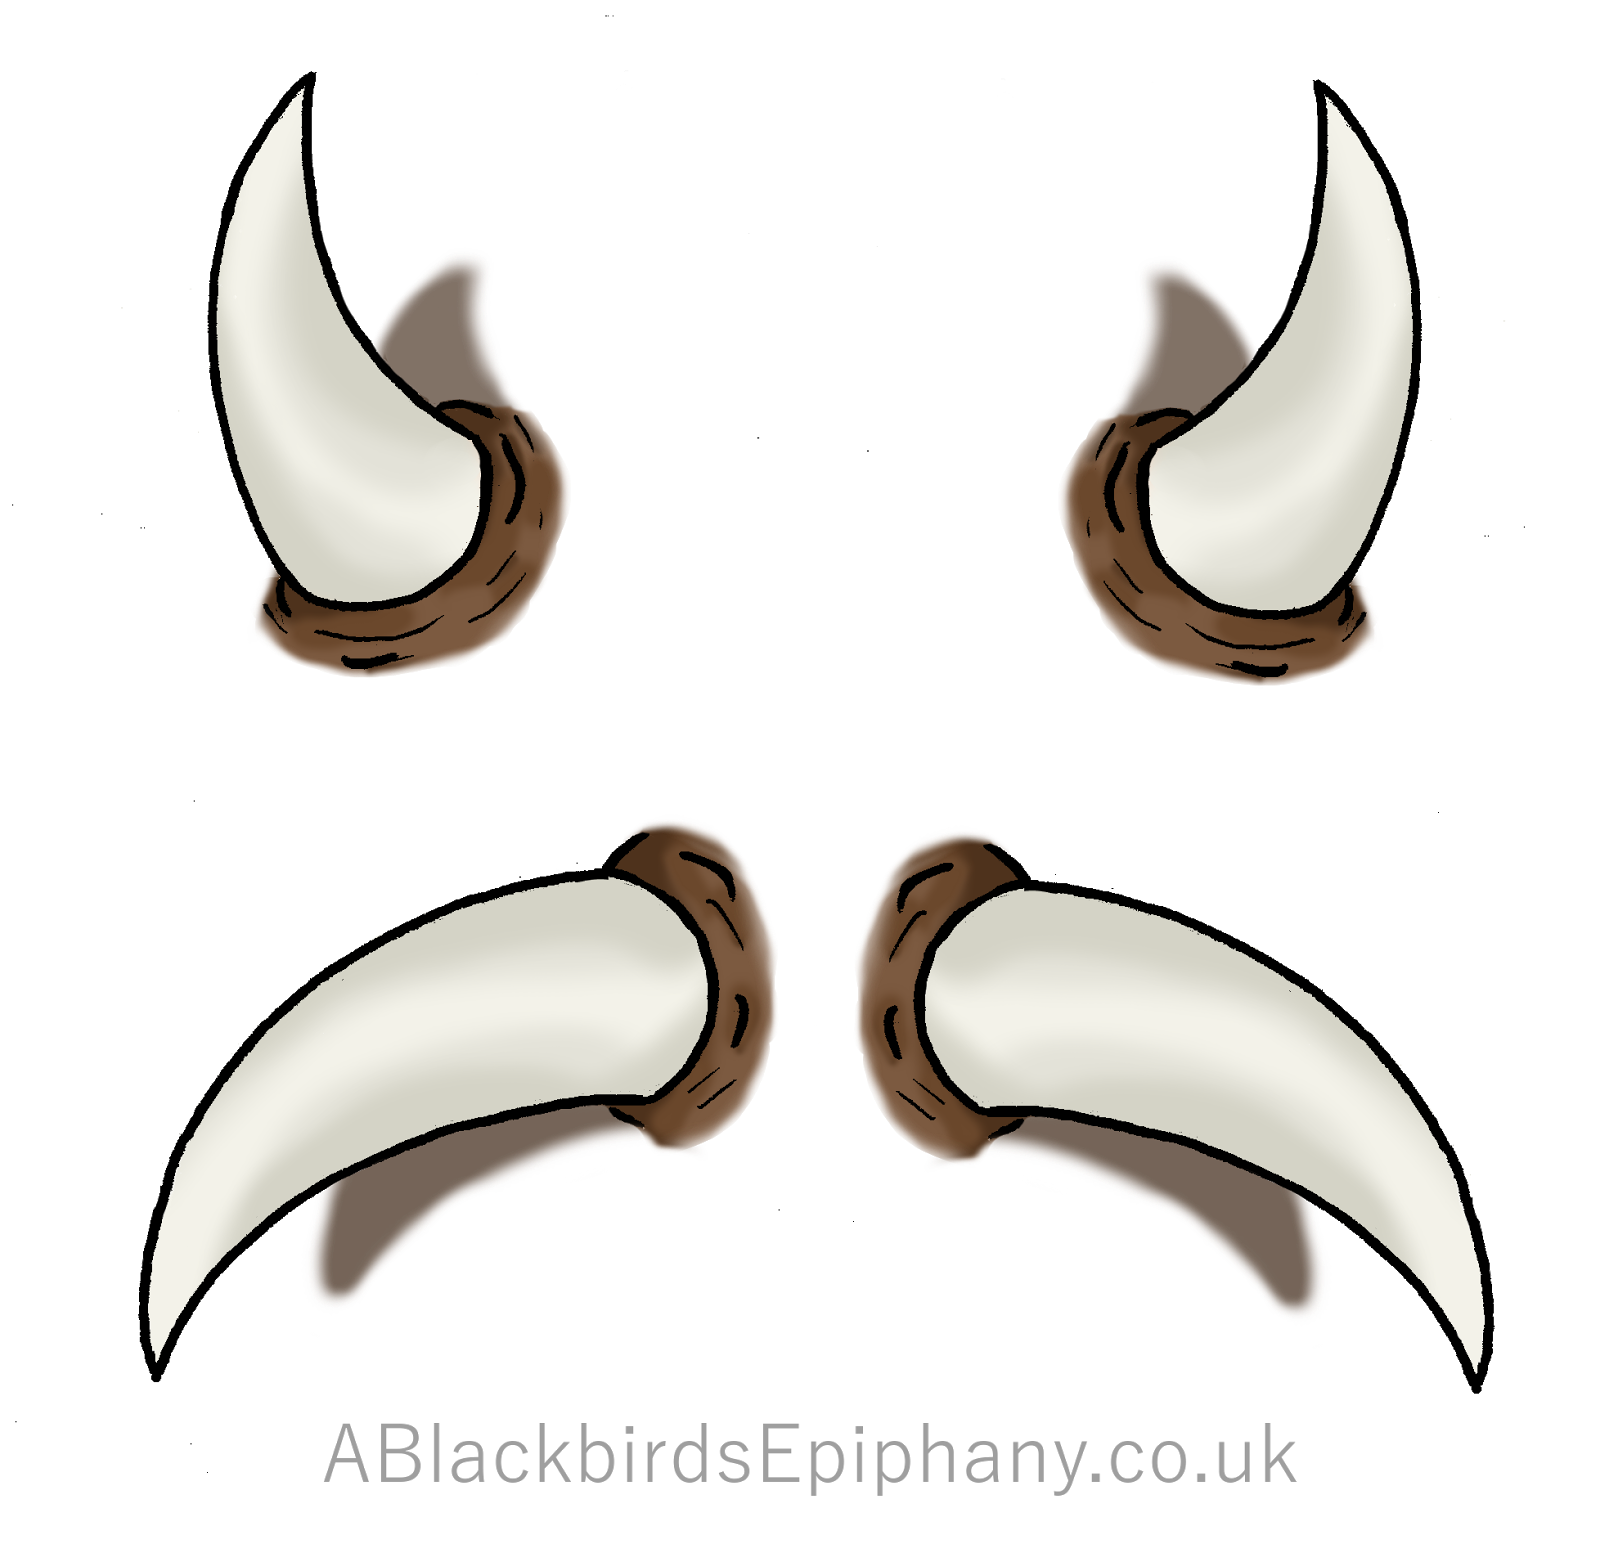
Temporary tattoos. Demon horn tattoos and tauren tattoos to go on your forehead, shadows and all to give them that 3D look.
You can get printable tattoo paper if you know where to look, and in the UK that's Crafty Computer Paper, and in the US you can probably find it in similar places, this ebay listing being one example. You can find them elsewhere but these are the two places I've looked at personally.
They're easier to use than you'd think, too. You've got two parts to each sheet - the printable tattoo paper itself, and then a clear adhesive sheet to stick on top and protect them before you use them, and in truth the only hard part is applying that clear top sheet with as few bubbles as possible.
There are both inkjet and laser printer paper, just make sure you buy the right one for your machine, and when it comes to printing, make sure that you set the printing quality to 'glossy photo paper' on your computer beforehand. Generally it will print regardless, but the one time I forgot to change it to 'glossy' the colours didn't come out as bright and the finish wasn't as crisp because the printer wasn't prepared for the glossy surface. But they were still more than usable. Either way, the paper usually comes with instructions, and if it doesn't, the info I just gave you will suffice.
Save and print the images below, choosing your horn type. You can open them in any basic program, including MS Paint. Print a test horn first on normal paper to make sure your sizing is right.
How to resize:
Using the 'page settings' or 'print setup' under 'File' in the image window, adjust the size percentage. I reduced the entire thing to 20% of its full size and printed landscape to use as little paper as I could and make it easier to feed the paper back through in the future. If you want them bigger or smaller but aren't sure what size would be best, roughly draw them out on an ordinary piece of paper the same size as the tattoo paper and consider the proportions, then, using the 'print preview' option, see if it matches up. But remember: they will look smaller on the screen's print preview than they will once printed, and equally when you draw them out yourself remember that less is more. Don't overestimate the size of your forehead.
Once printed:
Peel the edge of the backing paper away and line up the two corners with the tattoo paper. Be aware that you only need to cover the printed area, so if you've only used half a sheet, you'll only need half of the adhesive, so cut the transparent sheet in half before peeling from its backing paper. Line it up as carefully as you can and try to avoid air bubbles. One of the best ways to do this is to use something like a bank card or other thick, laminated card to flatted the adhesive as you stick it down. If you do get some air bubbles in the adhesive you can tease them out by pushing them with the edge of a bank card away from the printed area.
The trouble with inkjet or laser printer tattoo paper is that most of them do leave a plasticky feel to the tattoo and give it a shine. It can feel quite uncomfortable, like having a sticker stuck to you, but if you're just wearing it for a party, Halloween or a photoshoot, it shouldn't matter. Because of this, however, they're very easy to remove, and so you won't have to worry about a red forehead the next day after a vigorous scrubbing.
These designs (digital or printed product) aren't for resale. They're permanently free for anyone to use whenever they wish. If you do use them, I'd love it if you could send me a picture, or link back to me on your blog or website!

Those are really snazzy, I like!
ReplyDeleteThank you! ^^
Delete