Well, it's my birthday tomorrow. I am excited, of course, I always am. Seeg has bought me a few things he's quite excited about, I have a package from Vicky which I have yet to open, and I happen to know that a box from UKGE.co.uk has turned up for my dad. So I'm quite excited!
But onto the point of this post: my cake. I love cake. Who doesn't? Saying that, I once knew a strange girl who didn't like chocolate or pizza. Strange. But anyway: I recently found a lovely box mix.
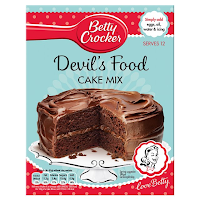
So that was what I decided to have as my birthday cake. BUT! As lots of you know very well, I love dinosaurs. I love history and science, especially natural history. I had an idea some time ago about making a dinosaur skeleton out of royal icing, using similar methods to that of a royal icing tiara, but I never had the opportunity to try it out. But here was my chance. I'd tried to make a tiara before but the icing was too runny, through fault of my own, but I knew that the sugar I had bought that time was suitable. So I hunted it down and bought it again (Squire's Kitchen, though the packaging had changed), and I made sure to follow the instructions this time, but to also make it on the stiffer side. It worked very well, and though I only mixed up a small amount of what was in the packet, I ended up with far too much. But anyway!
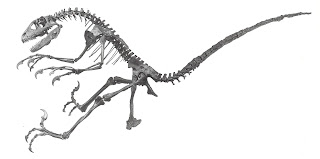
I found myself a dinosaur skeleton. Initially I was looking for an illustration because it would be less detailed and easier to follow. I didn't know what I wanted. In my head it was always a brontosaurus with a nice big rib cage, but when I thought about what dinosaur I liked, I was drawn to ceratosaurs and other big hunters. In the end, I decided to go with a raptor, because somehow I'd forgotten about them. So I had a look for a good picture, and after dismissing most of the illustrations, I happily accepted the picture shown to the left. I actually decided then that having a real fossil as a base would be more realistic than a raptor in mid-run.
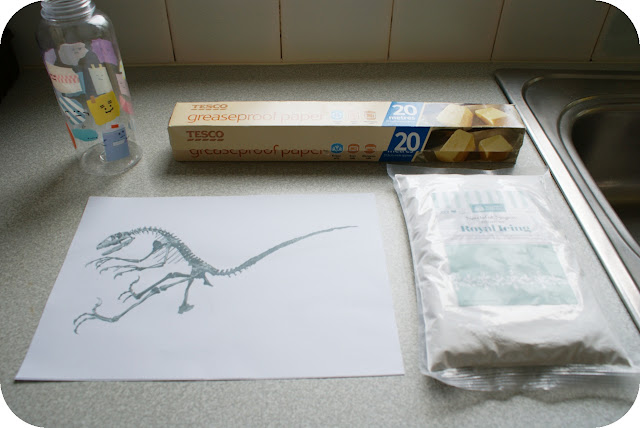
The materials used, half of which are not shown above because I was eager to start:
Royal Icing ♦ Piping bag (I used disposable with no nozzle fittings)
Grease-proof/wax paper ♦ a Print out of the fossil, appropriately sized ♦ a Clean paintbrush
Tape to fix the GP paper to the print out ♦ a Bottle I ended up not using
1. First of all I fixed some grease-proof paper over the print out, taping it in place on the back. I then mixed up my royal icing to a nice stiff consistancy. It's better it be too thick than too thin - you can add more water, but you only have as much icing as you purchased. Thick icing will give you much more controlled piping. Try to buy a good brand of royal icing. You could always use gum paste and a clay gun, but I don't like the look of gum paste, it's too thick and shiney. Of course, it's hardier and less likely to break.
2. Once my icing was ready, I took one of my plastic, disposable piping bags and cut off the tip. You want a nice, fine line of icing. It may be that your icing is too thick to squeeze through, in which case you'll want to cut the hole slightly bigger. Don't cut off too much because you can't add it back on. Of course, I payed £2.50 for 100 bags, so I could easily have just tried again, though transferring icing from one bag to another can be messy work.
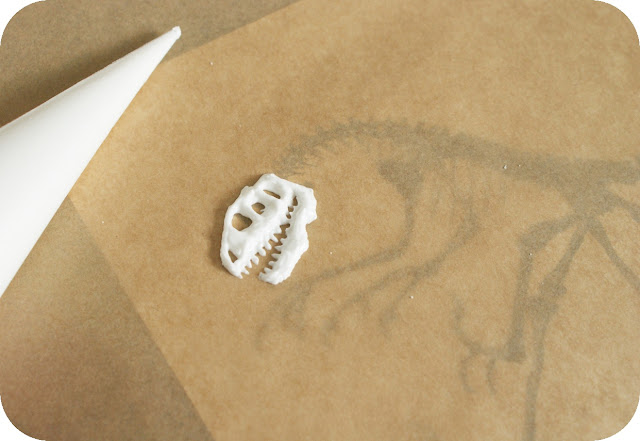
3. Once you're satisfied the the icing line is the right thickness, begin. I started out very fine and ended up cutting a little more off. I started on the head, and traced the outline first before filling it in. It was surprisingly easy! Just be sure to get the outline of the sensory holes (eyes, ears, nose and so on) before filling it in. Once you've done it, either let it set before adding more layers, or just go for it. If your icing is a bit too thin, then it may start to spread out if you add too much. Of course, you can generally tell if that is the case from just doing the outlines. I built up 3-4 layers of icing without letting it dry. I was too eager. But nothing bad came of it.
The teeth were a nightmare, but do be aware that, if your icing is thick enough, you can easily wipe mistakes away with a fine tool - the tip of a knife would give fair precision without disrupting the rest of the piece. I only gave the teeth one layer to begin with because of how small they were.
4. Continue on with the rest of the body. I ended up keeping my laptop open next to me with the picture I'd printed open on it. This allowed me to see important details that were occasionally hidden by shadow cast by the rest of the icing. For example, the tail of a raptor is generally rigid, apart from a few vertebrae at the base that allowed for movement to aid balance and/or attack (I'm not sure which, if either). This meant that while I was making obvious vertebrae images along the spine and base of the tail, it was not a mistake to stop adding them on the tail itself.
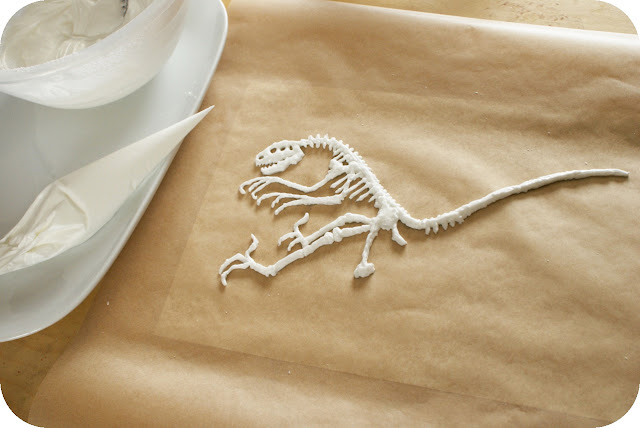
Here is the finished dinosaur. All parts of the picture beneath have been covered. I'm not too happy with the pelvis, it's a bit lumpy, but for some reason I just couldn't figure out how to flatten it out. Let it set for a day or so. The internet said a tiara would take about 2 hours, but the packaging didn't say anything except how to store unused icing. I didn't want it to still be remotely wet when I went to put it on the cake so I made this on a Saturday, and removed it on the Tuesday, so it got about 3-4 days to dry. To be honest, it was fine on Sunday, but my cake wasn't ready yet :P
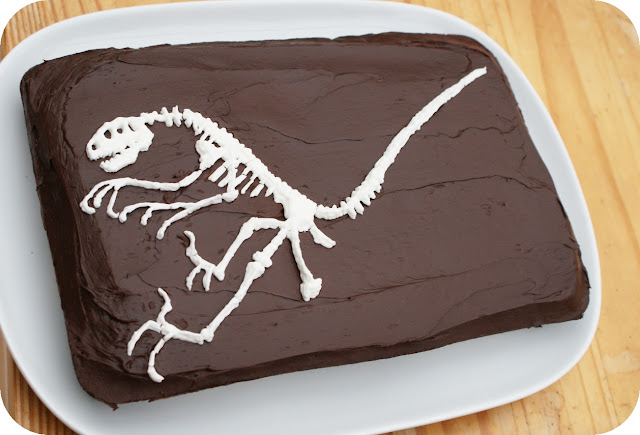
I had baked and frosted my cake on Monday, leaving it until Tuesday to apply the dinosaur bones. This gave the frosting on the cake a chance to set a little, which would reduce the mess - even if only slightly - that was sure to come when placing the broken bones back down. The last thing I want is for my unrealistically white bones to get chocolatey!
If you need it to be in one piece, then if it breaks, lay it out upside down and put a little bit more royal icing on the back, like a glue. It'll hold it together, hopefully long enough to move it.
As for why there is a bottle in the picture:
I had wanted to have 3D ribs - I planned to mark out the rib cage on the edge of a bottle to make them round, so that they could give the fossil more dimension. Not all fossils are 3D mind you, a lot are flattened by the pressure of the rocks, so having a flat ribcage like above is no problem. I had to scrap the idea of a rounded ribcage, however, when I picked my dino. Those ribs are far too short and narrow to work out well, so I ended up not doing it.
I cut the rough shape of the fossil image out and placed it gently on the cake to figure out where to place things. I did it perhaps a little too low down, but I'm still happy with it. I placed the skull down first - surprisingly enough, the spine only broke in about 3 places, I think, but just about every toe, and half the ribs, all broke as I had expected. Luckily, the frosting had set very well, so I was able to faff about and fiddle with the toes while getting them in the right place. There are a few visible breaks in the bones, but a lot of fossils are cracked and broken when found, and others break between death and fossilisation, and where the bone has turned to rock, it's held back together. So I'm not bothered by the breaks.
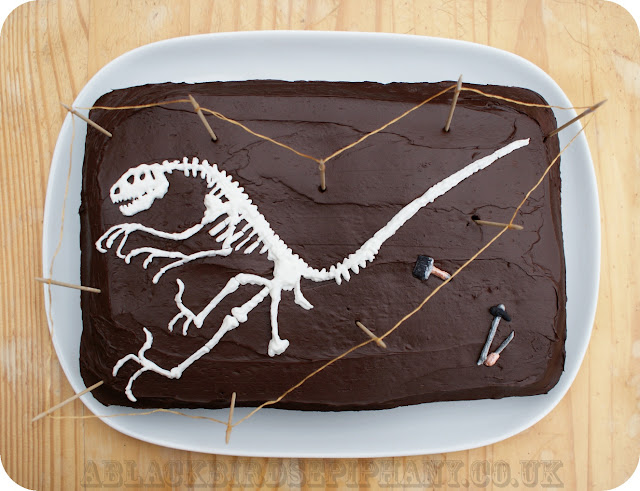
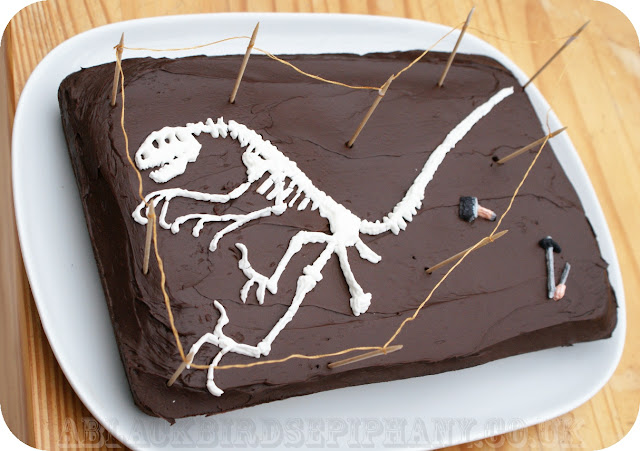
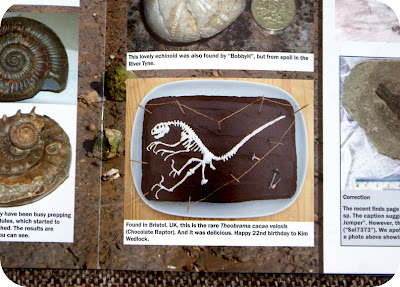
Next I added few more bits and pieces - I used embroidery thread and tooth picks to make a sort of fence, and once I had made my dinosaur, I also made a "hammer", "chisel" and "brush". I coloured these in with what I had lying around (silver lustre dust + water, a black pen - edible, of course - and some peach and white lustre dust with water), and I put that on the cake afterwards to fill it up a little more. Here is the finished piece - my Theobrama Cacao Veloxis:
UPDATE:
This cake was featured in the 33rd issue of Deposits magazine!


That is so cool looking Kim! I am not artistic at all so I'm always jealous of people that can make something like this.
ReplyDeleteSo clever! I love it, especially that you fenced in the dinosaur!
ReplyDeleteLovely!! I thought the bones weren´t edible, that adds up a lot! Congrats
ReplyDelete